Create Your Own Dazzling Suncatcher
Ready to bring more sparkle into your space? In this step-by-step tutorial, learn how to create your own dazzling suncatcher using crystals, drops, beads, wire and simple jewelry-making techniques. While not jewelry, this project uses many of the same supplies and skills—making it perfect for personal décor, heartfelt gifts or even items to sell. Explore a variety of large focal crystals, colorful dangles and light-reflecting accents as the design comes together from start to finish. Then see the finished piece shimmer beautifully in the light.


Design Idea SC23
-- Designer --
Patti, Jewelry Designer, Exclusively for Fire Mountain Gems and Beads®
To learn more about Patti Miller, read her jewelry artist success story here.
: : : Materials : : :
Click here to view a full list of materials used in this design.
Please take the creative opportunity to select the products of your choice for this design, offered here at Fire Mountain Gems and Beads. Some materials may not be available or listed.
- Bead, copper, 6x2mm beaded rondelle.
- Wire, Zebra Wire™, natural copper, round, 14 gauge.
- Wire, ParaWire™, copper, round, 24 gauge.
- Wire, ParaWire™, titanium-finished copper, round, 20 gauge.
- Peach quartz, hand-cut top-drilled point bead natural, 15x4mm-28x6mm.
- Cord, Hemptique®, hemp, green shades, 1mm diameter, 20-pound test.
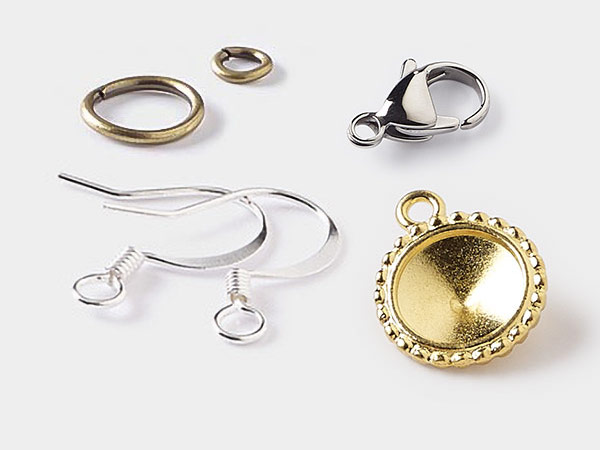
- Jump ring, clear-coated copper, 8mm round, 5.4mm inside diameter, 16 gauge.
- Rose quartz, Hawaiian chip bead natural, extra-large.
- Rose quartz, hand-cut top-drilled unpolished freeform focal natural 35x25mm-55x40mm.
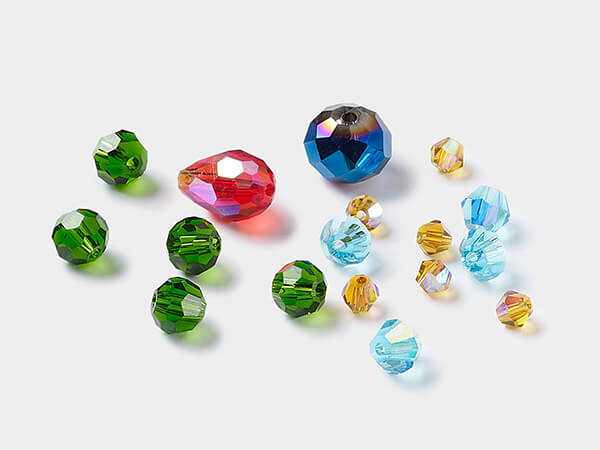
- Bead, transparent peridot green AB, Celestial Crystal® 8mm bicone.
- Bead, transparent turquoise blue AB, Celestial Crystal® 8mm bicone.
- Bead, 32 facets translucent peridot green AB, Celestial Crystal® 4mm round.
- Bead, 32 facets translucent turquoise blue AB, Celestial Crystal® 4mm round.
- Suncatcher, clear AB, Asfour Crystal 37x21mm top-drilled faceted flat teardrop.
- Beading hoop, imitation rhodium-plated steel, 2-inch closed round.
- Beading hoop, imitation rhodium-plated steel, 6-inch closed round.
- Jump ring, copper, 12mm hand-cut round square wire, 9.8mm inside diameter, 18 gauge.
- Pliers, nylon jaw, steel / rubber / nylon, black or blue, 5-1/4 inches.
- Pliers, wire-wrapping, stainless steel and PVC plastic, black, 6 inches.
- Adhesive, E6000® Fray Lock™, crystal clear.
Instructions
Cut the following lengths and set aside:
- Seven 15-inch lengths of 24-gauge copper ParaWire™
- Two 66-inch lengths of 24-gauge copper ParaWire
- One 36-inch length of 14-gauge copper Zebra Wire
- One 32-inch length of 14-gauge copper ParaWire
- Five 8-inch lengths of 20-gauge titanium-finished ParaWire
- One 45-inch length of green hemp cord
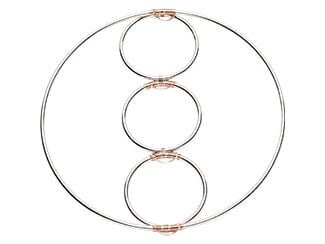
Using one 15-inch length of 24-gauge copper ParaWire, tightly wrap the wire five times around one edge of a 2-inch steel beading hoop. Use chain nose pliers to squeeze the wraps together.
Place the wrapped edge of the 2-inch hoop on top of one edge of a 6-inch beading hoop (the frame). Wrap around both edges five times to bind them together.
Bring the tail back around the 2-inch hoop and wrap nine times. Drape the tail across the wraps to create a small swag, leaving a small space.
Wrap four times next to the original wraps, then cut off and tuck in the tail.
Start wrapping a new 2-inch beading hoop the same way, positioning it next to the bottom of the previously attached 2-inch hoop. Repeat the same wrapping sequence.
Repeat again to attach a third 2-inch beading hoop.
At the bottom of the frame, wrap a new 15-inch wire five times around the frame instead of the 2-inch hoop.
Offset the top 2-inch hoop so its top edge sits behind the top edge of the frame. Arrange the bottom 2-inch hoop so its bottom edge also sits behind the frame.
Wrap around both edges five times, then wrap nine times around the 2-inch hoop. Create a swag as before, wrap four times next to the original wraps, then cut off and tuck in the tail.
Place the body on a silicone sheet with the 2-inch hoops centered and the top and bottom hoop edges positioned behind the frame. Place something of equal thickness to the beading hoops under the outside edged to keep it level. Add a small drop of Devcon 5-minute epoxy to each wrap joint and allow to dry for 10 minutes.
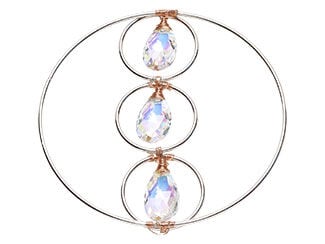
Thread one 37x21mm Asfour AB crystal teardrop onto a 15-inch length of 24-gauge copper ParaWire and center it.
Bring both tails straight up so they are parallel. Thread one tail through the swag on the top 2-inch hoop and the other tail through the swag from the opposite direction.
Pull the wires apart so the crystal tip sits just below the swag. Wrap one tail downward, covering the swag and the top of the crystal, then continue wrapping about 1/4 inch down the crystal.
Cut off the tail at the back and tuck it in securely.
Repeat to attach crystals to the remaining two 2-inch hoops.

Wrap the end of one 66-inch length of 24-gauge copper ParaWire tightly around the frame next to the juncture where the 2-inch hoops are attached.
Using chain nose pliers, make a 90-degree bend in the wire approximately 2mm from the outside edge of the frame. Thread on a 4mm round crystal bead and slide it down to the bend.
Wrap the wire tightly around the frame to secure the bead on the outside edge. Continue adding beads in your desired pattern.
When you reach the end of one side, wrap four times, then cut off and tuck in the tail.
Tip: After adding each bead, run your fingers along the wire to prevent kinking. If a kink occurs, gently straighten it using nylon jaw or chain nose pliers before continuing.
Repeat the beading process on the opposite side of the frame.
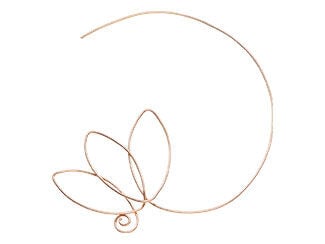
Using the 36-inch length of 14-gauge copper Zebra Wire, make a small one-revolution spiral at one end.
Measure approximately 2.5 inches from the spiral and allow the wire to curve naturally. With the tail running down the back, bend the wire to form a petal shape.
Use your fingers to smooth both sides so they are even, leaving about 1 inch between the centers of each side of the petal.
Just above the first spiral, bend the wire upward, overlapping the first petal by about 0.25 inch to begin the second petal. Bend it back down to match the first.
Repeat to form the middle petal.
For the fourth petal, ensure the tail is positioned on the front as you bend. Repeat for the fifth and final petal.
With the remaining tail, make a small one-revolution spiral to mirror the first spiral. Set the lotus piece aside.
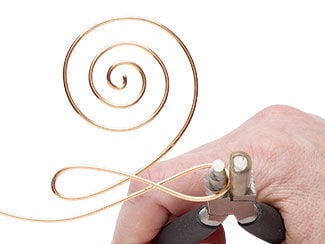
Using the 32-inch length of 14-gauge copper Zebra Wire, make a 2-inch spiral at one end.
Bring the tail out approximately 0.6 inch from the spiral. Using the middle barrel of stepped wire-wrapping pliers, form an upward loop with the tail flowing to the opposite side.
Repeat to create a second mirrored loop. Continue forming loops in this manner, making each lower set of loops approximately 0.3 inch narrower than the previous set, until six loops are formed.
Bring the tail downward and use the large barrel of stepped wire-wrapping pliers to create a teardrop loop, folding the tail around the top of the loop. Cut off and tuck in the tail.
To create a peach quartz point drop, thread 1.5 inches of one 8-inch length of 20-gauge titanium ParaWire through the hole in a peach quartz point.
Bring both tails upward, crossing them slightly and allowing a gentle curve on each side of the crystal. Bend the long tail so it points upward from the top of the crystal.
Wrap the short tail around the long tail twice, then cut off and tuck in the tail.
Thread one 8mm peridot Celestial bicone and one 6x2mm beaded copper rondelle onto the remaining tail, then finish with a small wrapped loop.
Repeat to make three additional drops, leaving two with unwrapped loops.
Attach one unwrapped drop to the bottom-right loop of the unalome piece and wrap closed. Attach the final drop to the loop on the opposite side and wrap closed.
Thread 1.5 inches of an 8-inch length of 20-gauge titanium ParaWire through the hole of a freeform rose quartz focal.
Bring both tails upward, crossing slightly and allowing curved sides next to the crystal. Bend the long tail upward from the top of the crystal.
Wrap the short tail around the long tail twice, then cut off and tuck in.
Thread one 8mm turquoise Celestial bicone, one 6x2mm beaded copper rondelle, and one 8mm peridot Celestial bicone onto the tail. Finish with a small wrapped loop and attach it to the bottom loop of the unalome piece.
Open two 12mm 18-gauge square copper jump rings. Attach one peach quartz drop to the bottom of the frame just outside the last rose quartz chip.
Repeat on the opposite side of the frame.
Open three 8mm 16-gauge copper jump rings. Use them to attach the top of the unalome piece to the bottom wire swag on the frame.
Fold the 45-inch green hemp cord in half, aligning the ends.
Thread the folded cord through the back of the top of the lotus piece. Open the loop, center it, and bring the cord ends through. Repeat to create a double lark’s head knot and pull tight.
Measure 8 inches from the base of the lotus and tie an overhand knot. Cut off the excess cord, leaving a 1.5-inch tail beyond the knot.
Open two 12mm 18-gauge square copper jump rings. Thread each jump ring through the top of the frame, over both the 6-inch and 2-inch hoops next to the top crystal teardrop, then through one spiral of the lotus piece.
Repeat on the opposite side.
Shop for Your Materials Here:


Have a question regarding this project? Email Customer Service.
Copyright Permissions
All works of authorship (articles, videos, tutorials and other creative works) are from the Fire Mountain Gems and Beads® Collection, and permission to copy is granted for non-commercial educational purposes only. All other reproduction requires written permission. For more information, please email copyrightpermission@firemtn.com.