Fusing Glass in a Microwave Kiln
Fusing is the process of heating glass to a new shape. Basic supplies needed for this technique are: compatible glass, kiln wash (glass separator), a kiln and safety glasses. You can use a microwave kiln when fusing small pieces of glass. Glass is typically 1/8 inch to 1/4 inch thick--no more than two pieces of either thickness should be stacked in a microwave kiln. Follow manufacturer's instructions included with the kiln for usage and safety information.
by Tammy Honaman, Author, Jewelry-Making Expert and Educator, Exclusively for Fire Mountain Gems and Beads®
Instructions
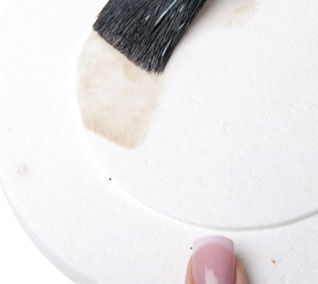
Following manufacturer's instructions, create kiln wash using kiln wash or glass separator provided with the microwave kiln. Using a one-inch brush, apply 3 - 4 layers of kiln wash to the base of the microwave kiln following manufacturer's instructions. Allow the kiln wash to dry completely between layers and have the last layer be completely dry before using in the microwave kiln.
Note: Alternatively, you can place a piece of fiber paper onto the base of the microwave kiln to act as the release between the kiln and the glass. Cut the fiber paper to just a bit larger than the shape of the glass as the fiber paper will shrink during firing. Wear a dust mask when removing the glass from the fiber paper after firing as it will be dust like.
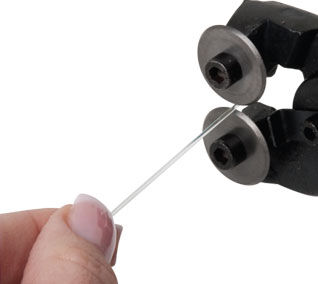
Create a design using glass pieces. Use a glass cutter to alter the shape. Consider adding in small pieces of stringers. Use the nippers to cut the stringers into pieces suitable for your design. Wear safety glasses when cutting glass.
Clean all pieces of glass with soap and water. Dry the pieces and only touch them from the ends so you do not leave any oil on the glass. Traces of oil will cause unwanted changes to the glass in the fusing process.
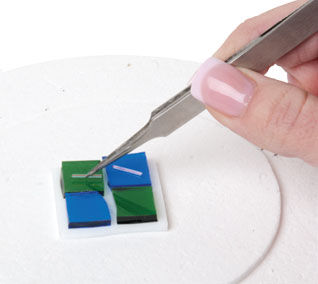
Place the microwave kiln onto three ceramic posts in the center of the microwave. Following manufacturer’s instructions, assemble your design in the center of the base of the kiln (using tweezers helps when placing stringers and shifting the glass pieces into position.
Place the cover of the kiln gently onto the base of the kiln then fuse according to recommended time, adjusting the power level of your microwave if needed.
Place three ceramic posts onto a heat-proof surface. While wearing heat-resistant gloves (found at your local hardware store), remove the microwave kiln from the microwave once you are sure the fuse is as you desired. Place the microwave kiln onto the three ceramic posts resting on the heat-proof surface. Allow the microwave kiln to rest for 45 minutes undisturbed--no peeking! Once complete and the piece cooled, remove and wash with soap and water. Use as you would like.
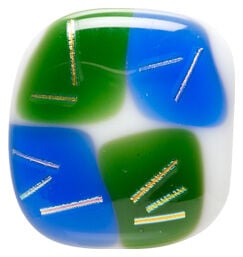
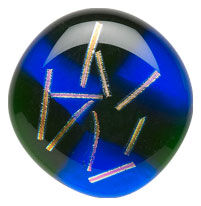
The piece shown at the top of the page was fired in the microwave kiln at 50% power for 5 minutes. This was done to preheat the glass, as it is more than one layer of glass thick. The microwave was then reset and the microwave kiln fired at 80% with a 10 minute cycle. At 5 minutes fusing was observed, the lid reset and the microwave started again. After 2 more minutes the fuse was observed again. The fuse was stopped at 8 minutes, 45 seconds and the piece allowed to cool for over one hour on the ceramic posts on the heatproof surface. Never allow the microwave kiln to cool inside the microwave.
Be sure to take notes on the time and results of each firing. Adjust the power of your microwave if the fuse is not to your liking. Follow manufacturer's instructions for basic glass cutting, options on fusing times, limits on size of glass to fire in kiln, safety precautions and troubleshooting.
Optional Alternative Design
Have a question regarding this project? Email Customer Service.
Copyright Permissions
All works of authorship (articles, videos, tutorials and other creative works) are from the Fire Mountain Gems and Beads® Collection, and permission to copy is granted for non-commercial educational purposes only. All other reproduction requires written permission. For more information, please email copyrightpermission@firemtn.com.