How to Use the Adaptable Eyelet and Rivet Tool Set

Watch how this pliers-like tool makes it easy to set eyelets in leather and metal sheet
Instructions
Install Interchangeable Attachment Settings:
Step 1
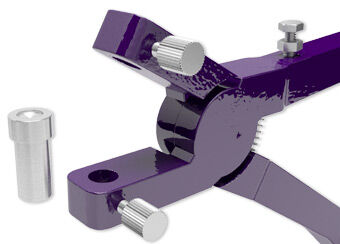
Turn bottom jaw thumbscrew counter clockwise to loosen.
Insert desired interchangeable setting into bottom jaw (spring loaded side).
Turn thumbscrew clockwise to tighten.
Step 2
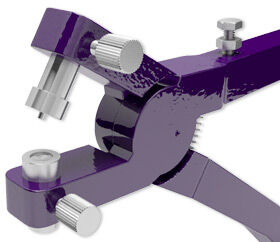
Turn top jaw thumbscrew counter clockwise to loosen.
Insert coordinating interchangeable setting into top jaw.
Turn thumbscrew clockwise to tighten.
Installing and Attaching Eyelet To Metal Sheet:
Step 1
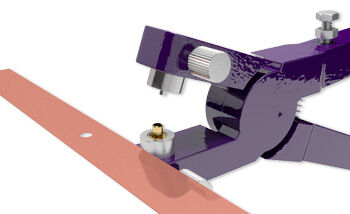
Insert desired eyelet with post into bottom jaw setting.
Lay pre-punched material over eyelet post.
Step 2
Adjust compression adjustment screw.
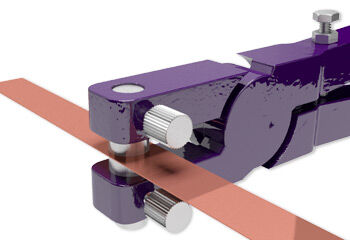
Step 3
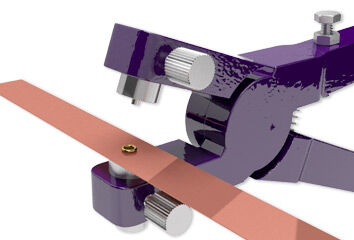
The flanged side of the eyelet should rest on the anvil with the solid center post. Firmly squeeze eyelet tool handles together to secure eyelet to material.
The tool's spring-loaded center should press into the hollow side of the eyelet to create a smooth, rolled finish.
Tip: For the best results, ensure the eyelet is properly seated before squeezing the pliers. Test on a scrap piece first to perfect your technique.
Shop for Your Materials Here:


Have a question regarding this project? Email Customer Service.
Copyright Permissions
The pieces featured in the Gallery of Designs are copyrighted designs and are provided for inspiration only. We encourage you to substitute different colors, products and techniques to make the design your own.
All works of authorship (articles, videos, tutorials and other creative works) are from the Fire Mountain Gems and Beads® Collection, and permission to copy is granted for non-commercial educational purposes only. All other reproduction requires written permission. For more information, please email copyrightpermission@firemtn.com.