Setting up a Safe Kiln-Firing Area and Firing Enamels with a Kiln

Glass enamels are applied to metal for a beautiful and colorful finish. Enamels are fired onto the metal with the heat of a torch or kiln. When using a kiln for enameling, the target temperature is in the area of 1500 degrees Fahrenheit.
Safety Notes
- The area where you will be working with enamels should have good ventilation
- Don't eat or drink anything where you will be doing the enameling (particulates could wind up in these items and then inadvertently be ingested)
- When sifting the enamels wear a dust mask
- Fire enamels in a well-ventilated area so you exhaust any fumes, especially those caused from metal oxides that may be present in the enamels
- Change your clothes after you have completed your enamel work for the day. Be aware of removing your shirt over your face, as some enamel particles may still be present.
- Wear natural fiber clothing when firing in your studio. Should there be an accidental fire, natural fibers will not stick to you like manmade fabrics would.
- Work in as clean an area as possible
- Clean throughout the enameling process so you do not add particles of something to something else--e.g. introducing fire scale to your enamel jars, or blue enamel into your white enamel, etc.
- Clean up your worktable when you are finished enameling and before moving into a new design project
There are 4 stages that enamel will progress through when heated: sugar, orange peel, full fuse and over fired. These words describe what the enamel looks like at each stage:
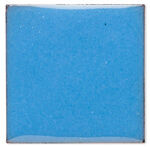
Sugar looks like fine sugar.
Orange peel looks just like an orange peel--glossy with bumps.
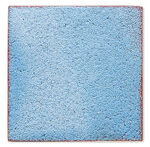
Full fuse is when the surface is smooth and shiny.

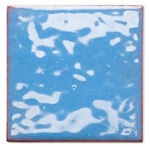
Over fired is when you start to see pits in the surface, black spots and sometimes the edges start creeping and/or changing color.
Each stage is obtained by controlling the heat. All have their place and it is advisable to become familiar with each so you understand what they look like, how they can work to your advantage and how to avoid them if they are not what you are looking for.
Each stage is obtained by controlling the heat. All have their place and it is advisable to become familiar with each so you understand what they look like, how they can work to your advantage and how to avoid them if they are not what you are looking for.
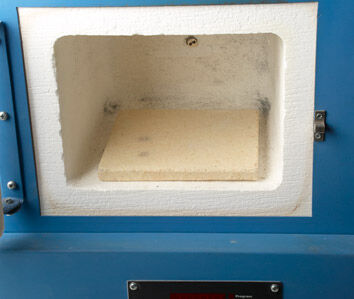
Kiln Firing Area
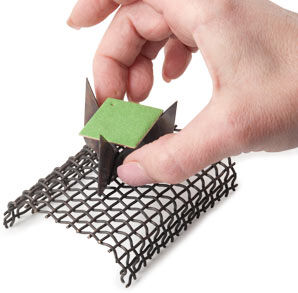
- Place a trivet onto a folded mesh rack
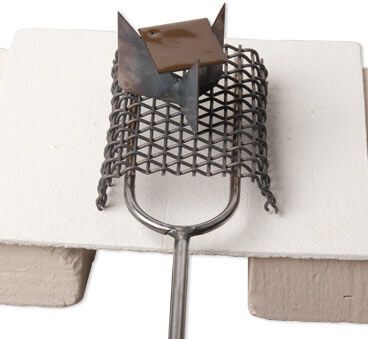
- Place a kiln shelf onto the floor of the kiln; this will protect the surface of the kiln
- Set up a heat-proof area outside the kiln so you can place the mesh rack and trivet onto a safe surface when removing from the kiln (everything will be very hot)
- Place your heat resistant gloves, safety (green tinted) glasses and firing fork next to the kiln
- Place a bowl of cold water and a fire extinguisher near the kiln for safety in the event of an accident
Enameling Area
- Cut recycled magazine pages or copy paper into halves
- Have sifters and enamels nearby
- Clean your work surface so it's free of debris from any past projects
- Have a good dust mask ready
Kiln Firing Enamel
Preheat the kiln between 1450-1500 degrees Fahrenheit.
Note: The first few times you use your kiln for enameling, heat the kiln to 1450 degrees. As needed, increase the temperature until the finish of the enamels is as you desire. Once you have used your kiln a few times for firing enamel, you will become familiar with the temperature that works best and can then set the kiln to that temperature from the beginning.
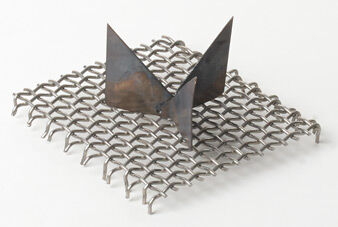
Apply the enamel then place the enameled piece onto a trivet.
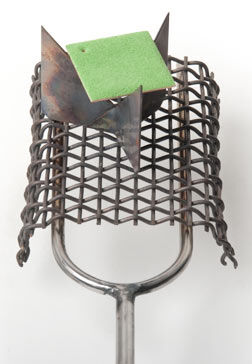
Put heatproof gloves and safety glasses on then open the kiln door. Place the firing fork under the folded mesh screen then lift the screen and trivet. Place the firing rack into the kiln on the kiln shelf and close the kiln door, doing your best to not slam the door so you don't disturb the enamels.
Note: The kiln's temp will drop as you place the piece into the kiln. Allow the kiln to come back up to the set temperature, then in about 1 minute, with your safety glasses still on, peak into the kiln to see how the enamels appear. If they need more time, close the kiln and allow it to come back up to temperature again. Wait a short period of time then open the kiln and check again.
Once the piece is fired as you would like, place the firing fork under the trivet or use a spatula to remove the kiln shelf. Place the trivet or kiln shelf onto a heatproof surface next to the kiln. Allow all to cool to room temperature.
When enameling on metal, depending on the thickness and the technique you are working in, it is advisable to enamel both sides of the piece. This will help distribute the stress evenly and help lessen warping, which might occur as the metal and enamel expand and contract. These enamel layers are called counter enamel (the under or back side) and top coat (the layer that is facing forward).
Since this first enamel coating will be the counter enamel, heat the blank until the surface of the enamels is at least to the sugar stage. The metal and enamels will be heated again so "sugar" will eventually turn to fully fused.
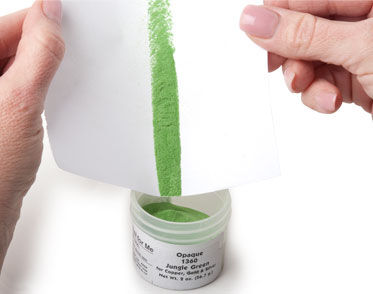
Fold the paper that caught the enamels, to form a funnel-like spout then pour the enamels back into its original container.
Repeat to add a topcoat of enamels until the finish of the enamels is as your design calls for.
Have a question regarding this project? Email Customer Service.
Copyright Permissions
All works of authorship (articles, videos, tutorials and other creative works) are from the Fire Mountain Gems and Beads® Collection, and permission to copy is granted for non-commercial educational purposes only. All other reproduction requires written permission. For more information, please email copyrightpermission@firemtn.com.