Stringing and Jewelry-Making Fundamentals
by Tammy Honaman, Author, Jewelry-Making Expert and Educator, Exclusively for Fire Mountain Gems and Beads®

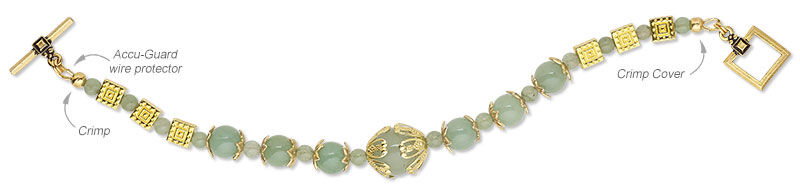
Three Stringing Fundamentals for a Professional Finish:
- Using Accu-Guard™ wire protectors to protect and masquerade Accu-Flex® professional-quality beading wire
- Crimping Accu-Flex beading wire to the finding of your choice
- Camouflaging crimped crimp beads with crimp covers
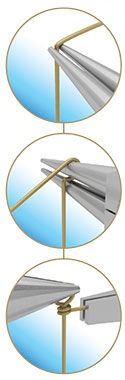
Using Accu-Guards
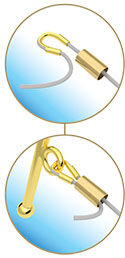
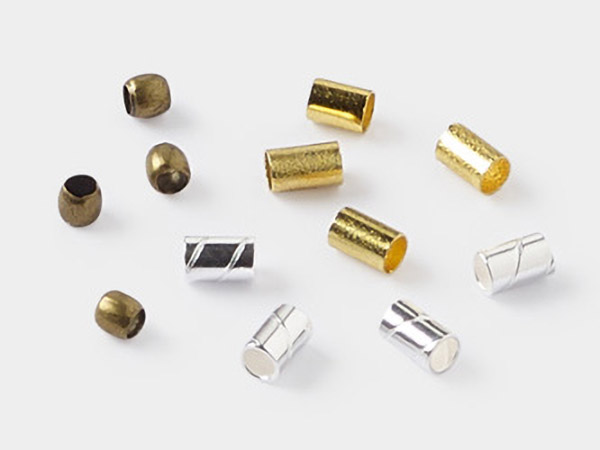
At one end of a length of Accu-Flex beading wire (cut to the proper length for your design) thread on a crimp bead (or crimp tube) then thread the wire through one side of an Accu-Guard wire protector. Continue passing the wire over the curve of the wire protector then through the other side until the wire exits.
Thread the loop of your clasp or finding over the end of the beading wire and up into the curve of the wire protector. Thread the beading wire back through the crimp bead.
Crimping Accu-Flex
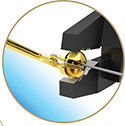
Pull the short end of the beading wire so there is about one inch beyond the crimp tube, giving you some length to hold onto while you crimp the crimp bead in place. While holding both lengths of wire so they are as far apart from each other inside the crimp bead as is possible, place the crimp bead into the second notch of the crimping pliers. Squeeze the handles to compress the crimp bead, forming a "U" in the crimp, with each wire on either side of the curve.
Place the crimped crimp in the first notch of the crimping pliers then gently squeeze the handles to form the crimp into a small rounded cylinder.

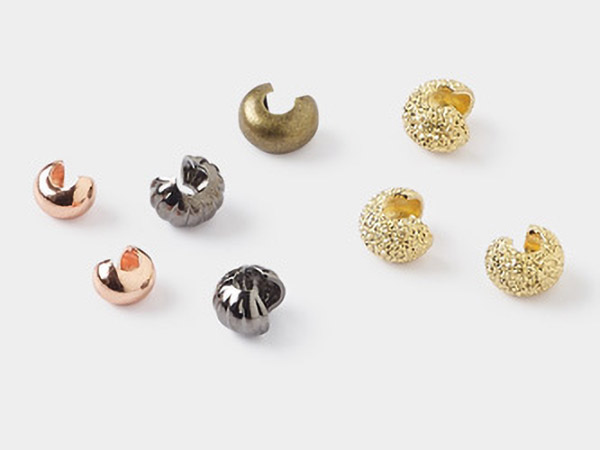
Placing Crimp Covers
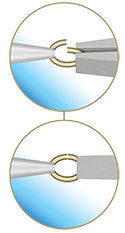
Using flush cutters, trim the short length of beading wire. Position a crimp cover over the crimped crimp bead. Using chain-nose pliers or crimping pliers, gently close the crimp cover to hide the crimped crimp bead.
String the beads in your design then finish the second end the same way.
Jewelry-Making Fundamentals
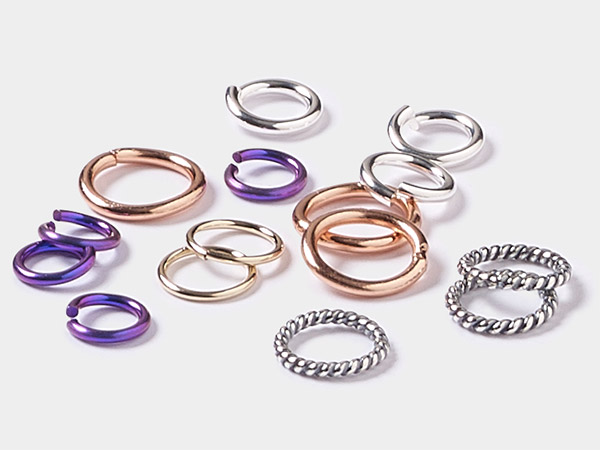
Opening and Closing a Jump Ring
Jump rings are a versatile go-to finding when connecting items together such as linking a chain to a clasp (or other finding) and connecting bead drops to an ear wire, chain or other bead drop. Jump rings can also be linked together to form a chain.
To open a jump ring, place a pair of chain-nose or flat-nose pliers on each side of the opening, with one pair positioned at 3:00 and the other at 9:00; open the jump ring by moving one pair of pliers away from you and holding the other one steady.
Reverse the motion to close.


Creating a Simple Loop
Add a few beads to a length of wire, head pin or eye pin then finish with a simple loop to create a beaded dangle.
Using round-nose pliers, grip the wire above the last bead added in your design or about 3/8 inch down from the end of a length of wire. Bend the wire to a 90-degree angle.
Grip the tip of the wire with the end of the round-nose pliers, leaving very little wire peeking through the barrels of the pliers.
Rotate your wrist away from your body, while using the tip of your thumb on the other hand to push on the wire below the pliers, forming a loop. The placement of your thumb will help keep the angle sharp and the loop circular. Turn the wire into a loop. If necessary, adjust the loop so it is centered.

Forming a Wrapped and Double Wrapped Loop
Wrapped loops create a solid connection without the need for solder. It is the technique to use when connecting bead drops to a design that might have a lot of wear and tear.
Hold a pair of round-nose pliers so the jaws are horizontal. Grip the wire with the tips of the pliers, about 1-1/2 inches down from one end of the wire. With your free hand, bend the top of the wire to form a 90-degree angle.
Place the pliers into the angled section, vertically, so one barrel is above and one is below the wire. Bring the wire up and over the top barrel of the pliers so it is now facing down at an angle.
Reposition the pliers so they are horizontal again, with one barrel in the loop and one out and to the right. With chain-nose pliers, or your free hand, grasp the tip of the wire and direct it behind the length of wire extending below the loop you just created.
OPTIONAL: Open the loop slightly and slide on the loop of your pendant, charm, chain or finding; close the loop.
Grip across the loop with a pair of chain-nose pliers. Grasp the tip of the wire with chain-nose pliers and wrap it around the straight length of wire above the pendant, making approximately three tightly wound wraps. Trim any excess wire, then press in the cut end with chain-nose pliers.
Optional: Place a bead onto the wire.
For a double wrapped loop, repeat to form a second wrapped loop on the other end of the wire.
Shop for Your Materials Here:

Have a question regarding this project? Email Customer Service.
Copyright Permissions
All works of authorship (articles, videos, tutorials and other creative works) are from the Fire Mountain Gems and Beads® Collection, and permission to copy is granted for non-commercial educational purposes only. All other reproduction requires written permission. For more information, please email copyrightpermission@firemtn.com.