How to Use the Artistic Wire® Connector 1:5 Jig
Courtesy of Beadalon®
Instructions
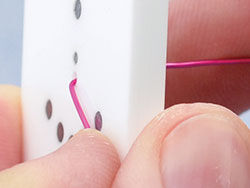
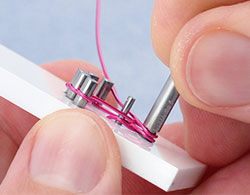
Place one end of wire (20-24 gauge) 6 inch (15cm) in length through the hole in the findings form and bend about 10mm.
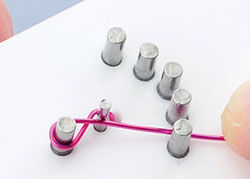
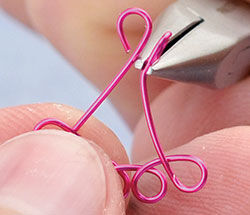
Pull the wire and go to the right of the center thin peg then (clockwise) around the single larger peg, then down to the first peg as shown.
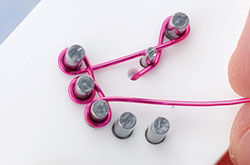
Wrap each of the pegs with one complete revolution (clockwise).
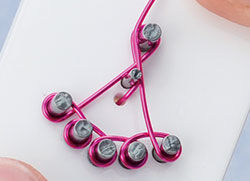
After wrapping all 5 of the bottom pegs, go back up to the single large peg.
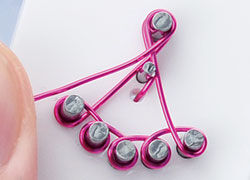
Take another full wrap (clockwise) around the peg.
Use the included pusher tool to push the design all the way down to the surface of the finding form.
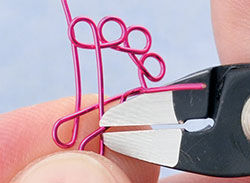
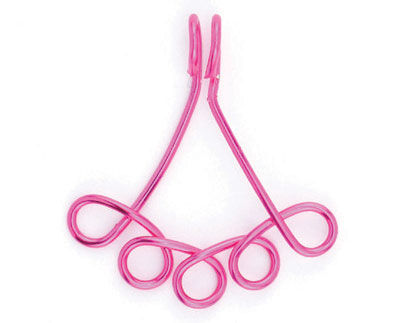
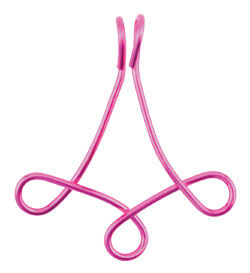
Un-bend the wire that is through the hole and remove the connector from the form. Separate the two top rings and cut each of the "tail" wires off keeping a complete circular/pear shape on each of the wires.
Grasp one of the circular/pear shape wires and twist it 90 degrees so that the ring is sideways, do the same on the other side for a mirror image. Connect these two circular/pear shape wires to a jumpring, earwire, or use as a bail, then connect the items to dangle from the 5 rings.
Alternative design: At Step 3 omit the second and fourth pegs for a 3 ring dangle.
Note: Some people prefer to turn the findings form instead of wrapping the wire around the pegs.
Have a question regarding this tutorial? Email Customer Service.
Copyright Permissions
All works of authorship (articles, videos, tutorials and other creative works) are from the Fire Mountain Gems and Beads® Collection, and permission to copy is granted for non-commercial educational purposes only. All other reproduction requires written permission. For more information, please email copyrightpermission@firemtn.com.