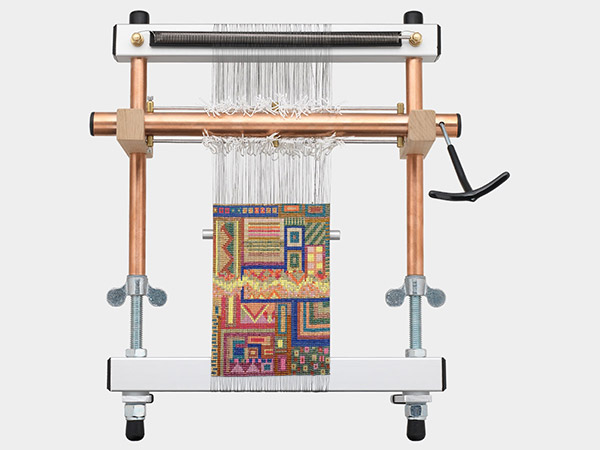
Warping for Bead Weaving
Straight from Mirrix Looms, this tutorial shows two different ways to weave beads on a loom. You’ll see how to warp a Mirrix loom for bead weaving with and without the shedding device.

Instructions
Loom Setup
Use the wing nuts to adjust the loom to the desired height. Measure the exposed threaded rods on both sides of the loom after adjusting the height to make sure it has been evenly raised and leveled.
Attach one warp coil to the top spring kit in the warp coil tray. If your loom also has a bottom spring kit, attach a coil to it as well.
Measure from the top of the loom down to both wooden clamps to make sure they are even. Rotate both clamps inward so their attached round plastic screws are facing out towards the front of the loom.
Note: If the wooden clips are moving freely or slipping down the loom they can be tightened in place using the attached plastic screws.
Secure the warping bar to the wooden clamps by placing each end of the bar in one of the clamp's circular indentations, push the clamps inward to ensure a tight fit.
Warping
Tie the end of a thread to the warping bar then bring the thread down under the loom moving from the back of the loom to the front.
Tip: It's important not to pass through the center of the loom when warping. Always wrap around the top or bottom.
Place the thread in one of the spring dents directly below the tied knot then bring the thread up the front of the loom.
Place the thread in the top spring dent directly above the dent on the bottom spring. Pass the thread over the top of the loom, front to the back, and make a U-turn around the warping bar, heading back up to the top of the loom.
Tip: Avoid tangling by constantly moving either left or right with the thread, not back and forth.
Moving from back to front, pass the thread over the top of the loom. Place the thread in the adjacent top spring dent and continue down the front of the loom.
Place the string in the next bottom dent and continue around the bottom of the loom to the back. Continue up the back of the loom making a U-turn around the warping bar then bring the thread down under the loom moving back to front.
Repeat the warping pattern in Step 2 to add the desired number of threads woven on the loom. Use scissors to cut the thread then tie the thread to the warp bar and trim the excess tail.
Note:
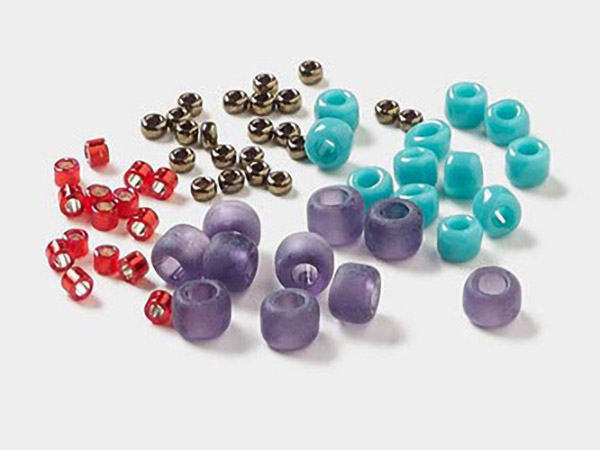
- Add one more thread than the number of beads to be woven onto the loom
- It's important to have consistent tension on all warp threads so do not stop during the process
- If you run out of thread during warping, simply tie off on the bar and continue with a new length of thread
Rotate both clamps out to disengage the warping bar then carefully and evenly lower the bar down to the base of the loom. Leave approximately four to five inches of space between the underside of the loom and the warping bar.
Slightly tighten the wing nuts making sure to tighten both the same amount so there is an even tension through the threads.
Warping with Shedding Device
Repeat warping Step 1 but place two threads in every spring dent instead of one. Warp the desired number of warp threads onto the loom. Use scissors to cut the thread then tie the thread to the warp bar and trim the excess tail.
Repeat Warping Steps 4 - 5.
Use a Philips head screwdriver to loosen the clasps on top of the wooden clamps. Place the shedding device into the clamps with its bars facing straight up and down then retighten the clasps to secure the device.
Measure from the top of the loom down to both wooden clamps to make sure they are even.
Pass the spring bar in between each pair of warp threads; this will help differentiate front threads and back threads from each other.
With the spring bar positioned between the warp threads, use two lengths of cord to tie the bar to the top of the loom.
Use an Allen wrench to loosen the top bar of the shedding device then slide the bar to the left out of the way of the warp threads. Working from left to right, wrap one heddle around each front warp thread. Wrapping around the warp thread will turn the single loop of the heddle into two separate loops. Secure by passing the loosened shedding bar through each new loop of the heddle.
Note: Be sure the heddles are not crossing or overlapping each other as this will not allow proper shedding.
Once all the front threads have been secured, slide the loosened bar back into place and tighten.
Rotate the shedding device forward so the top bar is now the bottom and the bottom bar is the top. Repeat Step 5 securing the back threads instead of the front to the new top shedding bar.
Untie and remove the spring bar suspended between threads. Thread the spring bar through the top spring to keep the warp threads from popping out of place. Be sure the heddles are not intertwining.
Attach the loom handle to the shedding device by passing the exposed metal rod of the handle through the far right (or left if the left hand is dominant) hole of the shedder. Secure the handle by tightening the nut to the exposed metal screw.
Make the threads taught by evenly rotating both wing nuts.
Shop for Your Materials Here:

Have a question regarding this project? Email Customer Service.
Copyright Permissions
All works of authorship (articles, videos, tutorials and other creative works) are from the Fire Mountain Gems and Beads® Collection, and permission to copy is granted for non-commercial educational purposes only. All other reproduction requires written permission. For more information, please email copyrightpermission@firemtn.com.