Secrets to a Double Wrapped Loop
Learn how to create a double wrapped loop, a jewelry-making technique that combines the benefit of a secure wrapped loop with the ability to add a charm on something (like chain) already soldered closed.
Instructions
The double wrapped loop takes advantage of the benefit of a wrapped loop which gives you a secure finish while also allowing you to add a charm or a dangle to something that is already soldered closed.
Cut a 3-inch or 4-inch length of wire.
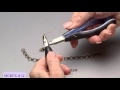
Place your round-nose pliers about 2 inches down from one end of the wire to begin a wrapped loop. Bend the wire at a 90-degree angle over one barrel of the pliers. Rotate the pliers so one barrel rests close to the just bent angle.
Bring the wire over and around the barrel of the pliers, creating a loop.
Open the loop slightly, string the charm onto the wire then close the loop.
Insert the tail end of the wire into a pair of chain-nose or flat-nose pliers then wrap the wire around the other side of the wire close to the base of the loop, making sure not to wrap over previous wraps.
Repeat a few times to secure the charm into place.
Trim any excess wire.
Using chain-nose pliers, gently flatten the end of the wire to prevent snagging.
Note: For a more decorative look, continue wrapping until no more wire is available to wrap.
Place the jaw of the plier just above the wrap then close the jaw over the wire. Repeat Step 2 to create a second loop.
Open up the loop, string one link of chain onto the wire then close the loop.
Repeat Step 4 to secure the second wrapped loop.
Shop for Your Materials Here:


Copyright Permissions
All works of authorship (articles, videos, tutorials and other creative works) are from the Fire Mountain Gems and Beads® Collection, and permission to copy is granted for non-commercial educational purposes only. All other reproduction requires written permission. For more information, please email copyrightpermission@firemtn.com.