Single-Strand Necklace and Earrings Set with Cultured Freshwater Pearls and 12Kt Gold-Filled Wire
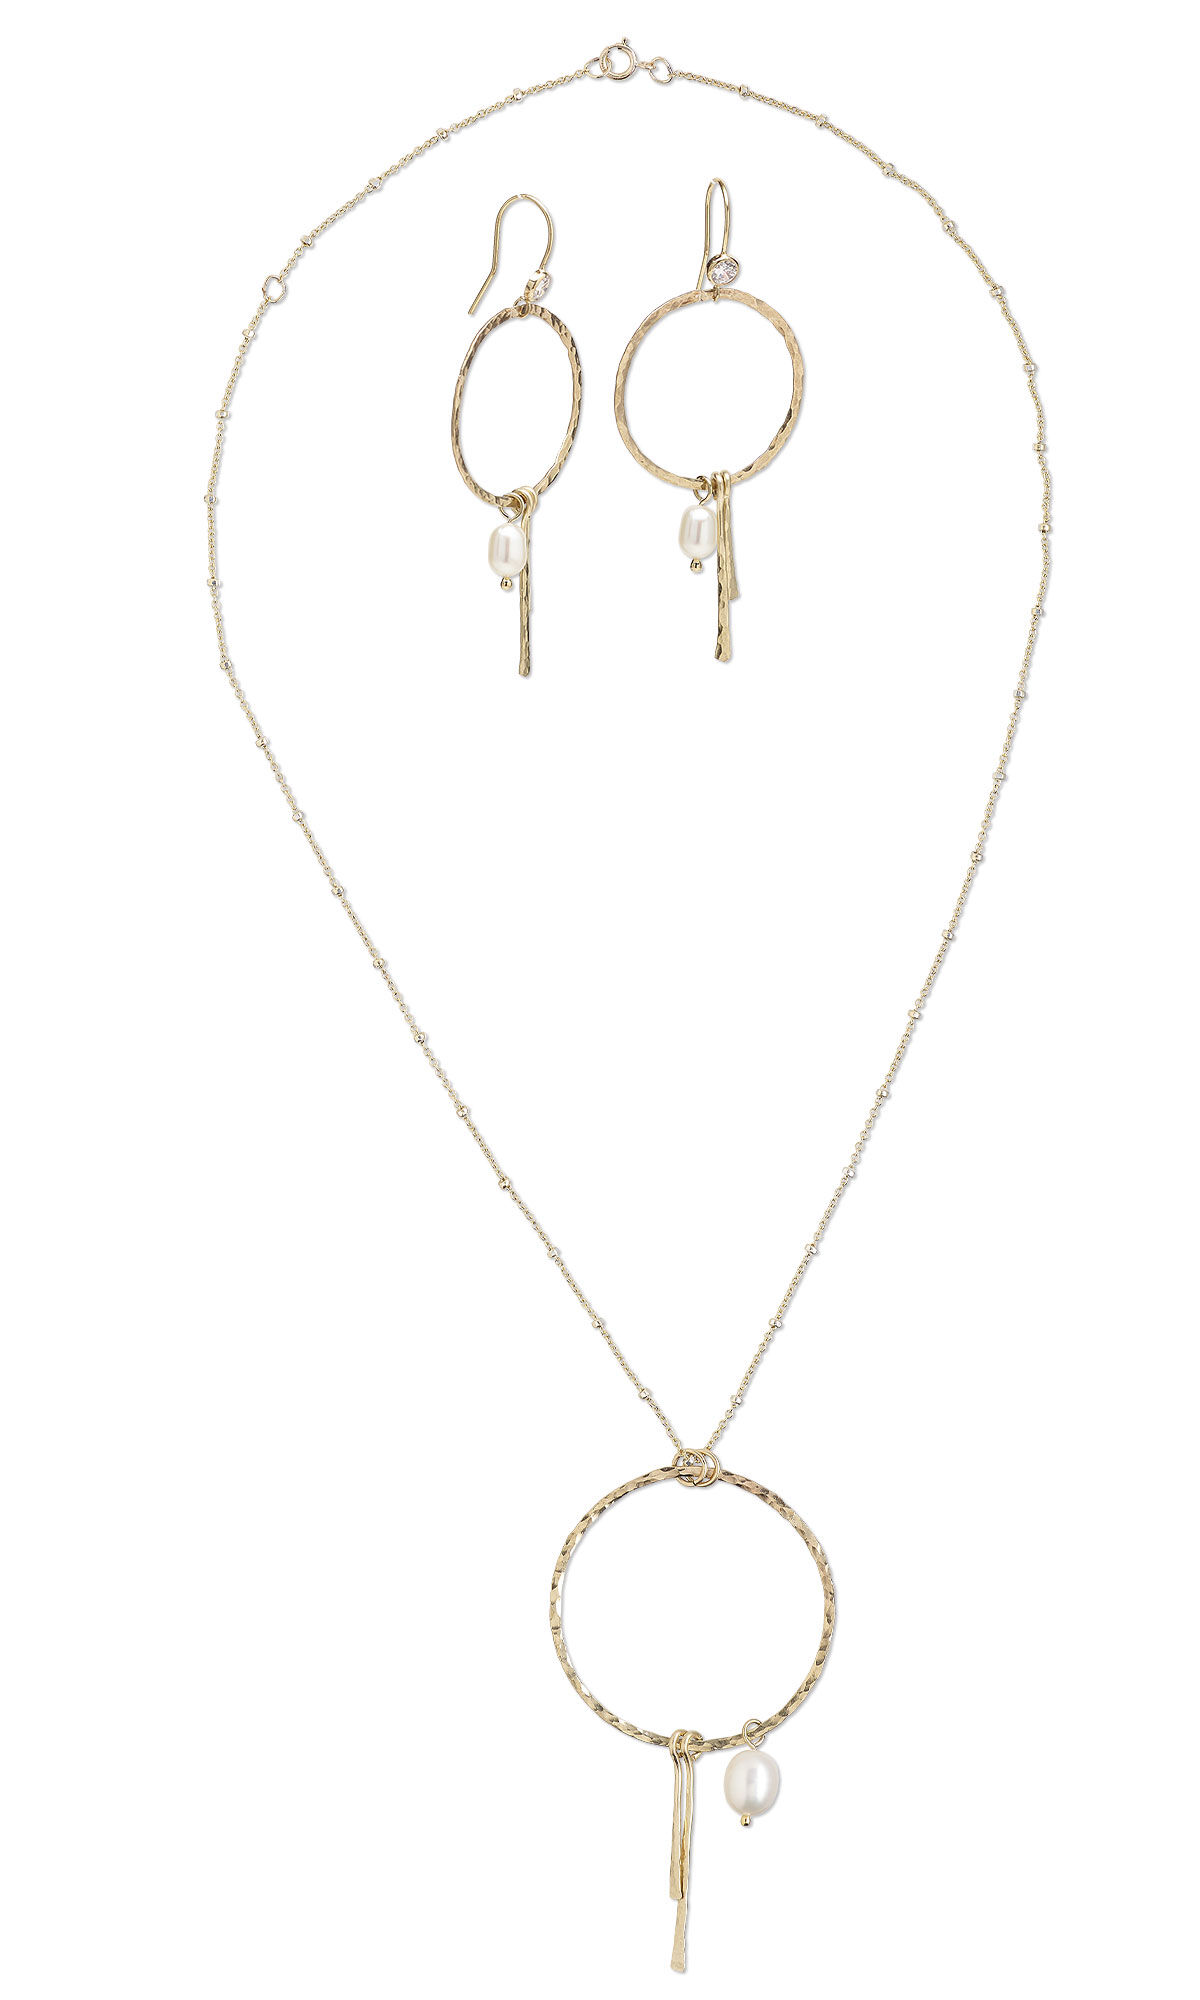

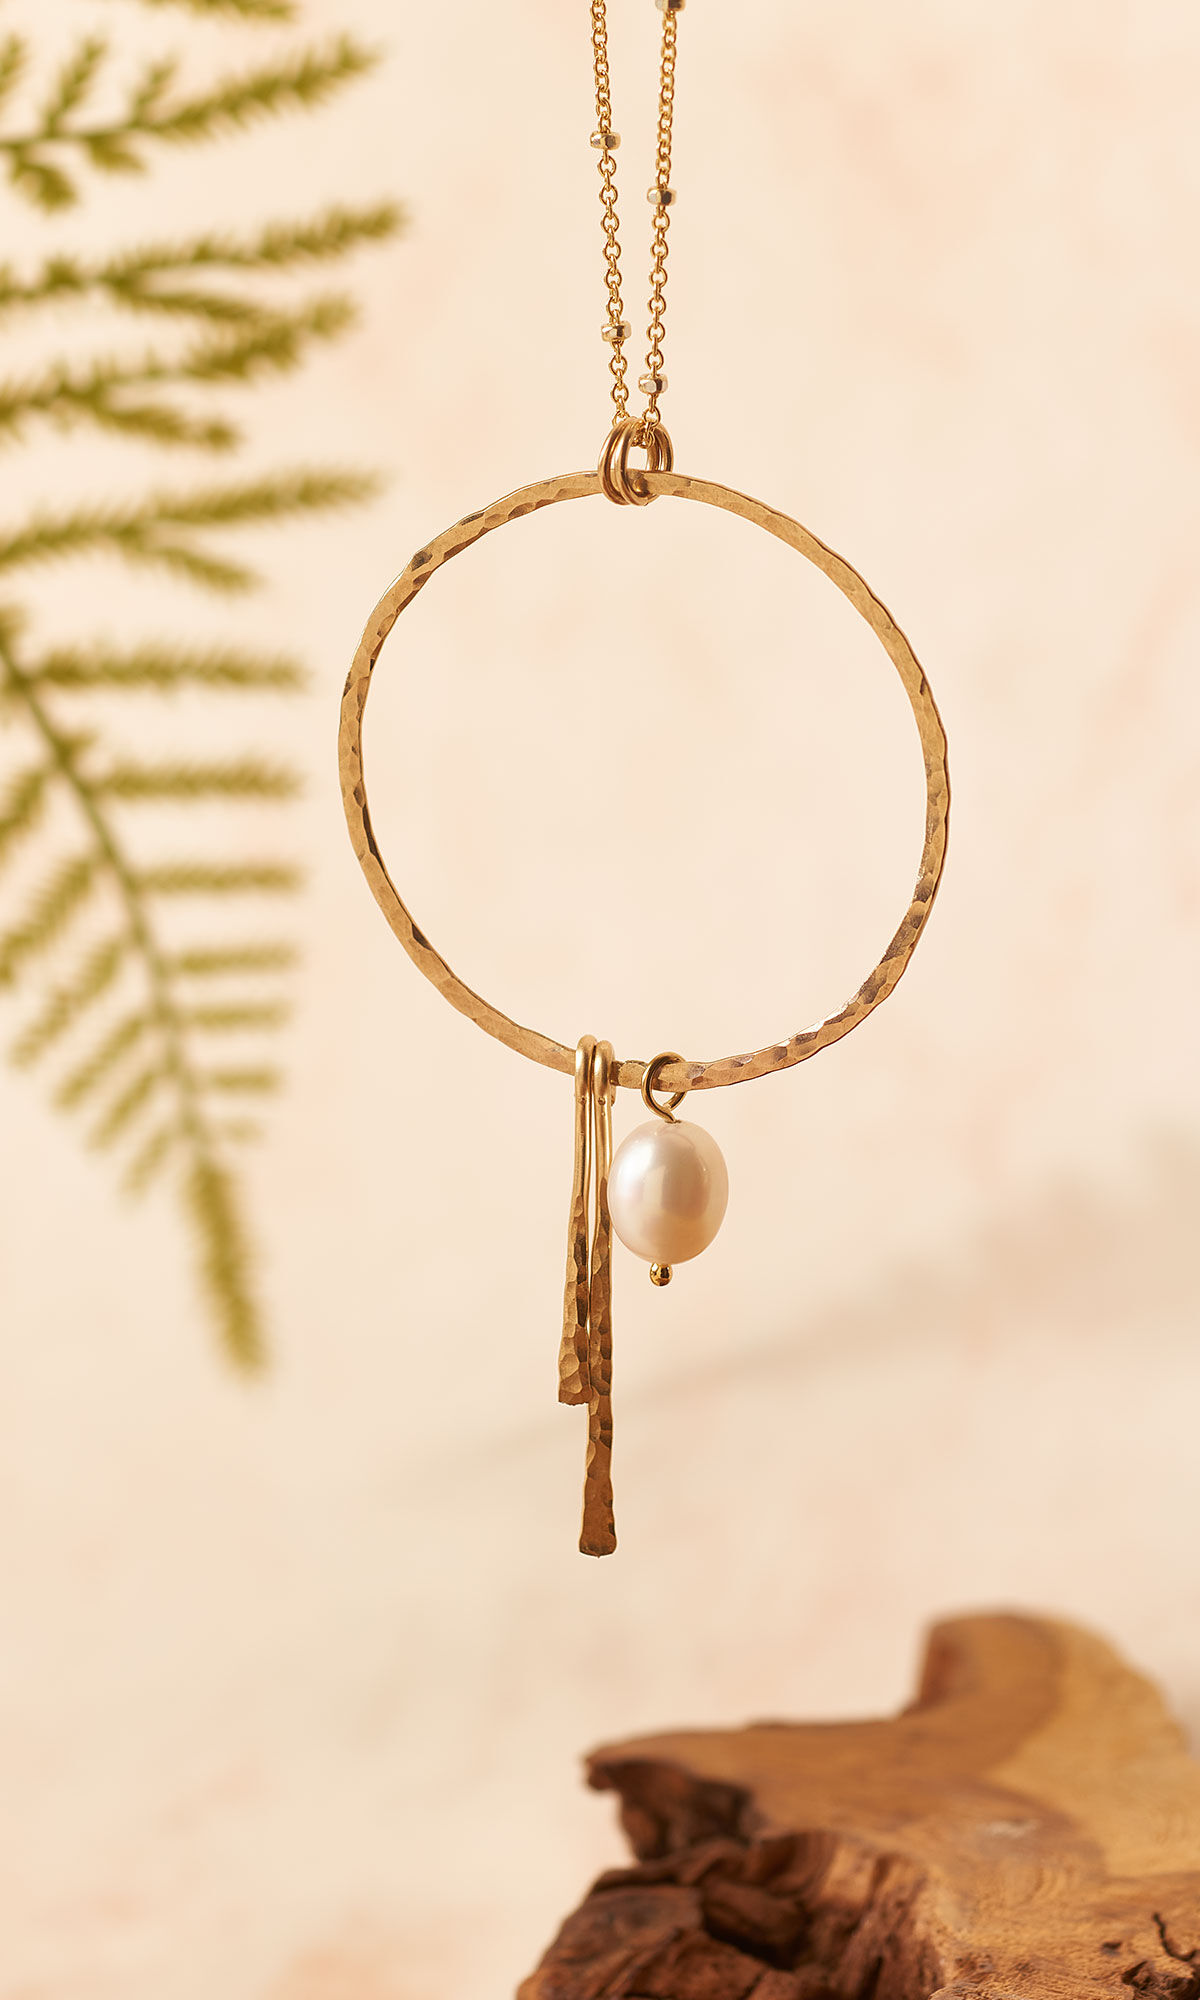


Design Idea QH3U
-- Designer --
Patti, Jewelry Designer, Exclusively for Fire Mountain Gems and Beads®
To learn more about Patti Miller, read her jewelry artist success story here.
: : : Materials : : :
Click here to view a full list of materials used in this design.
Please take the creative opportunity to select the products of your choice for this design, offered here at Fire Mountain Gems and Beads. Some materials may not be available or listed.
- Chain, 14Kt gold-filled / sterling silver curb, 1mm / 1.9mm faceted round / springring clasp, Gossamer™
- Chasing hammer, steel and rubberwood, natural, 28mm convex head and 14mm ball head, 10 inches
- Ear wire fishhook, 14Kt gold-filled / cubic zirconia, 15mm / 4mm faceted round / open loop, 21 gauge
- Firing block, compressed vermiculite, 6x4-1/2x1-1/2-inch block
- Head pin, 14Kt gold-filled, 1 inch with 1.5mm ball, 22 gauge
- Jump ring, 14Kt gold-filled, 5mm round, 3.6mm inside diameter, 22 gauge
- Pearl, White Lotus™, cultured freshwater (bleached), white, 7-7.5mm smooth rice, B grade
- Pearl, White Lotus™, cultured freshwater (bleached), white, 5-5.5mm rice, A- grade, Mohs hardness 2-1/2 to 4
- Pickle compound, Sparex® No. 2, sodium acid sulfate
- Pliers, Wubbers® Designer Mandrel, jumbo round mandrel, steel and rubber, 7 inches
- Polishing cloth, Sunshine®, light yellow, 7-3/4 x 5-inch rectangle
- Rubber tool dip, liquid coating Tool Magic® 2 ounce jar white
- Safety glasses, fits over regular eyeglasses, polycarbonate and nylon, clear and black, anti-fog and scratch-resistant
- Sanding swabs, mixed colors, 3-1/2 inches
- Solder paste, silver / copper / zinc / cadmium, medium flow
- Third hand, steel and stainless steel, 3-1/2 x 2-1/2 inches with 6-1/2 inch tweezers
- Tongs, copper, 8-3/4 inch curved
- Torch, Micro Torch, steel and acrylic, black, 6x4 inches
- Tweezers, steel and fiberglass, silver and brown, 6-1/2 inches
- Wire, 12Kt gold-filled, dead-soft, round, 18 gauge
Instructions
Necklace Instructions
Prepare the pickle using a small slow cooker with Sparex® and water, using the directions on the Sparex package. Set the slow cooker to low so it can preheat for at least ten minutes. Have copper tongs ready.
Cut one 1.75-inch length and one 1.25-inch length of 18-gauge gold-filled dead-soft wire.
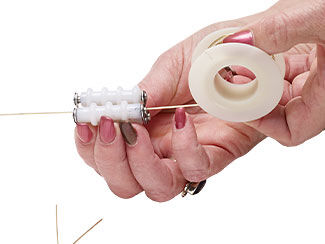
Use a wire straightener to carefully straighten a 7-inch length of wire, without cutting it off the roll. The straighter the wire, the more success you will have in soldering. You will only use about 5 inches of this for your circle, but overlap when making the circle is necessary to create a tight seam to solder. For instructions on using a wire straightener, watch this video or follow the instructions below it.
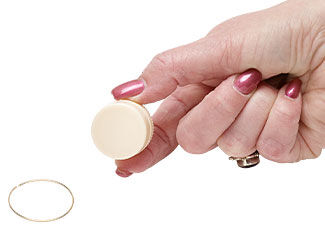
Form the wire around a 1.25-inch cylinder (like a medicine bottle), until it forms a circle of one and a quarter revolutions. The wire will spring out, making an approximately 5-inch circle.
Find the place in the wire circle you just created where the sides meet and are completely curved. Use a flush cutter to cut both ends of the wire so the cut edges meet perfectly, with no spaces. Be sure you cut the wires very flush.
Gently slide the ends together sideways so they meet and stay together precisely, with no spaces. You should now have a perfect circle.
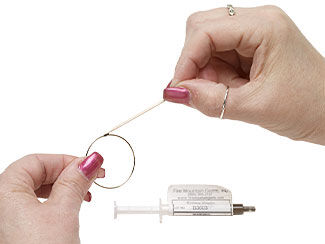
Gently slide the ends of the wire apart sideways. Use a toothpick to apply a small amount of gold-filled solder paste. Let the sides come back together so the solder stays between the ends and smooth the solder around the seam so only a very small amount stays at the seam. Remove any excess.
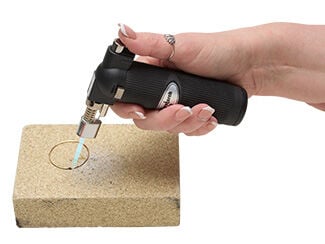
Grip the side of the circle of wire with the tip of a third hand oriented so the seam is at the top. Position a firing block below the circle of wire.
Fill a small, shallow glass dish with water as a quench dish and set it aside in your work area.
Put on eye protection (safety glasses, goggles or face shield), tie back long hair, secure any loose clothing and remove any flammable objects from your work area.
Use a small torch to fire the seam of the circle. Watch the seam carefully. The binder in the paste will burn off quickly. Watch and wait to be sure the solder flows. You will see it quickly move and smooth out. Turn off and secure the torch.
Holding the base of the third hand, drop the circle into the quench dish. It will cool immediately. Move the circle to the pickle to remove the black soldering residue. Leave it for 5 to 10 minutes.
Remove the circle from the pickle with copper tongs and rinse it with water. Test the seam to be sure the joint is secure. If it is not secure, repeat Steps 3-5 until it is. It needs to be completely soldered before you can hammer it.
Brush the circle, front and back, with a medium sanding pad to remove the white residue from the pickle and sand down any excess solder. If you have overused the solder, you can use a small file to file it down, then re-sand it.
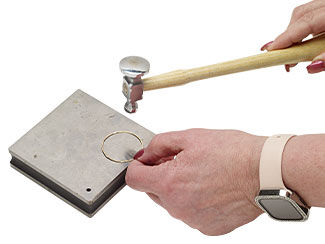
Place the circle on a steel block. Use the domed surface of a chasing hammer to gently flatten the circle. Do this by starting at one point in the circle and going around it, moving the hammer evenly on the outside then on the inside of the wire, until the whole surface of the circle has been flattened. Make sure to pay special attention to the seam when flattening, as you should be able to hide much of the seam.
Flip the hammer to the ball peen end and repeat the process, this time creating a textured surface on the circle. Pay extra attention to the seam, as again, you should be working to hide it.
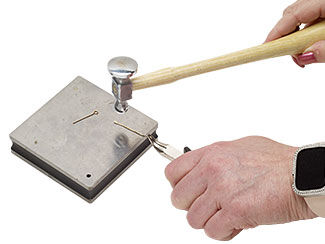
Make a small simple loop at one end of both the 1.25-inch and 1.75-inch 18-gauge wires. For instructions on making a simple loop, watch this video or follow the instructions below it.
Place the 1.25-inch wire on a steel block, holding it so that you are gripping it by the simple loop with the eye of the loop facing sideways.
Use the domed surface of the chasing hammer to hammer the wire flat, starting with the end, then moving side to side, moving back down to the end and moving upward a few more millimeters. Repeat the process until it is hammered flat up to the simple loop. Do not flatten the loop.
Repeat this process with the ball peen side of the hammer to texturize the wire.
Repeat this process with the 1.75-inch 18-gauge wire.
Add both wires to the hammered circle, orienting them so all hammered sides are facing front, using their simple loops.
Thread a 7mm to 7.5mm white cultured freshwater rice pearl onto a 1-inch 22-gauge gold-filled ball head pin. Make a simple loop. Add to the hammered circle next to the 1.75-inch wire dangle using the simple loop.
Add two 5mm 22-gauge gold-filled jump rings to the top of the hammered circle to create a bail.
Thread your finished chain through the jump rings.
Earring Instructions
Prepare the pickle using a small slow cooker with Sparex and water, using the directions on the Sparex package. Set the slow cooker to low. Have copper tongs ready.
Cut one 1.5-inch length and one 1-inch length of 18-gauge gold-filled dead-soft wire.
Use a wire straightener to carefully straighten a 5-inch length of wire, without cutting it from the roll.
Wrap the wire around a cylinder, like the larger barrel of Wubbers® jumbo round mandrel pliers or a small medicine bottle. You should make one and a quarter revolutions. The wire will spring out, making an approximately 3.5-inch circle.
Find the place in the wire circle you just created where the sides meet and are completely curved. Use a flush cutter to cut both ends of the wire so the cut edges meet perfectly, with no spaces. Be sure you cut the wires very flush.
Gently slide the ends together sideways so they meet and stay together precisely, with no spaces. You should now have a perfect circle.
Gently slide the ends of the wire apart sideways. Use a toothpick to apply a small amount of gold-filled solder paste. Let the sides come back together so the solder stays between the ends and smooth the solder around the seam so only a very small amount stays at the seam. Remove any excess.
Grip the side of the circle of wire with the tip of a third hand oriented so the seam is at the top. Position a firing block below the circle of wire.
Fill a small, shallow glass dish with water as a quench dish and set aside in your work area.
Put on eye protection (safety glasses, goggles or face shield), tie back long hair, secure any loose clothing, and remove any flammable objects from your work area.
Use a small torch to fire the seam of the circle. Watch the seam carefully. The binder in the paste will burn off quickly. Watch and wait to be sure the solder flows. You will see it quickly move and smooth out. Turn off and secure the torch.
Holding the base of the third hand, drop the circle into the quench dish. It will cool immediately. Move the circle to the pickle. Leave it for 5 minutes.
Remove the circle from the pickle with copper tongs and rinse it with water. Test the seam to be sure the joint is secure. If it is not secure, repeat Steps 3-5 until it is. It needs to be completely soldered before you can hammer it.
Brush the circle, front and back, with a medium sanding pad to remove the white residue from the pickle and sand down any excess solder. If you have overused the solder, you can use a small file to file it down, then re-sand it.
Place the circle on a steel block. Use the domed surface of a chasing hammer to gently flatten the circle. Do this by starting at one point in the circle and going around it, moving the hammer evenly on the outside then on the inside of the wire, until the whole surface of the circle has been flattened. Make sure to pay special attention to the seam when flattening, as you should be able to hide much of the seam.
Flip the hammer to the ball peen end and repeat the process, this time creating a textured surface on the circle. Pay extra attention to the seam, as again, you should be working to hide it.
Make a small simple loop at one end of both the 1-inch and 1.5-inch 18-gauge wires.
Place the 1-inch wire on a steel block, holding it so that you are gripping it by the simple loop with the eye of the loop facing sideways.
Use the domed surface of the chasing hammer to hammer the wire flat, starting with the end, then moving side to side, moving back down to the end and moving upward a few more millimeters. Repeat the process until it is hammered flat up to the simple loop. Do not flatten the loop.
Repeat this process with the ball peen side of the hammer to texturize the wire.
Repeat this process with the 1.5-inch 18-gauge wire.
Add both wires to the hammered circle, orienting them so all hammered sides are front, using their simple loops.
Thread a 5mm to 5.5mm white freshwater cultured pearl onto a 1-inch 22- gauge gold-filled ball head pin. Make a simple loop. Add it to the hammered circle using the simple loop on the side next to the 1.5-inch wire dangle.
Add a 15mm gold-filled ear wire to the top of the hammered loop, oriented forward.
Repeat Steps 2 - 9 for the second earring.
Pro Tip: When soldering, to get a good bond, both sides of the metal being joined together must meet in full contact with no spaces at all. Solder will not fill in gaps, but only adhere to existing metal.
Pro Tip: Always double check solder seams for stability and re-solder if necessary.
Pro Tip: Not all filled metals solder well. Do a solder test to see how your filled wire performs when torched before doing a gold- or silver-filled soldering project.
Copyright Permissions
The pieces featured in the Gallery of Designs are copyrighted designs and are provided for inspiration only. We encourage you to substitute different colors, products and techniques to make the design your own.
All works of authorship (articles, videos, tutorials and other creative works) are from the Fire Mountain Gems and Beads® Collection, and permission to copy is granted for non-commercial educational purposes only. All other reproduction requires written permission. For more information, please email copyrightpermission@firemtn.com.

