Learn How to Finish Elastic and Powercord® Jewelry
Finishing elastic or stretch cord properly is essential to creating secure, long-lasting jewelry designs. A well-finished stretch cord prevents knots from slipping, beads from scattering, and your hard work from unraveling. Whether you're making bracelets or anklets, taking the time to tie, glue, and hide your knots ensures a polished, professional look that stands up to everyday wear.
In this video, learn how to finish elastic and Powercord® jewelry like a pro to create popular gemstone energy bracelets and more.

Instructions
Step 1
Using a ruler, measure a length of elastic cording suitable for your design, then add 4 inches so you have extra to tie a secure knot. Using scissors, cut the cording to the measured length.
Step 2
Give the cord several stretches to condition it.
Step 3
String on beads in desired pattern.
Step 4
Pick up the two ends of the elastic cord.
Step 5
While holding an end of the cording in each hand, overlap the strands of the cording twice to begin a surgeon's knot.
Step 6
Pull the ends of the cording until the knot is cinched down to the beads and forms a circle in the cording, with little space between the two end beads.
Step 7
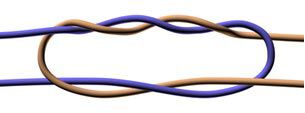
Overlap the ends of the cording one time. Pull tightly to finish the surgeon's knot.
Step 8
Tighten the knot, down to the beads.
Step 9
Add a drop of adhesive to the knot and pull the knot into the hole of a bead.
Step 10
Let glue dry per the manufacturer's recommendation.
Step 11
Once the glue is dry, trim off the excess cord close to the bead.
Tip: E6000® Jewelry and Craft Adhesive is a great glue to use when working with elastic cording. It is a strong holding, clear glue that remains flexible after curing.
Shop for Your Materials Here:


Copyright Permissions
All works of authorship (articles, videos, tutorials and other creative works) are from the Fire Mountain Gems and Beads® Collection, and permission to copy is granted for non-commercial educational purposes only. All other reproduction requires written permission. For more information, please email copyrightpermission@firemtn.com.