Multi-Strand Necklace and Earring Set with Czech Fire-Polished Glass Beads, Cloisonné Beads and Gold-Plated Chain


Design Idea CB4A
Purple Passion
-- Designer --
Gulten Dye
To learn more about Gulten Dye, read her jewelry artist success story here
: : : Materials : : :
Click here to view a full list of materials used in this design.
Please take the creative opportunity to select the products of your choice for this design, offered here at Fire Mountain Gems and Beads. Some materials may not be available or listed.
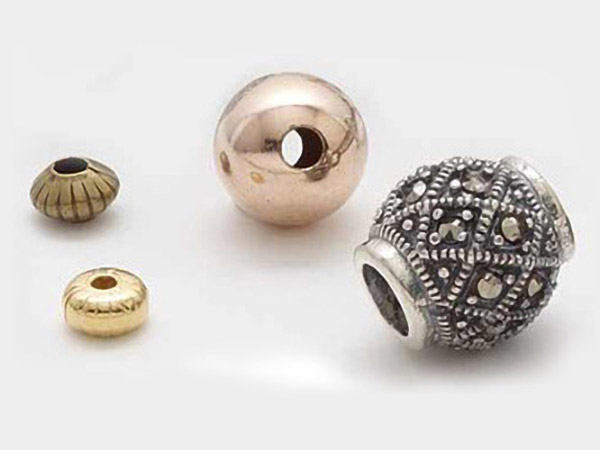
- Bead, cloisonné, enamel and gold-finished copper, multicolored, 12mm round with flower design
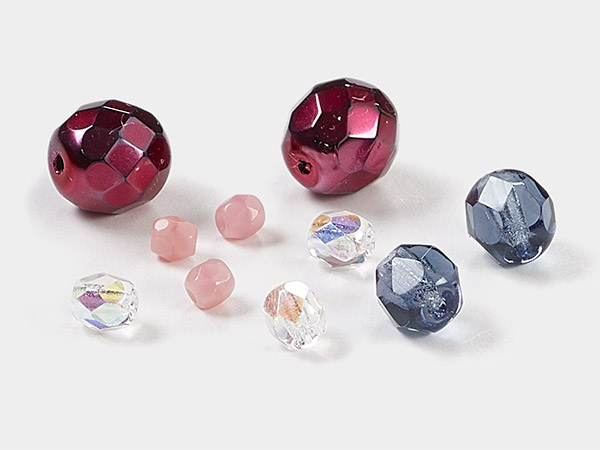
- Bead, Czech fire-polished glass, amethyst purple AB, 10mm faceted round
- Bead, Czech fire-polished glass, amethyst purple AB, 3mm faceted round
- Bead, Czech fire-polished glass, transparent lavender, 6mm faceted round
- Bead, gold-finished copper, 6x2mm beaded rondelle
- Beading wire, Accu-Flex®, nylon and stainless steel, clear, 49 strand, 0.019-inch diameter
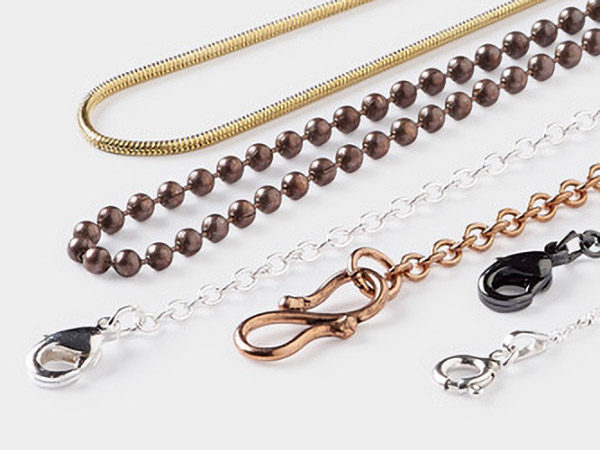
- Chain, gold-finished copper, 24mm brushed round / 33mm brushed double round / 41mm brushed triple round, 36 inches with S-hook clasp
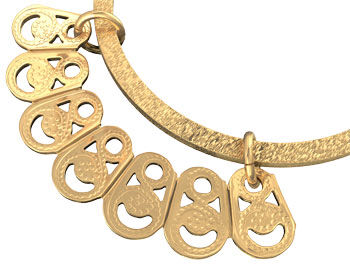
- Chain, gold-plated brass, 8mm hammered marquise
- Clasp, lobster claw, gold-plated brass, 12x7mm with swivel
- Component, gold-plated brass, 32x8mm 7-row filigree cluster
- Ear wire, gold-plated brass, 16mm leverback with 7x2mm shield and open loop
- Head pin, gold-plated brass, 1 inch, 21 gauge
- Jump ring, gold-plated brass, 4mm round, 2.4mm inside diameter, 20 gauge
- Jump ring, gold-plated brass, 5mm round, 3mm inside diameter, 18 gauge
- Wire protector, Accu-Guard™, gold-plated brass, 4mm tube, 0.5mm inside diameter
Instructions
Necklace Instructions
Using flush-cutters cut the following lengths of Accu-Flex® professional-quality beading wire:
- One 18-inch length
- One 21-inch length
- One 24-inch length
Cut the following lengths of gold-plated 18x8mm hammered marquise chain:
- One 10-inch length
- One 13-inch length
- One 15-inch length
Remove two intact 33mm rings from the gold-plated triple link finished necklace chain.
First Strand
String onto the 18-inch length of beading wire one gold-filled 2x2mm crimp bead and the one Accu-Guard™ wire protector. Pass the beading wire back through the crimp bead. Pull the beading wire so the crimp rests snug against the Accu-Guard leaving approximately 1/4 inch of beading wire on the end. Place a small amount of adhesive (Loctite®) inside the crimp (optional).
Using crimping pliers crimp the crimp bead. Using flush-cutters trim the excess from the short end of the beading wire.
String the following onto the beading wire:
- Repeat this stringing sequence for a total of five sets:
- One Czech glass lavender 6mm round
- One Czech glass amethyst purple AB 3mm round
Continue to string one Czech glass lavender 6mm round
Continue to string the following:
- One gold-plated 6x2mm beaded rondelle
- One Czech glass amethyst purple AB 10mm round
- One gold-plated 6x2mm beaded rondelle
Repeat the stringing sequence in Steps 3 and 4 for a total of five sets.
Repeat the Stringing sequence in Step 3 once more.
Repeat Step 2 to secure the strand.
Second Strand
Repeat Step 2 on the 21-inch length of beading wire to begin the second strand.
String onto the beading wire one Czech glass amethyst purple AB 3mm round and one Czech glass lavender 6mm round. Repeat this stringing sequence for a total of ten sets.
Continue to string the following onto the beading wire:
- One Czech glass amethyst purple AB 10mm round
- One gold-plated 6x2mm beaded rondelle
- One cloisonné 12mm round bead
- One gold-plated 6x2mm beaded rondelle
- One Czech glass amethyst purple AB 10mm round
Continue to string the following onto the beading wire:
- One Czech glass lavender 6mm round
- Five Czech glass amethyst purple AB 3mm rounds
- One Czech glass lavender 6mm round
- One gold-plated 6x2mm beaded rondelle
- One Czech glass amethyst purple AB 10mm round
- One gold-plated 6x2mm beaded rondelle
- One Czech glass lavender 6mm round
- Five Czech glass amethyst purple AB 3mm rounds
- One Czech glass lavender 6mm round
Repeat the stringing sequence in Step 9 one time.
Repeat the stringing sequence in Steps 8 - 10 in the opposite direction to string the second half of the necklace.
Repeat Step 2 to secure the strand.
Third Strand
Repeat Step 2 on the 24-inch length of beading wire to begin the third strand.
String the following onto the beading wire:
- Four Czech glass amethyst purple AB 3mm rounds
- One Czech glass lavender 6mm round
- One gold-plated 6x2mm beaded rondelle
- One Czech glass amethyst purple AB 10mm round
- One gold-plated 6x2mm beaded rondelle
- One Czech glass lavender 6mm round
- Five Czech glass amethyst purple AB 3mm rounds
Continue to string the following onto the beading wire:
- One Czech glass amethyst purple AB 10mm round
- One gold-plated 6x2mm beaded rondelle
- One cloisonné 12mm round bead
- One gold-plated 6x2mm beaded rondelle
- One Czech glass amethyst purple AB 10mm round
String the following onto the beading wire:
- Five Czech glass amethyst purple AB 3mm rounds
- One Czech glass lavender 6mm round
- One gold-plated 6x2mm beaded rondelle
- One Czech glass amethyst purple AB 10mm round
- One gold-plated 6x2mm beaded rondelle
- One Czech glass lavender 6mm round
- Five Czech glass amethyst purple AB 3mm rounds
Repeat the stringing sequence in Steps 15 and 16 a total of four times.
Repeat the stringing sequence in Step 15 and then in Step 14 in the opposite direction.
Repeat Step 2 to secure the strand.
Assembling the Necklace
Using a pair of chain-nose pliers and bent-nose pliers open twelve gold-plated 4mm jump rings and six gold-plated 5mm jump rings.
Pass one 5mm jump ring through the last link on one end of the 13-inch length of hammered marquise chain and the first loop on the bottom right side of one gold-plated 32x8mm filigree cluster. Close the jump ring. Repeat to attach the opposite end of the chain to the first loop on the bottom left side of a second filigree cluster.
Attach one 5mm jump ring to the last link on each end of the 15-inch length of hammered marquise chain.
Pass one 4mm jump ring through the 5mm jump ring on one end of the 15-inch length of hammered marquise chain and the fifth loop from the bottom right of the first filigree cluster. Close the jump ring. Repeat to attach the opposite end of the chain to the fifth loop from the bottom left side of the second filigree cluster.
Pass one 4mm jump ring through the Accu-Guard on one end of the 18-inch strand of beads and the second loop on the bottom right side of the first filigree cluster. Close the jump ring. Repeat to attach the opposite end of the strand to the second loop on the bottom left side of the second filigree cluster.
Repeat to attach the 21-inch strand to the fourth loop on the bottom right side of the first filigree cluster and the center fourth loop on the bottom left side of the second filigree cluster.
Repeat to attach the 24-inch strand to the bottom left loop on the first filigree cluster and the bottom right loop on the second filigree cluster.
Pass one 4mm jump ring through the top left loop on the filigree cluster and one 33mm ring. Close the jump ring. Repeat to attach the top right loop on the filigree cluster to the same 33mm ring.
Repeat to attach the second filigree cluster to a second 33mm ring.
Pass one 5mm jump ring through the last link on one end of the 10-inch length of hammered marquise chain and the loop on one gold-plated lobster claw clasp. Close the jump ring.
Pass one 5mm jump ring through the opposite end of the 10-inch length of chain and the first 33mm ring. Close the jump ring.
Note: The gold-plated lobster claw clasp is attached to the second 33mm ring.
Earring Instructions
String onto one gold-plated 1-inch head pin one Czech glass lavender 6mm round. Using a pair of chain-nose pliers, round-nose pliers and flush-cutters form a simple loop on the straight end of the wire forming a Czech glass drop.
Repeat to create a total of ten Czech glass drops.
Beginning on the left side of one gold-plated 32x8mm filigree cluster attach one Czech glass drop to every other bottom loop adding a total of four Czech glass drops.
Using flush-cutters remove two 33mm rings from the gold-plated triple link finished necklace chain.
Using a pair of chain-nose pliers and bent-nose pliers open one 4mm jump ring and three 5mm jump rings.
Pass one 5mm jump ring through the top left loop on the filigree cluster and one 33mm ring. Close the jump ring. Repeat to attach the top right loop on the filigree cluster to the same 33mm ring.
Pass one 5mm jump ring through the fifth Czech glass drop. Close the jump ring.
Pass one 5mm jump ring through the previous 5mm jump ring and the opposite end of the 33mm ring. Close the jump ring. Repeat to attach a second jump ring creating double jump rings.
Pass one 4mm jump ring through the double jump ring and the loop on one gold-plated leverback ear wire. Close the jump ring.
Repeat Steps 2 - 8 to create a second earring.
Shop for Your Materials Here:
Have a question regarding this design idea? Email Customer Service.
Copyright Permissions
The pieces featured in the Gallery of Designs are copyrighted designs and are provided for inspiration only. We encourage you to substitute different colors, products and techniques to make the design your own.
All works of authorship (articles, videos, tutorials and other creative works) are from the Fire Mountain Gems and Beads® Collection, and permission to copy is granted for non-commercial educational purposes only. All other reproduction requires written permission. For more information, please email copyrightpermission@firemtn.com.