Bib-Style Necklace and Earring Set with Crystal Passions® Beads
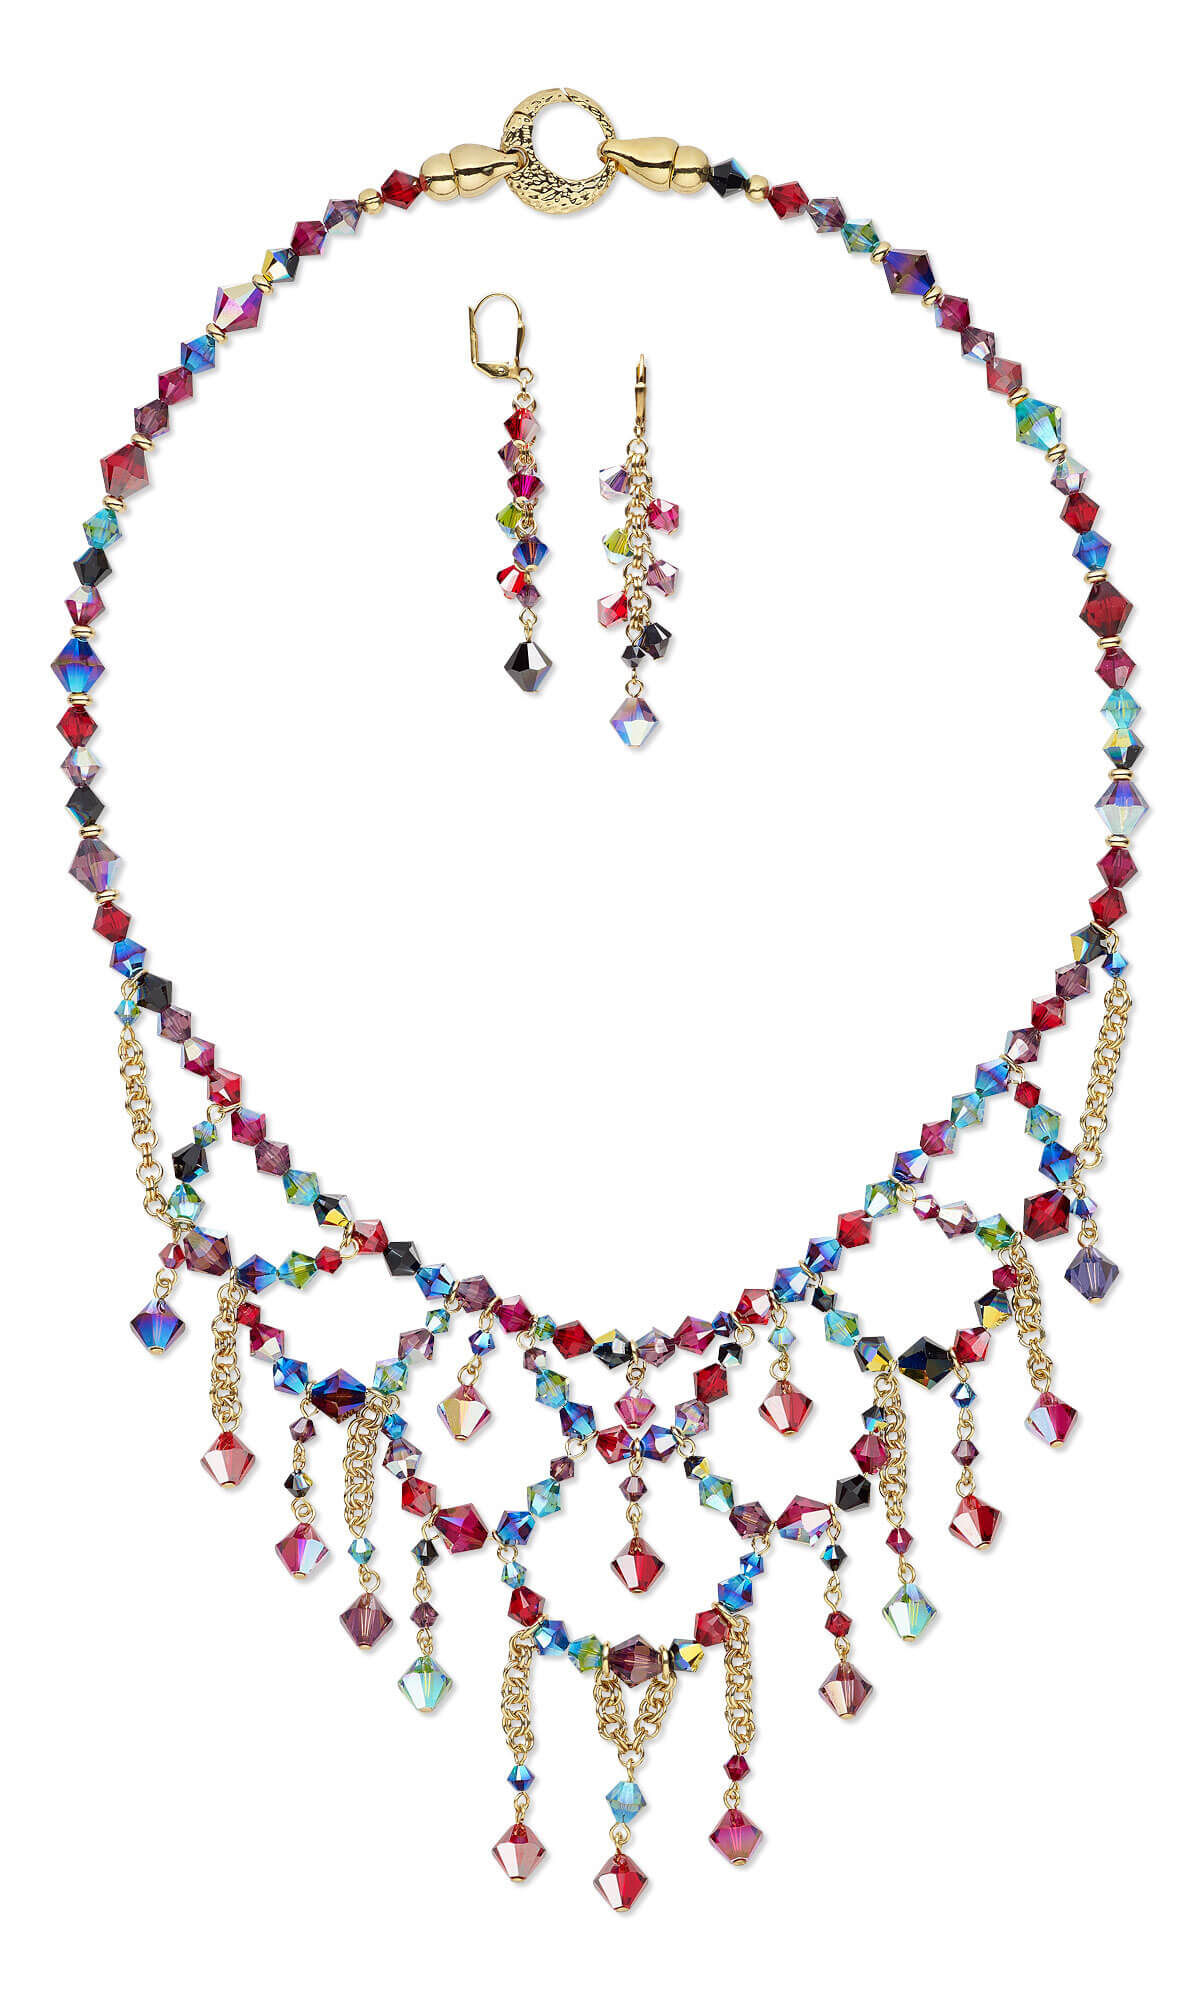


Design Idea DA09
Instant Chemistry
-- Designer --
Esther, Jewelry Designer, Exclusively for Fire Mountain Gems and Beads®
To learn more about Esther Pollock, read her jewelry artist success story here.
: : : Materials : : :
Please take the creative opportunity to select the products of your choice for this design, offered here at Fire Mountain Gems and Beads. Some materials may not be available or listed.
- Bead, Crystal Passions®, Alchemy, 4mm bicone (5328)
- Bead, Crystal Passions®, Alchemy, 6mm bicone (5328)
- Bead, gold-plated brass, 4x2mm heishi
- Bead, gold-plated brass, 7mm round
- Beading supply, Bead Stopper™, stainless steel, 12mm
- Beading wire, Accu-Flex®, nylon and stainless steel, clear, 49 strand, 0.019-inch diameter
- Clasp, triggerless springring, gold-plated brass, 34x17mm double-sided textured crescent with end caps
- Crimp cover, gold-plated brass, 4mm round
- Crimp, 12Kt gold-filled, 2mm smooth tube, 1.1mm inside diameter
- Ear wire, gold-plated brass, 16mm leverback with 7x2mm shield and open loop
- Eye pin, gold-plated brass, 1 inch, 21 gauge
- Eye pin, gold-plated brass, 2-1/2 inches, 21 gauge
- Head pin, gold-plated brass, 1 inch, 21 gauge
- Jump ring, gold-plated brass, 4mm round, 2.6mm inside diameter, 22 gauge
- Jump ring, gold-plated brass, 5mm round, 3mm inside diameter, 18 gauge
Instructions
Necklace Instructions
String one 8mm bicone onto one gold-plated 1-inch head pin then form a simple loop creating an 8mm bicone drop.
Repeat to create a total of sixteen 8mm bicone drops in the color pattern of your choice. Repeat once more to create a 6mm bicone drop.
String one 4mm bicone onto one gold-plated 1-inch eye pin then form a simple loop creating a 4mm bicone link.
Repeat to create a total of nineteen 4mm bicone links in the color pattern of your choice. Repeat once more to create a 6mm bicone link.
Open the loop on one 8mm bicone drop. Pass the loop through the first loop on one end of the 6mm bicone link then close creating a 6 and 8mm bicone drop.
Repeat to create nine single 4mm bicone drops by connecting one 8mm bicone drop and one 4mm bicone link.
Repeat to create four double 4mm bicone drops by connecting one 8mm bicone drop and two 4mm bicone links end-to-end.
Attach one 4mm jump ring to the loop on three single 4mm bicone drops and the single 6mm bicone drop. Attach a second jump ring to the previous jump ring on the 6mm bicone drop.
Pass one 4mm jump ring through the loop on the end of one single 4mm bicone drop and two closed 4mm jump rings. Repeat to attach a second jump ring creating double jump rings.
Continue to connect four more sets of double jump rings, creating a chain. Connect a single 4mm jump ring to the end of the chain using double jump rings.
Repeat to create a total of four single 4mm bicone drops with seven sets of double jump rings then attach a single 4mm jump ring to the end.
Repeat Step 5 to create two single 4mm bicone drops attaching a single 5mm jump ring on the end instead.
Pass one 4mm jump ring through the loop on one end of one 4mm bicone link. Connect ten sets of double jump rings to the loop on the opposite end then attach a single 4mm jump ring to the end.
Pass a one 4mm jump ring through the previous single jump ring and one single 4mm bicone drop (Step 4).
Repeat to attach jump rings and a single bicone drop to the remaining 4mm bicone link.
Connect the loop one the 6 and 8mm bicone drop and four 4mm jump rings using 4mm double jump rings.
Continue to connect four sets of double jump rings and a single 5mm jump ring on the end, to two of the previous four jump rings. Repeat using the second set of two jump rings.
String the following onto one gold-plated 2-1/2 inch eye pin:
- One 4mm bicone
- One 6mm bicone
- The on one 8mm bicone and single 4mm bicone drop (Step 6)
- Two 6mm bicones
- One 5mm jump ring on the 6 and 8mm bicone drop
- One 8mm bicone
- The second 5mm jump ring on the 6 and 8mm bicone drop
- Two 6mm bicones
- The 5mm jump ring on one single 4mm bicone drop (Step 6)
- One 6mm bicone
- One 4mm bicone
Form a simple loop on the straight end of the wire approximately 1/4 from the beads, creating a nine bicone link. Attach one 4mm jump ring to each end of the link.
String the following onto one gold-plated 2-1/2 inch eye pin:
- One 4mm bicone
- Two 6mm bicones
- The 4mm jump ring on one double 4mm bicone drop
- One 8mm bicone
- The jump ring on one end of the nine bicone link (Step 9)
- Two 6mm bicones
- One 4mm bicone
Form a simple loop on the straight end of the wire approximately 1/4 from the beads, creating a seven bicone link.
Attach one 4mm jump ring to the loop just created.
Pass one 4mm jump ring through the end 4mm jump ring on one single 4mm bicone drop (from Step 5) and the loop on the opposite end of the link. Close the jump ring.
Repeat Steps 10 and 11 in reverse order to create a mirror image of the seven bicone link using the opposite end of the nine bicone link.
Repeat Steps 10 - 12 using the loops on the previous seven bicone links instead of the nine bicone link.
String the following onto one gold-plated 2-1/2 inch eye pin:
- One 4mm bicone
- Two 6mm bicones
- The jump ring on the drop end of one 4mm bicone link from Step 7
- One 8mm bicone
- The right jump ring on the right seven bicone link
- Two 6mm bicones
- One 4mm bicone
Form a simple loop on the straight end of the wire approximately 1/4 from the beads, creating a seven bicone link. Attach one 4mm jump ring to each end of the link.
Repeat Step 14 in reverse order to create a mirror image of the seven bicone link using the opposite end of the linked components.
String the following onto one gold-plated 2-1/2 inch eye pin:
- One 4mm bicone
- Two 6mm bicones
- The left jump ring on the right seven bicone link from Step 10
- One 6mm bicone
- The 4mm jump ring on one 8mm bicone and 4mm bicone drop from Step 6
- One 6mm bicone
- The right jump ring on the left seven bicone link from Step 12
- Two 6mm bicones
- One 4mm bicone
Form a simple loop approximately 1/4 inch from the beads on the wire creating a 4 and 6mm bicone link. Attach one 4mm jump ring to each end of the link.
Moving from the nine bicone link out, gently curve each link upward (like a smile). Make sure the bicone drops lay evenly.
Using flush-cutters cut one 19-inch length of Accu-Flex® professional-quality beading wire.
String the following onto the beading wire:
- One gold-filled 2x2mm crimp bead
- One 6mm bicone
- One gold-plated 7mm round
Pass the beading wire around the bar in the end cap one portion of the clasp. Pass the beading wire back through the other beads. Pull the beading wire so the 7mm round rests snug against the end cap leaving approximately 1/4 inch of beading wire on the shorter end coming out the crimp bead.
Crimp the crimp bead then trim the excess from the short end of the beading wire. Place one gold-plated 4mm crimp cover over the crimp bead then gently close it.
String the following onto the beading wire:
- Repeat this sequence to string a total of four sets:
- Three 6mm bicones
- One gold-plated 4x2mm heishi
- One 8mm bicone
- Two 6mm bicones
- The jump ring on the end of 4mm bicone link on the right side of the bib
- Four 6mm bicones
- The first jump ring on the first seven bicone link on the left side of the bib
- Four 6mm bicones
- The second jump ring on the first seven bicone link on the left side of the bib
- Three 6mm bicones
- The second jump ring on the second seven bicone link on the left side of the bib
- One 6mm bicone
- The 4mm jump ring on one single 4mm bicone drop
- One 6mm bicone
- The first jump ring on the 4 and 6mm bicone link
- One 4mm bicone
- Two 6mm bicones
Continue to string the end jump ring on the 6mm bicone drop.
Repeat the stringing sequence in Step 20 in reverse order to string the second half of the necklace using the jump rings attached to the links on the right side of the bib.
Repeat Step 19 to secure the strand.
Earring Instructions
String one 8mm bicone onto one gold-plated 1-inch head pin. Form a simple loop on the straight end of the wire creating an 8mm bicone drop. Repeat to create a second 8mm bicone drop.
Create twelve 6mm bicone drops in the color pattern of your choice.
Create two 4mm bicone links using gold-plated 1-inch eye pins.
Open forty-six gold-plated 4mm jump rings.
Open the loop on one end of one 4mm bicone link. Pass the loop through the loop on one 8mm bicone drop. Close the loop.
Connect eleven sets of double jump rings to the opposite end of the 4mm bicone link creating a chain then attach a single 4mm jump ring to the end.
Open the loop on one 6mm bicone drop. Pass the loop through the single jump ring on the end of the chain. Close the loop.
Continue to attach 6mm bicone drops to every other double jump ring set alternating sided of the chain.
Open the loop on one gold-plated leverback ear wire. Pass the loop through the singe jump ring on the end of the chain. Close the loop.
Shop for Your Materials Here:
Have a question regarding this design idea? Email Customer Service.
Copyright Permissions
The pieces featured in the Gallery of Designs are copyrighted designs and are provided for inspiration only. We encourage you to substitute different colors, products and techniques to make the design your own.
All works of authorship (articles, videos, tutorials and other creative works) are from the Fire Mountain Gems and Beads® Collection, and permission to copy is granted for non-commercial educational purposes only. All other reproduction requires written permission. For more information, please email copyrightpermission@firemtn.com.

