Macramé Basics, Techniques and Finishing Techniques

Instructions
Macramé Basics and Techniques
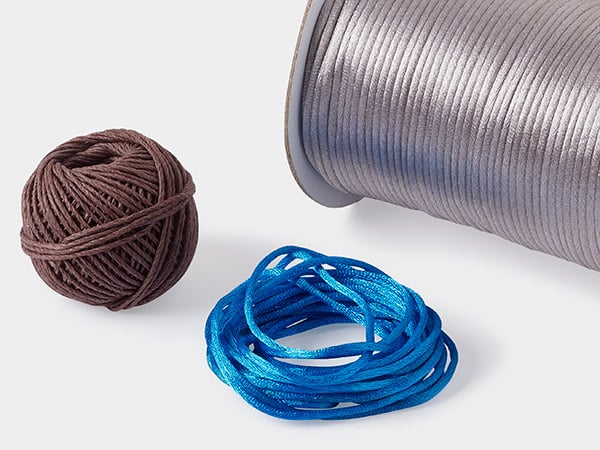
Cut two of the desired length of cord (approximately 36 inches). Attach the center of each length of cord to a component using a lark's head knot, creating four cords. Pin or tape the strands to your work station at the center to make it easier to form your knots evenly.
Basic Macramé Square Knot
Make a square knot using the two inside cords (anchor cords) and the two outside cords (working cords 1 and 4).
Pass cord 1 horizontally over the anchor cords then pass cord 4 over the end of cord 1, under the anchor cords and up through the loop (created by strand 1) then pull snug. (This is a half square knot.)
Pass cord 1 under the anchor cords then bring the cord 4 under cord 1, over the center cords and through the loop. Pull the ends of the 1 and 4 cords tight, so the knot rests close to the previous half of the square knot.
Continue making square knots to the desired length.
Note: It's important to alternate the cord 1 over and under the anchor cords to get a flat pattern. Consistently passing over the anchor cords will cause the pattern to twist.
Macramé Spiral Knot
Make a square knot using the two inside cords (anchor cords) and the two outside cords (working cords 1 and 4).
Pass cord 1 horizontally over the anchor cords then pass cord 4 over the end of cord 1, under the anchor cords and up through the loop (created by strand 1) then pull snug. Repeat to create a spiral pattern to the desired length.
Double Half Hitch Knot
Cut three of the desired length of cord (approximately 36 inches). Attach the center of each length of cord to a component using a lark's head knot, creating six cords. Pin or tape the strands to your work station at the center to make it easier to form your knots evenly.
Begin the half hitch knot by crossing cord 1 (anchor) over the other cords. Bring cord 2 (working) up and over cord one, then pass back through the loop created, cords by 1 and 2. Repeat to create a second half hitch knot using cord 2 once more. Repeat using cords 3 - 6.
Tips:
- Place a pin through a knot or between cords near the last half hitch knot to secure it in place
- Increasing or decreasing the distance between the previous rows of half hitch knots will cause various patterns
Bring the anchor cord back over the working cords then use cord 6 to create a half hitch knot. Continue to create half hitch knots along the anchor cord in reverse order to create a zig-zag pattern.
Macramé Finishing Techniques
Once your macramé jewelry design is complete, there are many options for finishing the ends. Here are a few ways that provide a professional look and enhance your design.
Overhand Knot
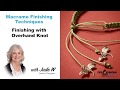
See how to finish a macramé bracelet (or other piece of jewelry) using an overhand knot technique by following along with jewelry designer Jude.
Option 1
Apply adhesive (such as E6000 Jewelry and Craft adhesive) around the ends of the working cord close to the sides and to the center of the square knot, to secure. Repeat on the opposite end of the design then allow to dry. Trim excess cord from the ends of the working cord.
Option 2
Use the working cords to tie an overhand knot or square knot on the back side of the design. Apply a very small amount of adhesive to the center of the knot then pull it tight and allow to dry. Trim excess working cord.
Adjustable/Slide Knot
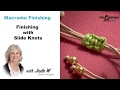
Follow along with jewelry designer Jude, who will walk you through the steps needed to finish macramé using a slide knot technique.
Bring the ends of the design together so they lay parallel in opposite directions.
Pass an approximately 8 - 12-inch length of cord behind the ends of the design, through the center of the bracelet, then form a square knot securing the ends together. Create several square knots, approximately 1/2 inch.
Tips:
- Keep the cord as tight as possible when creating the knots to ensure they are not too loose when the design is finished
- Typically, approximately six or more knots will ensure a sturdy clasp
Repeat Step 1 to secure the ends of the adjustable clasp, being careful not to let adhesive touch the anchor stands.
Tip: If glue dries on the anchor strand it will prevent the clasp from sliding.
Tie an overhead knot in each anchor strand approximately one inch from the adjustable clasp.
If desired, string a bead onto the end of one cord then tie a second overhand knot, securing the bead in place. Repeat on the second end of cord.
Apply adhesive to the knots, allow to dry then trim excess cord.
Button Clasp

Follow along with these instructions presented by jewelry designer Jude to learn how to use a button clasp when finishing your macramé jewelry creations.
Before beginning your design, match up one end of the lengths of cord then fold them in half. Create an overhand knot forming an approximately 3/4 inch loop (large enough for a button to pass through).
Create your macramé design to the desired length.
Secure the working cords or separate the cords then pass a couple strands of cord through each hole in the button. Bring the ends of the cord together then tie an overhand knot close to the button to secure end it in place.
Apply a small amount of adhesive to the knot then allow to dry. Trim excess cord.
Cord Ends

Finish your macramé jewelry designs with cord ends after learning how to in this quick tutorial presented by jewelry designer Jude.
Instead of cutting the working cord ends:
Apply a small amount of adhesive to the inside of a cord end. Bring the ends of the cord together then place the cord end over the cords close to the last knot in the design.
Use pliers to press the sides of the cord end closed over the cord. Use a fine tip cutter to cut the ends close to the edge of the cord end. Attach a clasp to the cord end.
Repeat on the opposite side of the design attaching an extender length of chain or a jump ring.
Tips:
- Be sure the ends of the cords fit inside the cord end with room to close it before applying adhesive
- Be sure to press the sides of the cord end tight and tug the cord end to verify it is secure
Ribbon Ends

Looking for an easy way to finish the ends of your macramé? Try ribbon crimp ends by following these simple instructions as presented by Jude.
Insert the finished end of the macramé design into a ribbon crimp end. Use pliers to press the sides of the ribbon end over the end of the ribbon, securing it in place. Attach a clasp to the ribbon end.
Repeat on the opposite side of the design attaching an extender length of chain or a jump ring.
Tip: If desired, apply a small amount of adhesive inside the ribbon end before inserting the cord.
Wire Wrap
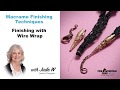
There are lots of ways to finish macramé, including wire-wrapping. Jewelry designer Jude walks you through the technique that uses wire and a bead cone.
Insert a length of wire through the end of the macramé. Bend one end of wire at a 90-degree angle. Tightly wrap the opposite end of the wire around the ends of the cord close to the end of the macramé. Apply adhesive to the very tip of the end to secure. Once dry trim excess cord close to the glued area.
Place a cone and the beads of your choice onto the straight end of the wire and finish with a wrapped loop.
Shop for Your Materials Here:

Have a question regarding this project? Email Customer Service.
Copyright Permissions
All works of authorship (articles, videos, tutorials and other creative works) are from the Fire Mountain Gems and Beads® Collection, and permission to copy is granted for non-commercial educational purposes only. All other reproduction requires written permission. For more information, please email copyrightpermission@firemtn.com.