Making a Butterfly Polymer Clay Cane
The cane shown in these instructions is the Monarch butterfly. However, you can get very creative with colors and patterns, making fantasy butterflies of all colors and shapes. The instructions will show how to make one wing of the butterfly; cutting another wing off the cane and flipping it will create a mirror image for the second wing of the butterfly. Design by Donna Kato.
Instructions
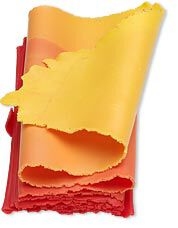
Using the Poly-Roller machine, condition three blocks of red and three blocks of yellow polymer clay. Make a Skinner Blend gradient.
Using the Poly-Roller, turn the gradient into a 4-inch wide strip of clay. Keep running the strip through the Poly-Roller until it is down to the #5 setting. When the clay is thin, the gradient colors will transition well in the cane.
Fold the gradient clay back and forth onto itself. It does not matter which color you begin with.
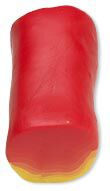
Using your hands, shape the block into a log shape.
Using the Poly-Roller, condition 3 blocks of black clay. Roll it down to the # 2 setting of the Poly-Roller. Using the clay blade, cut a piece of black clay that will cover the outside of the log.
Tip: Canes that are irregularly shaped, meaning they are not a circle, square or triangle, lose their shape when they are reduced in size. You want to make this cane close to the size that you will be using it, unless you don't mind that it will change shape as you reduce. This means that if you want to make earrings, make fairly small pieces in these next steps, but if you plan to use the cane in the Jungle Crown or in a home décor project, use larger pieces.
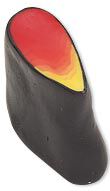
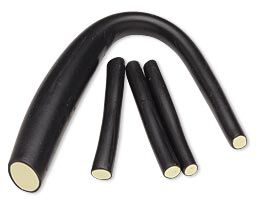
Using your hands, squeeze, roll and pull on the cane, this will elongate it and reduce the diameter. Reduce it to the size pieces you want to work with, shape it into a tear drop shape.
Using a ruler, measure the length of the cane, calculate how long each piece would be if you cut 12 pieces out of it.
Example: if the cane is 12 inches long, each piece would be 1-inch long. Using the clay blade, cut the cane into eight 1-inch pieces, and two 2-inch pieces.
Using your hands, press down on the 2-inch pieces, reducing them in length back down to 1-inch. They will now be larger than the other eight pieces.
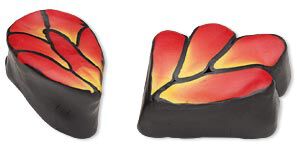
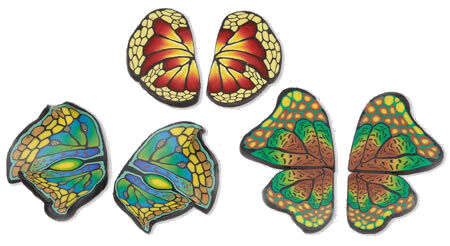
Arrange the pieces together in the two patterns shown. Press the clay together to make the pieces adhere to each other.
Using the Poly-Roller, condition 1 block of white clay, adding 1/4 of a block of yellow clay. Condition the two together until the clay sheet is the color of cream. This will be used for the spots on the wings.
Using your hands, shape the cream clay into a log, cover it with the black clay sheet. Squeeze, roll and pull on the cane, reducing it down to the size spots that will look good on your cane. Make larger and smaller spots.
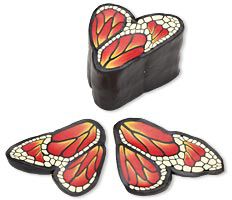
Begin adding the spots around the two pieces from Step 7, use photo as shown as a reference for placing the spots or create your own pattern.
Once the spots are everywhere that you want them, wrap each piece with black sheet clay. If the two pieces put together will make a cane larger than you want it, this is a good time to reduce each piece, hold its original shape as much as possible. Press the two pieces together to create a wing. Leave the cane the size it is, or, if you reduce it, try to keep its shape. Cut two pieces from your cane, you now have the two mirror sides of the butterfly wings.
Have a question regarding this tutorial? Email Customer Service.
Copyright Permissions
All works of authorship (articles, videos, tutorials and other creative works) are from the Fire Mountain Gems and Beads® Collection, and permission to copy is granted for non-commercial educational purposes only. All other reproduction requires written permission. For more information, please email copyrightpermission@firemtn.com.