Creating a Polymer Clay Steampunk Fish
Follow along with award-winning polymer clay artist Christi Friesen to make your own version of her clay steampunk fish project with Premo! Sculpey® in this step-by-step tutorial.
Instructions
Step 1
Gently cut little slivers of different colors of polymer clay with your clay cutter blade. Condition the clay well by hand kneading or running through a polymer clay roller until soft and pliable.
Step 2
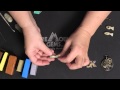
Separate the resulting fish friendly color into four tiny balls, about the size of a pea, and roll the remainder into an oval.
Divide a section of leather colored clay into three balls, about the size of a pea. Roll two balls into thin 1-inch snakes and set aside.
Use a paint brush handle, or similar, to gently roll the oval back and forth approximately a third of the way down the clay oval making an even indentation in the clay, separating the fish’s body from its tail.
Roll the clay between your index fingers to soften the indentation. Then flatten the end to create the tail. Slice off the excess clay from the tail; about half.
Step 3
Cut through the edge of the tail with the clay blade, approximately in the center. Insert the needle tool in between the newly cut tail and soften the cut by wiggling the blade to and fro, creating fins.
Pinch the end of each fin into a better fin shape. They should be about the thickness of a dime.
Tip: Pinch away any excess clay with fingers to shorten fins if one is too large.
Step 4
Poke the body of the fish with a dowel to create an eye socket. Flatten the ball of leather-colored clay and place it over the eye socket. Poke a hole through the leather-colored clay into the previous hole underneath, gently twisting the dowel so as to make the hole larger.
Step 5
String a gemstone bead onto the middle of an approximately 2-inch length of wire. Bring the ends of wire together then twist the ends together, securing the bead onto the wire. Trim the twisted wire to approximately 1/8 inch then form a hook on the end.
Insert the hook into the fish's eye hole. Press the pointed end first, ensuring the bead stays on your piece.
Step 6
Apply the end of one snake of clay onto the upper-back side of the goggle, tucking the other end towards the back side of the fish. Apply the second snake to the upper-front side of the goggle, near the nose, tucking the other end towards the back side of the fish. Trim any excess clay.
Step 7
With the needle tool, make a curved indentation along the fish's lower-front side of the body to create a smile.
With the needle tool, lightly press onto the back fin, pressing the needle tool from the body towards the end of the fins to create designs on your fins.
Tip: Lay the needle tool down flat to create a more professional look to your piece.
Step 8
Roll one fish-colored ball into a rice shape and lightly press the needle tool onto the pieces, creating designs on the fins.
Apply a larger piece of the rice shape by gently pressing it onto the fish's body, creating the lower fin.
Step 9
With your finger, gently apply a piece towards the tail of the fish. Repeat with the rest of the clay pieces, making sure each piece is applied closer to the fish's head.
Tip: Polymer clay attaches well to itself, making applying more clay easy.
Step 10
Using a pair of tweezers, pick up a steampunk gear component and dab a small amount of glue onto the back of the steampunk gear component. Quickly press the component into the desired place on your piece.
Tip: Poly Bonder is super glue and dries quickly.
Repeat to attach 2 - 3 steampunk components as desired.
Step 11
Apply a small amount of mica powder to the tips of the fish's fins.
Repeat with a different color around the steampunk gear components if desired.
Tip: Remove any excess powder by brushing it onto your palm or with a tissue or towel.
Step 12
Bake according to manufacturer's instructions.


Have a question regarding this project? Email Customer Service.
Copyright Permissions
All works of authorship (articles, videos, tutorials and other creative works) are from the Fire Mountain Gems and Beads® Collection, and permission to copy is granted for non-commercial educational purposes only. All other reproduction requires written permission. For more information, please email copyrightpermission@firemtn.com.