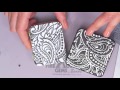
The Sutton Slice for Polymer Clay
Lisa Pavelka, renowned mixed media artist, is here with a sutton slice tutorial, one of her favorite polymer clay techniques. Follow along to make your own sutton slice design with Fimo® Professional clay and texture stamps.
Instructions
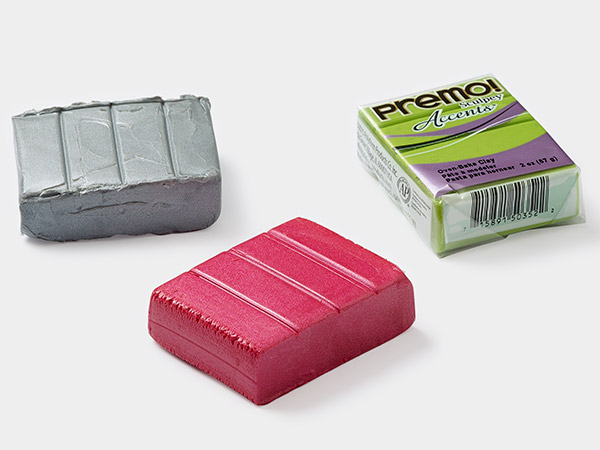
Condition the desired colors of Fimo® Professional polymer clay by hand kneading or running through a poly roller until soft and pliable.
Press a pea size ball of clay into an area on a clean and dry stamp. Use a flexible clay blade to carefully shave the excess clay from the stamp by pressing the flat of one end of the clay blade onto the stamp with the non-dominant hand and pivoting the other end of the blade across the face of the stamp with the dominant hand so that the only clay remaining is in the crevices. Repeat to press small amounts of clay into the cavities and slice excess until you have filled the area of the stamp that you like.
Tips:
- Using large pieces of clay may cause the need to spend time patching areas
- If using multiple colors of clay, begin with the lightest color
Continue to firmly shave any excess clay that may be resting on the surface of the stamp to prevent distortion later. Using a ball of clay, pick up any small bits of clay that may have come loose during the shaving process. It's imperative that the embedded area is very clean before moving to the next step.
Note: Aggressively shave the surface to ensure there is no clay on the surface of the rubber. This will not damage the stamp.
Tips:
- If clay begins to pick up out of the stamp regularly check to see if the blade needs to be cleaned
- Another option is to slice from a different direction if struggling to fill a hole
Use a poly-roller machine on its thickest setting to form a sheet of different colored clay that is large enough to comfortably fit over the portion of the stamp that is already covered.
Firmly apply the sheet of clay over the portion of the stamp with the filled crevices then firmly tamp the sheet down into the layer of embedded clay to bond the two together.
Tip: A sheet of Teflon® non-stick paper can be placed between the sheet of clay and your fingers while tamping to keep the clay from sticking to you, just remember to remove the Teflon before continuing if you choose to do this.
Flip the stamp over so the clay is face down on the surface of the workstation. Firmly press the clay, through the stamp, onto the workstation so the clay will cleanly remove itself from the stamp while peeling. Aggressively fold the stamp onto itself then press the top edge of the clay sheet onto the work surface again to make sure it will stick in place.
Continue to slowly roll the stamp back to peel the clay from the stamp. If any clay remains on the stamp, roll it back into place and firmly apply more pressure to the area of the stamp that the clay is sticking to then continue to carefully peel the stamp back from the clay.
Tips:
- If you miss areas of clay that remain on the stamp, simply embellish with crystals or spacers to cover the flaw
- Plexiglas and ceramic tile are great to use as a workstation for this project, they will allow the clay to slightly adhere to their surface which makes the process of removing the clay from the stamp much easier
When all of the clay has been removed from the stamp, place a sheet of Teflon paper over the clay and lightly tamp down the two layers to ensure they are making contact with each other. Remove the stamped clay sheet from the work surface by carefully sliding the clay cutter blade underneath the sheet.
Note: A shimmying motion with the clay cutter works best to detach the sheet from the work surface without deforming the clay sheet.
Applying the Slice
Use a clay cutter to trim the edges of the completed Sutton Slice so that only the colored-pattern portion remains.
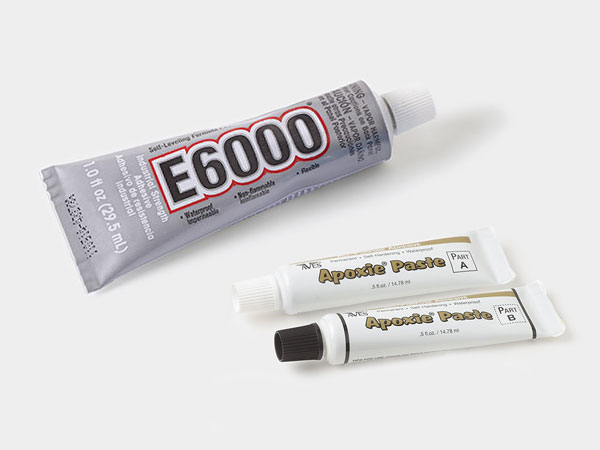
Apply Lisa Pavelka Signature Series Poly Bonder™ adhesive to the surface of a tin container. Place the clay over the adhesive with the design facing up and allow several seconds for the adhesive to bond to the clay.
Flip the container over onto a sheet of Teflon paper with the bonded clay facing down. Use a hobby knife to trim the excess clay from the rim of the container.
If you would like to complete the project without adding a decorative border, place the tin into the pre-heated clay craft oven and bake according to manufacturer's instructions.
If you would like to add a decorative border, bake in a pre-heated clay craft oven for only five to ten minutes at the manufacturer's recommended temperature for the brand of clay used. Remove the tin from the oven and allow to cool.
Use the clay cutter to cut several strips from the excess clay that was trimmed from the stamped sheet.
Apply Poly Bonder adhesive to the rim of the tin container then place the clay strips on the rim. When the rim is completely covered in clay, use a clay cutter to trim the excess to make a seamless border.
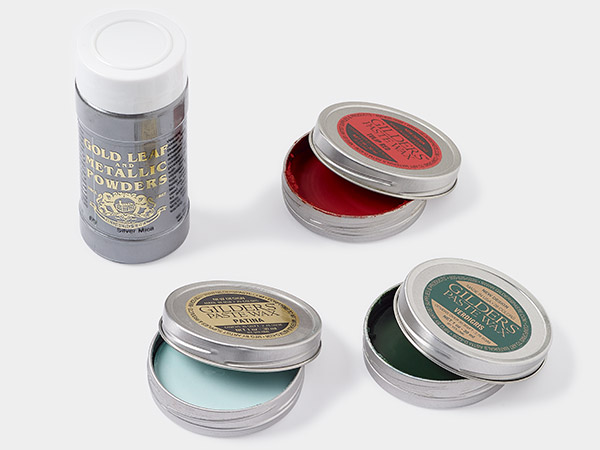
Coat the trimmed border with a thin layer of automotive protectant spray. To add a different look, use a stippling tool to texture the rim of the container then use the clay cutter to trim the border of the rim again.
Place the tin into the pre-heated clay craft oven and bake according to manufacturer's instructions.
Note: The first baking was just a heat set, so the baking time will be as if it had not been baked before.
Shop for Your Materials Here:
Copyright Permissions
All works of authorship (articles, videos, tutorials and other creative works) are from the Fire Mountain Gems and Beads® Collection, and permission to copy is granted for non-commercial educational purposes only. All other reproduction requires written permission. For more information, please email copyrightpermission@firemtn.com.