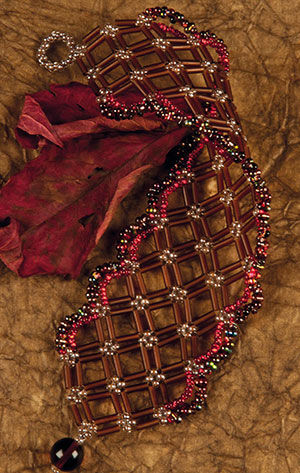
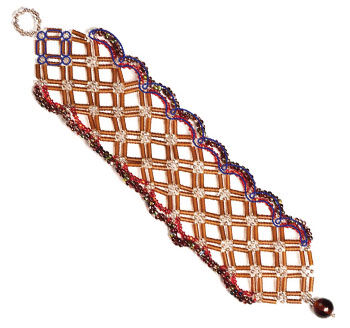
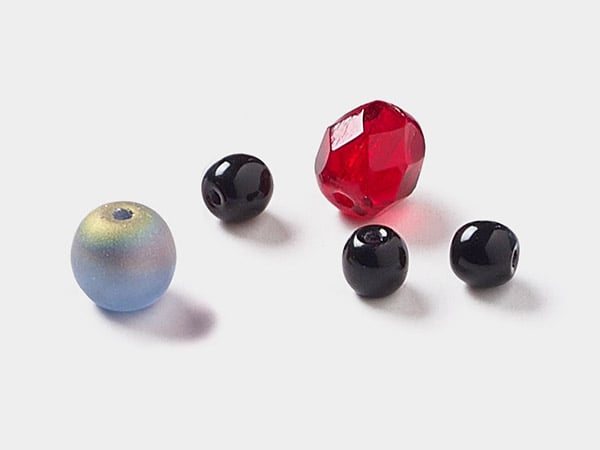
Bracelet with Seed Beads and Czech Pressed Glass Beads
Courtesy of Preciosa
Autumn Seed Bead Bracelet: Colorful October
Preciosa Ornela presents a set of three original, seed bead bracelets in fashion colors for the 2012 - 13 autumn/winter season within the framework of a series of tutorials designed for people who are interested in creative work with seed beads from the Preciosa Traditional Czech Beads brand. The flat bracelets are sewn from various types of seed beads in color combinations corresponding to the moods of the individual autumn months. The short description of the procedure together with the line describing the direction and priority of the stringing will assist you in creating these three completely different seed bead ornaments.
The wide range of color finishes will enable you to apply your imagination and to create your own color combinations. We wish you many creative ideas when working with seed beads from the Preciosa Traditional Czech Beads brand. Preciosa Ornela presents the second bracelet of them here.
You can use the indicated color combination according to the detailed drawing or you can choose the colors according to your own design. The bracelet which we have described corresponds to the standard bracelet length of 17 cm without the fastening. You can lengthen or shorten the bracelet as required.
Instructions
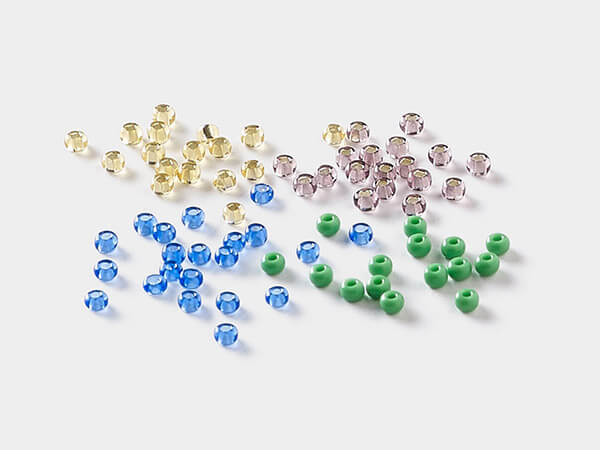
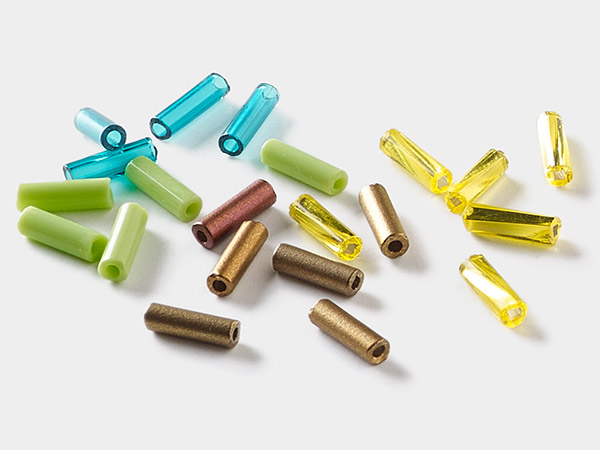
String twenty-one #11 beads. Pass through them again to form a circle and tie a tight surgeon’s knot. Pass through one more bead in the circle and add three #11 beads and form a very small circle of four with the bead you just passed through. Pass through 2 of the beads in the tiny circle so that your working thread is coming out of the bead furthest away from the large circle. Add a bugle bead and four #11 beads. Form a tiny circle with the 4 beads. Pass through one more bead in the tiny circle. Repeat Steps E – G twice more. To finish the inner square, add one more bugle bead and pass through the #11 bead you started from in Step D. For the outer square, add one bugle bead and pass through the same #11 bead that you passed through on the inner square. Repeat 3 more times. This completes one double square.
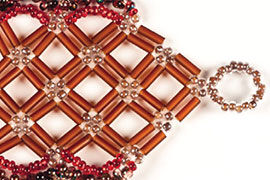
To start your next square, pass through the inner bugle bead again and two #11 seed beads. As you can see, you already have one side of the inner square completed. Continue making double squares per the method above and following the pattern according to the pictures provided.
- For the outer curves, prepare by coming out the outermost #11 seed bead. Add ten #11 seed beads and pass through the corresponding seed bead on the other side of the gap. Repeat until you reach the end of the design.
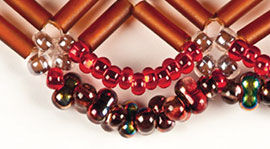
- Once you have bridged the outside of the last gap, pass through three of the #11s in the square of seed beads and coming out of the seed bead just below the outer curve, add eight #11s and go back through the corresponding seed bead on the other side of the gap. Repeat until you have created inside curves to the end of the design.
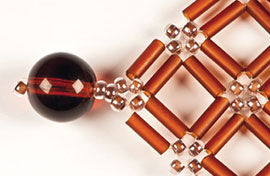
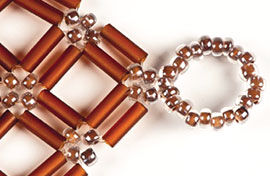
- To finish - with your working end coming out the last #11 bead at opposite side of your design from the initial circle, add two #11 seed beads, an 8mm bead and another #11 seed bead.
- Skipping the last #11 pass back through the 8mm bead, the 2 seed beads and the 4 seed bead circle. Trace this path 2-5 times to create a strong, secure connection.
Finish ends and trim.
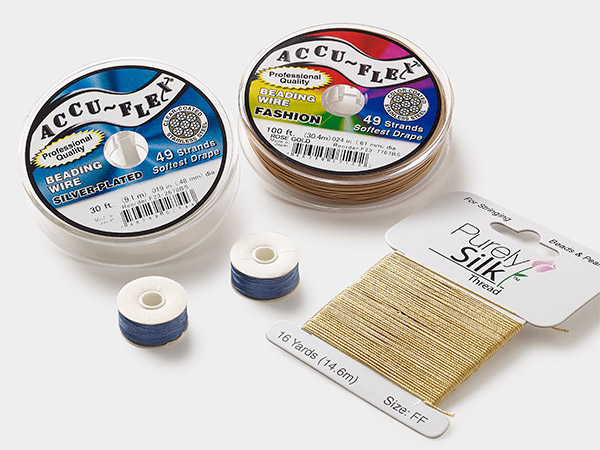
Shop for Your Materials Here:
Have a question regarding this project? Email Customer Service.
Copyright Permissions
All works of authorship (articles, videos, tutorials and other creative works) are from the Fire Mountain Gems and Beads® Collection, and permission to copy is granted for non-commercial educational purposes only. All other reproduction requires written permission. For more information, please email copyrightpermission@firemtn.com.