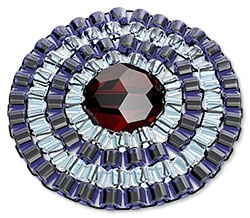
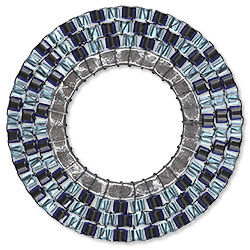
How to Create the Circular Brick Stitch
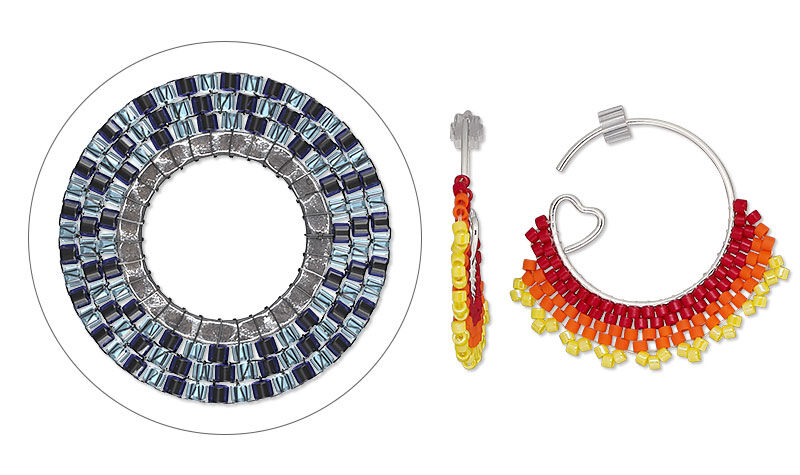
Join jewelry designer Rose to learn how to make the circular brick stitch. This technique creates wonderfully intricate designs to be used on their own or around frames, focal beads and more.


Join jewelry designer Rose to learn how to make the circular brick stitch. This technique creates wonderfully intricate designs to be used on their own or around frames, focal beads and more.
Instructions
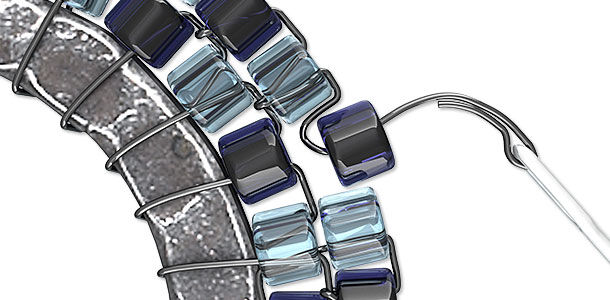
Stitching Around a Bead
Cut a 3-foot length of stringing material.
Thread a beading needle, leaving a tail.

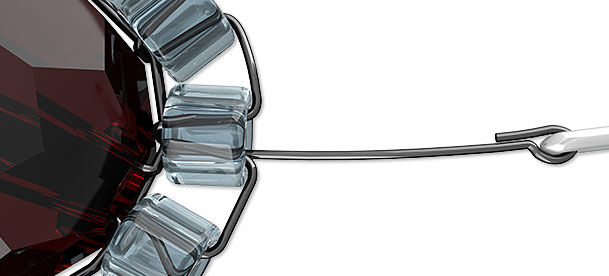
Leaving a 4-inch tail, pass through a round bead twice, looping the thread around the outside of the bead. Pull the thread taut to secure the bead on the thread.

Pass through the round bead again, looping the thread a second time on the same side of the bead.
Pass through the round bead two more times, looping the thread on the opposite side of the bead.

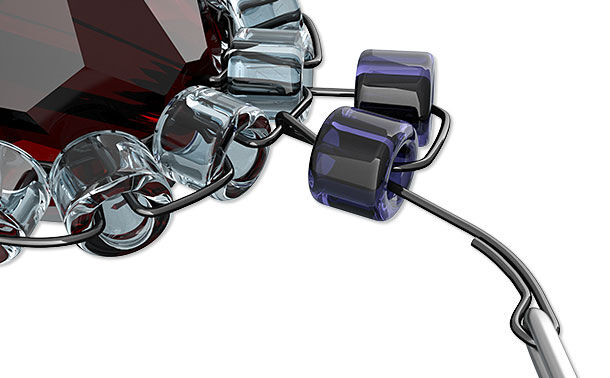
Pick up two seed beads. Pass under the two looped threads on the center bead, then pass through the second seed bead added.

Pick up one seed bead. Pass under the two looped threads on the center bead, then pass back through the seed bead just added.
Repeat to add beads once around the center bead.
Pass through the first seed bead added in Step 4, toward the center bead, then pass through the last seed bead added, away from the center bead. Pull taut to secure row one.
Pick up two seed beads. Pass under the thread between the first and last beads of the first circle, then pass through the second seed bead added.

Pick up one seed bead. Pass under the thread between the next two beads of row 1, then pass back through the seed bead just added. Repeat to complete row 2.

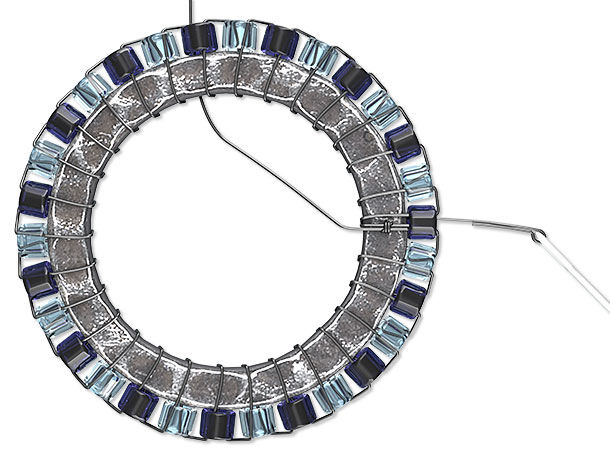
Repeat Steps 6 - 8 to add the desired number of rows.
Note: If a gap appears, an additional bead will be required due to the circle size increase. To add an additional bead, pick up a seed bead then pass under the thread passed under for the previously added seed bead. Pass back through the seed bead just added.
Weave the thread through adjacent seed beads several times, then pull the thread tight to secure. Trim excess thread.
Thread a beading needle onto the tail created in Step 2. Weave the tail through adjacent seed beads then pull the thread tight to secure.
Stitching Around an Open Component
Cut a 5-foot length of stringing material.
Thread a beading needle, leaving a tail.
Pass the thread through an open component. Tie a knot around the component, leaving a 4-inch tail then thread a beading needle on the long end of the thread.
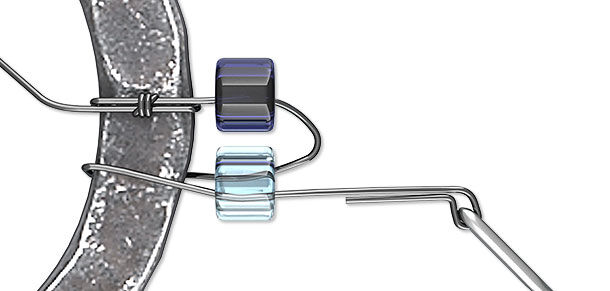
Pick up two seed beads. Pass through the open component then through the second seed bead added.
Pick up one seed bead. Pass through the open component then through the seed bead just added.
Repeat to add beads once around the component.
Pass through the first seed bead added in Step 4, toward the open component, then pass through the last seed bead added, away from the open component. Pull taut to secure row 1
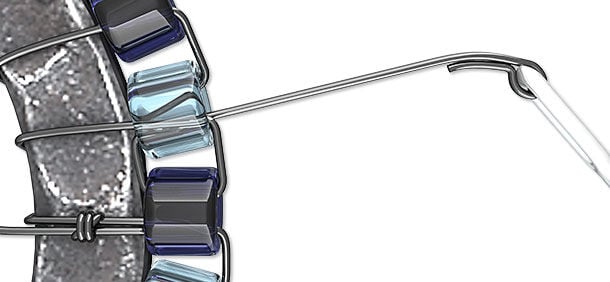
Pick up two seed beads. Pass under the thread between the first and last beads of the first circle, then pass through the second seed bead just added.

Pick up one seed bead. Pass under the thread between the next two beads of row 1, then pass back through the seed bead just added . Repeat to complete row 2.
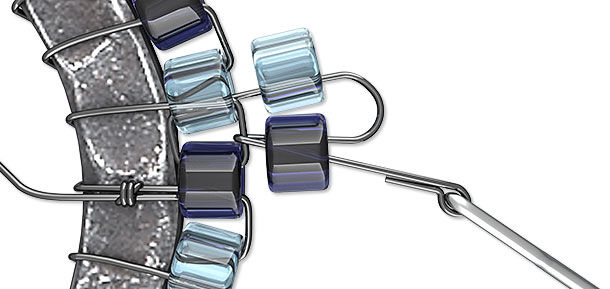
Note: If a gap appears, an additional bead will be required due to the circle size increase. To add an additional bead, pick up a seed bead then pass under the thread passed under for the previously added seed bead. Pass back through the seed bead just added.
Repeat Steps 5 - 7 to add the desired number of rows.
Weave the thread through adjacent seed beads several times, then pull the thread tight to secure. Trim excess thread.
Thread a beading needle onto the tail created in Step 2. Weave the tail through adjacent seed beads then pull the thread tight to secure.
Shop for Your Materials Here:


Have a question regarding this project? Email Customer Service.
Copyright Permissions
All works of authorship (articles, videos, tutorials and other creative works) are from the Fire Mountain Gems and Beads® Collection, and permission to copy is granted for non-commercial educational purposes only. All other reproduction requires written permission. For more information, please email copyrightpermission@firemtn.com.