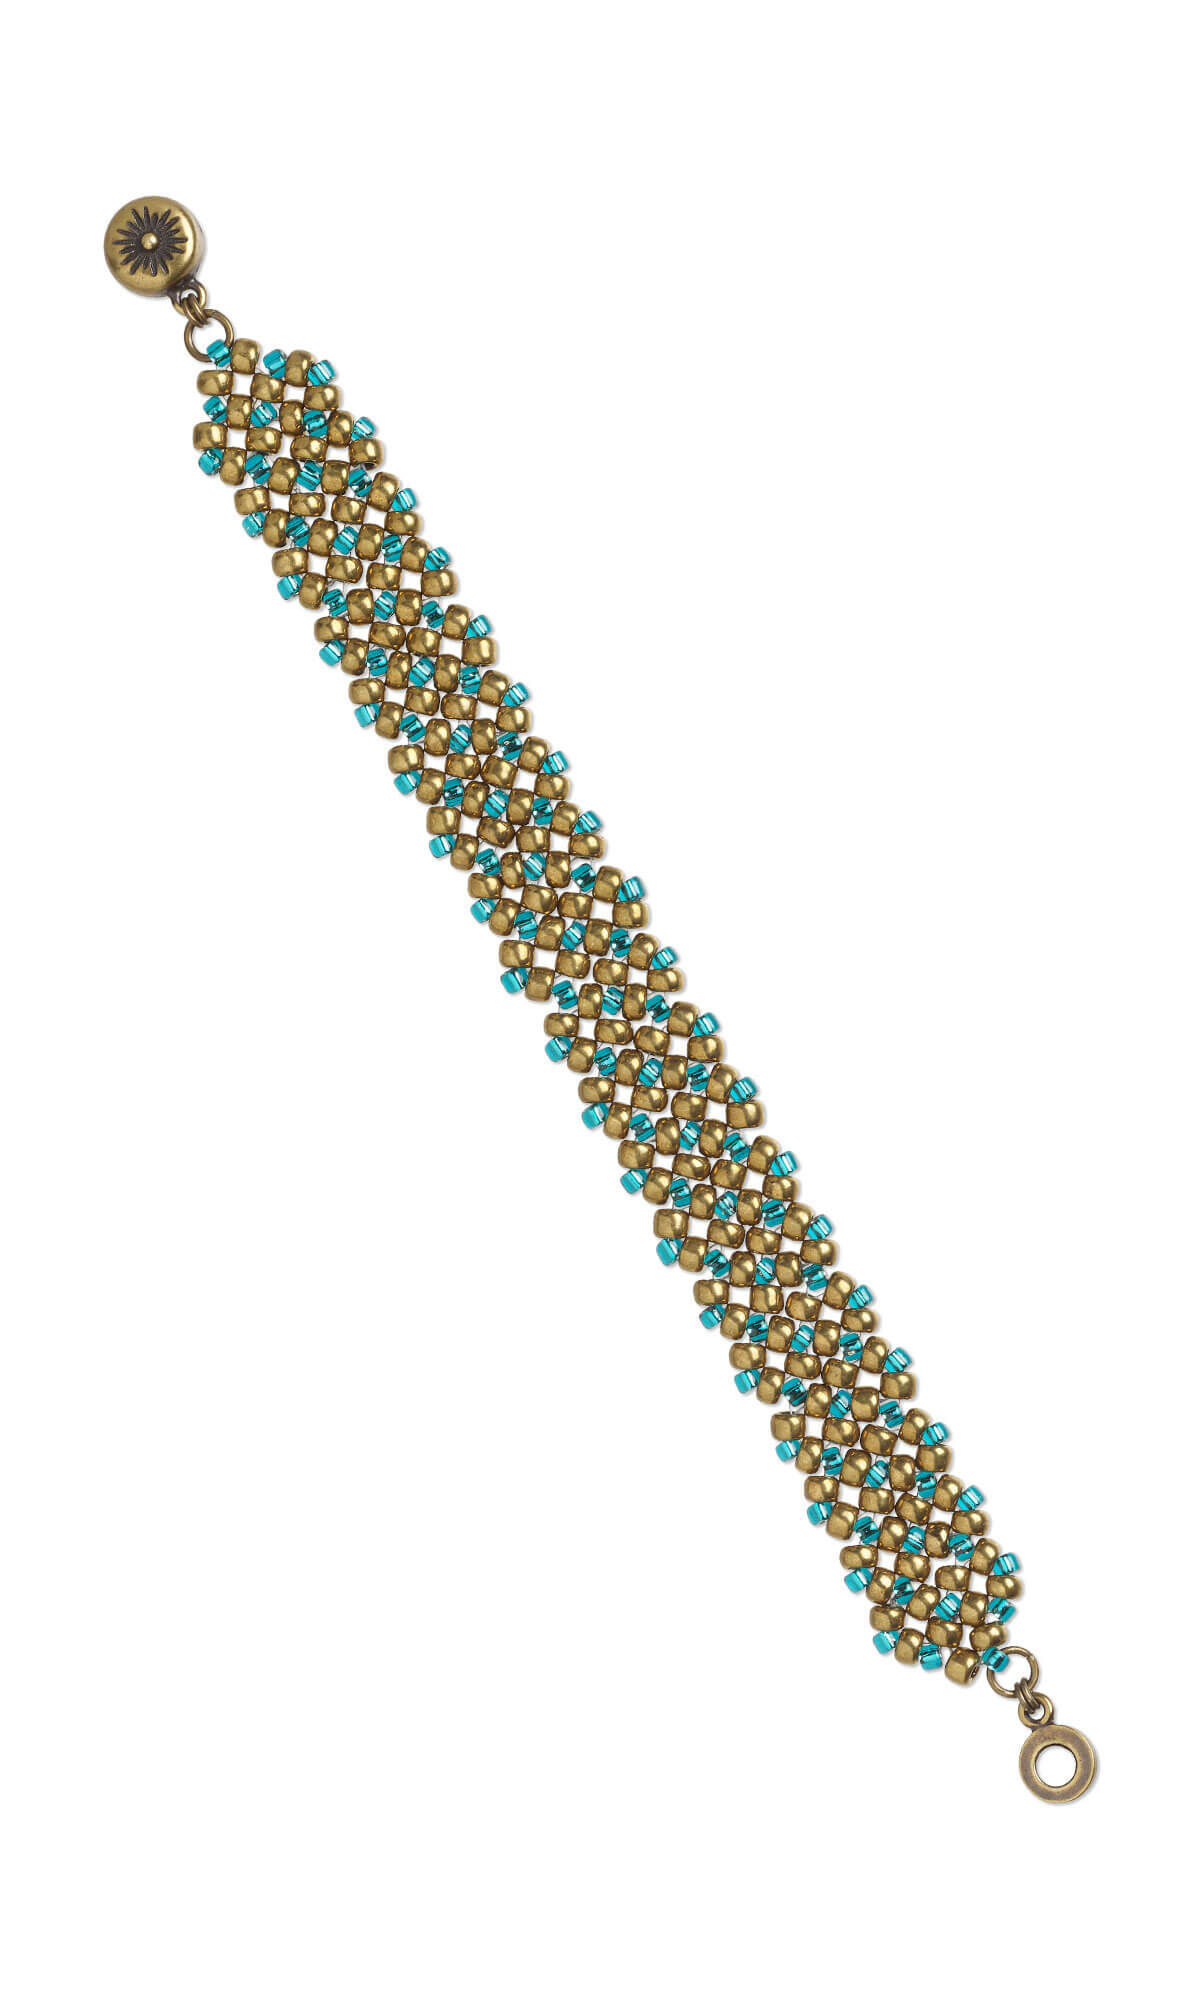
Bracelet with Dyna-Mites™ and Miyuki Seed Beads


Design Idea ND34
-- Designer --
Rose, Jewelry Designer, Exclusively for Fire Mountain Gems and Beads®
To learn more about Rose Wingenbach, read her jewelry artist success story here.
: : : Materials : : :
Click here to view a full list of materials used in this design.
Please take the creative opportunity to select the products of your choice for this design, offered here at Fire Mountain Gems and Beads. Some materials may not be available or listed.
- Jump ring, antique gold-plated brass, 4mm round, 2.4mm inside diameter, 20 gauge
- Jump ring, antique gold-plated brass, 6mm round, 4.2mm inside diameter, 18 gauge
- Seed bead, Dyna-Mites™, glass, silver-lined translucent teal blue, #8 round
- Thread burner, The Bead Buddy® Perfect Thread Sealer II™, acrylic / aluminum / steel, silver and black, 5-1/2 inches
- Needle, Tulip, nickel- and gold-plated steel, #11 with 0.52mm eye width, 2 inches
- Thread, Beadalon® WildFire™, polyester and plastic, grey, 0.15mm with bonded coating, 10-pound test
- Seed bead, Miyuki, glass, opaque metallic dark bronze, (RR457), #6 rocaille
- Clasp, magnetic, TierraCast®, "Celestial" collection, antique brass-plated pewter (tin-based alloy), 11mm two-sided round with starburst design
Instructions
Add a beading needle to an arm-length of Wildfire thread. Leaving a 6-inch tail, add a stop bead to the thread.
Pick up four #6 seed beads. Pass through all the beads again. Pass through the next bead again and pull tight to make a square.
Pick up one #8 seed bead. Pass through the next #6, pulling tight to sit the #8 in the corner of the square. Repeat to add a #8 to each corner.
Pass through the first #6.
Pick up four #6. Pass through the #8 exited again. Pass through the first #6 pick-up again and pull tight to make a square.
Pick up one #8 and pass through the next #6. Repeat two more times to add to the corners.
Pass through beads to go around the square, exiting the last #8 added.
Pick up four #6. Pass through the #8 exited again. Pass through the first #6 pick-up again and pull tight to make a square.
Pick up one #8 and pass through the next #6. Repeat two more times to add to the corners.
Pass through beads to go around the square, exiting the first #8 added.
Pick up four #6. Pass through the #8 exited again. Pass through the first #6 pick-up again and pull tight to make a square.
Pick up one #8 and pass through the next #6. Repeat once.
Pass through the adjacent #8 from the previous row.
Pass through beads to go around the square, exiting the first #8 added.
Repeat Steps 4 and 5 to create a length of pondo stitch, two units wide, the desired length.
After finishing the last unit of pondo stitch, pass through various beads to exit one of the center #6 seed beads in the middle of the end of the bracelet.
Pick up a #8 and pass through the other middle #6 seed bead at the end of the bracelet. Pass through adjacent beads to exit through the previously exited #6. Pass through all the beads again to secure the end #8 bead.
Pass through various beads of the stitch to secure the thread. For additional security tie a small knot. Trim the thread.
Remove the stop bead and add a beading needle to the thread tail. Repeat Step 8 to add an end #8 bead to the opposite end of the bracelet.
Attach a 6mm round jump ring to each end #8 bead.
Use a 4mm round jump ring to attach half of a clasp to the 6mm jump ring at the end of the bracelet. Add a second 4mm jump ring parallel to the first to create a double-ring connection. Repeat to add a clasp to the opposite end of the bracelet.
Have a question regarding this project? Email Customer Service.
Copyright Permissions
The pieces featured in the Gallery of Designs are copyrighted designs and are provided for inspiration only. We encourage you to substitute different colors, products and techniques to make the design your own.
All works of authorship (articles, videos, tutorials and other creative works) are from the Fire Mountain Gems and Beads® Collection, and permission to copy is granted for non-commercial educational purposes only. All other reproduction requires written permission. For more information, please email copyrightpermission@firemtn.com.

