Single-Strand Necklace and Earrings Set with Handmade Glass Jellyfish and Zebra Wire

Design Idea PE2C
-- Designer --
Patti, Jewelry Designer, Exclusively for Fire Mountain Gems and Beads®
To learn more about Patti Miller, read her jewelry artist success story here.
: : : Materials : : :
Click here to view a full list of materials used in this design.
Please take the creative opportunity to select the products of your choice for this design, offered here at Fire Mountain Gems and Beads. Some materials may not be available or listed.
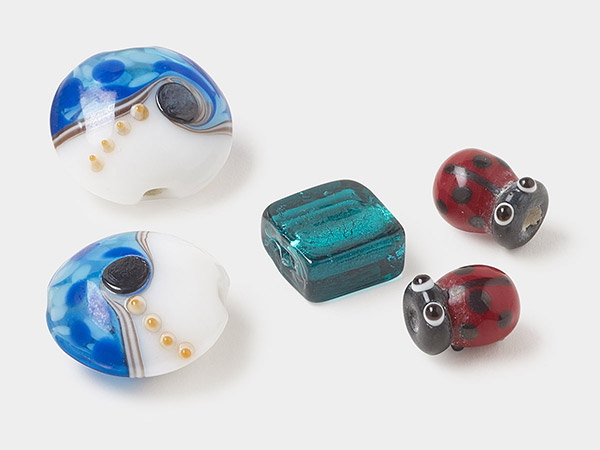
- Bead, Czech pressed glass, clear AB, 8.5x6.5mm flower
- Bead, sea "opal" (glass), translucent to semitranslucent, 6mm round
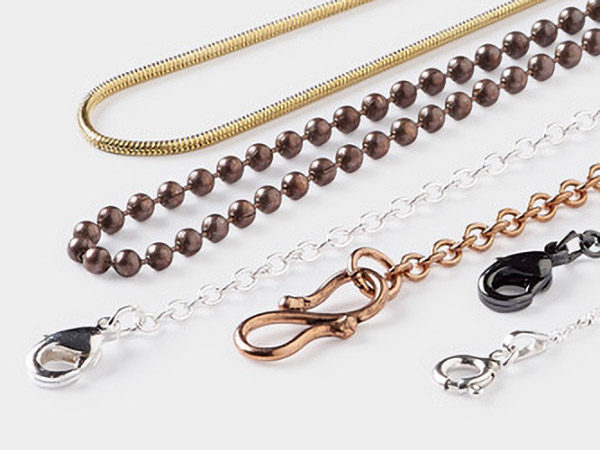
- Chain, silver-plated brass, 3.5mm long and short oval
- Clasp, lobster claw, silver-plated brass, 12x7mm with swivel
- Component, glass, teal, 24x16mm and 16x16mm jellyfish, handmade
- Focal, glass, teal, 34x19mm and 23x21mm jellyfish, handmade
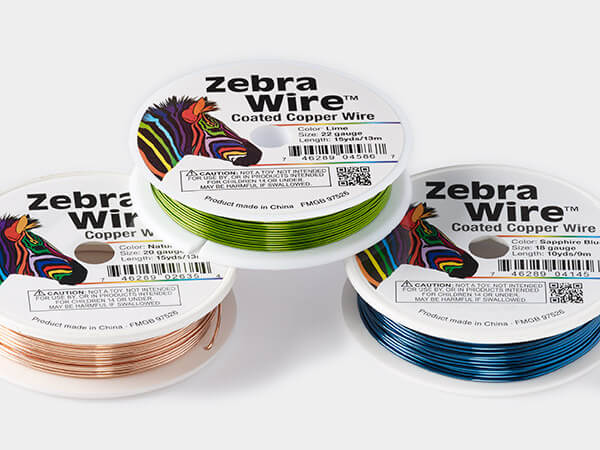
- Wire, Zebra Wire™, color-coated copper, aqua blue, round, 18 gauge
- Wire, Zebra Wire™, color-coated copper, turquoise blue, round, 18 gauge
- Wire, Zebra Wire™, color-coated copper, turquoise blue, round, 20 gauge
- Sanding pad, micro-mesh, 2-inch square, 1500-12000 grit
- Chasing hammer, steel and rubberwood, natural, 28mm convex head and 14mm ball head, 10 inches
Instructions
Necklace Instructions
Cut the following:
- One 5-inch section of turquoise blue 20-gauge Zebra Wire™
- Three 4-inch sections of turquoise blue 18-gauge Zebra Wire
- Three 4-inch sections of aqua blue 18-gauge Zebra wire
- One 30-inch section of silver-plated 3.5mm long-and-short chain
Make a small simple loop in the ends of all six 4-inch sections of wire. For instructions on creating a simple loop, view the "Making a Simple Loop" how-to video and illustrated instructions.
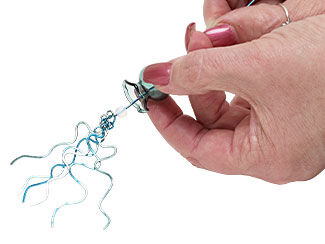
In the end of the 5-inch section of 20-gauge wire, make a simple loop just large enough to loosely hold all the simple loops from the 4-inch sections of wire. Do not attach the 4-inch sections of wire yet.
Make gentle, organic curves in all six 4-inch 18-gauge lengths of wire to resemble jellyfish arms. Make each a little differently.
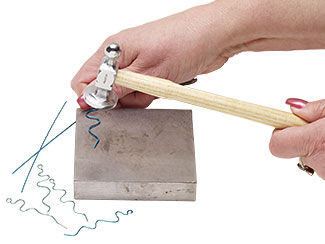
Hammer the 4-inch curved wires gently to lightly flatten. Do not flatten the simple loops. The ends of each wire should be rounded. If any rough ends exist, sand them lightly.
Add the simple loops on all of six hammered 4-inch wires to the simple loop at the end of the 5-inch 20-gauge wire. You may need to rearrange the 4-inch wires several times to get a pleasing combination. Once you are satisfied with your arrangement, close the simple loop on the 5-inch 20-gauge wire.
In this order, thread the following onto the 5-inch 20-gauge wire:
- A 6mm glass sea “opal” round bead
- The narrower glass jellyfish component from the 34x19mm set
- A glass crystal AB 8.5x6.5mm flower bead
- The wider glass jellyfish component from the 34x19mm set
- A glass crystal AB 8.5x6.5mm flower bead
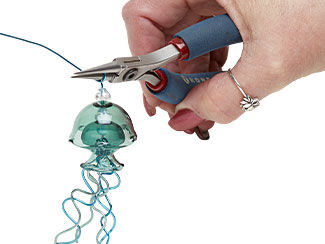
Make a large wrapped loop tightly above the top flower bead with the largest part of the barrel of round nose pliers. For instructions on creating a wrapped loop, view the "Making a Wrapped Loop and Double-Wrapped Loop" how-to video and illustrated instructions.
Add a 5.5mm silver-plated open jump ring to one end of the 30-inch length of chain. Thread the chain through the loop on the top of the jellyfish. Add a 12x7mm silver-plated lobster claw clasp to the opposite end of the chain using a 4mm silver-plated jump ring. For instructions on opening and closing jump rings, view the "Opening Jump Rings and Split Rings" how-to video and illustrated instructions.
Earring Instructions
Cut the following:
- One 5-inch section of turquoise blue 20-gauge Zebra Wire
- Three 3-inch sections of turquoise blue 18-gauge Zebra Wire
- Three 3-inch sections of aqua blue 18-gauge Zebra wire
- One 2.25-inch section of turquoise blue 20-gauge Zebra Wire
Make a small simple loop in the ends of all six 3-inch sections of wire.
In the end of the 5-inch section of 20-gauge wire, make a simple loop just large enough to loosely hold all the simple loops from the 3-inch sections of wire. Do not attach the 3-inch sections of wire yet.
Make gentle, organic curves in all six 3-inch lengths of wire to resemble jellyfish arms. Make each a little differently.
Hammer the 3-inch curved wires gently to lightly flatten. Do not flatten the simple loops. The ends of each wire should be rounded. If any rough ends exist, sand them lightly.
Add the simple loops on all of six hammered 3-inch wires to the simple loop at the end of the 5-inch 20-gauge wire. Try different orders and sides until you have a pleasing combination, then close the simple loop on the 5-inch 20-gauge wire.
In this order, thread the following onto the 5-inch 20-gauge wire:
- A 6mm glass sea “opal” round bead
- The narrower glass jellyfish component of the 24x16mm set
- A glass crystal AB 8.5x6.5mm flower bead
- The wider glass jellyfish component of the 24x16mm set
- A glass crystal AB 8.5x6.5mm flower bead
Make a large wrapped loop tightly above the top flower bead with the largest part of the barrel of round nose pliers. Thread the loop onto an ear wire.
Repeat Steps 1-8 for the second earring.
Shop for Your Materials Here:
Have a question regarding this design idea? Email Customer Service.
Copyright Permissions
The pieces featured in the Gallery of Designs are copyrighted designs and are provided for inspiration only. We encourage you to substitute different colors, products and techniques to make the design your own.
All works of authorship (articles, videos, tutorials and other creative works) are from the Fire Mountain Gems and Beads® Collection, and permission to copy is granted for non-commercial educational purposes only. All other reproduction requires written permission. For more information, please email copyrightpermission@firemtn.com.