How to Form a Wire Spiral
by Tammy Honaman, Author, Jewelry-Making Expert and Educator, Exclusively for Fire Mountain Gems and Beads®
Instructions
Cut a length of round wire per the instructions of your project.
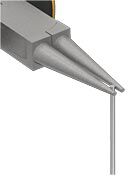
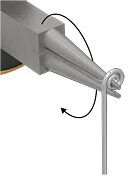
Using round-nose pliers, position the end of the wire in between the barrels of the pliers near the tips. Press the thumb of your non-dominant hand against the wire, immediately below the barrel of the pliers and rotate the pliers away from you, forming an eye in the wire.
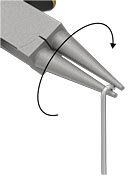

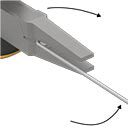
Reposition the pliers, regripping the eye, then rotate your wrist again, wrapping the wire and starting the second layer of the spiral.
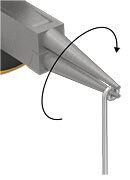
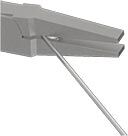
Place the growing spiral, flat, in the back of the flat-nose pliers close to the joint, so the straight length of wire is closest to you.
While pressing the thumb of your non-dominant hand on the straight length of wire (closest to the layered section in the jaws of the pliers), rotate the wrist holding the pliers inward. This will bend the straight wire around the curve of the growing spiral.
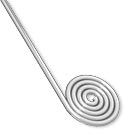
Repeat Step 4, repositioning the wire and bending the straight wire around the growing spiral. Work until you have a spiral the size your design calls for.
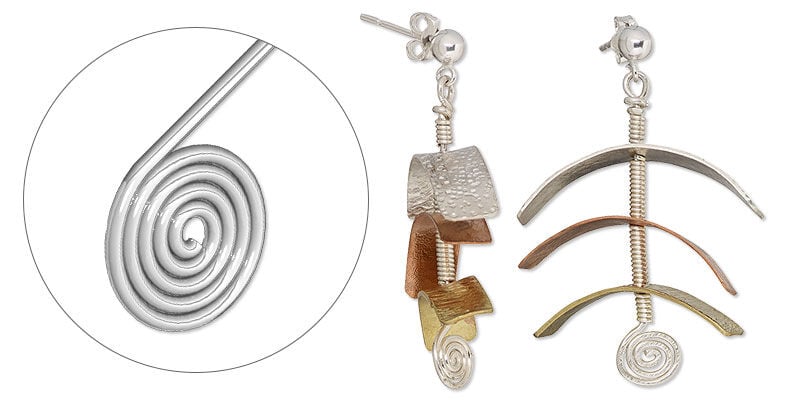
Beader's Tip: The end result of your spiral will depend on the gauge and length of the wire you use, e.g. 3-1/2 inch length of 14-gauge wire equals a 5/8 inch wide spiral.
Shop for Your Materials Here:


Have a question regarding this project? Email Customer Service.
Copyright Permissions
All works of authorship (articles, videos, tutorials and other creative works) are from the Fire Mountain Gems and Beads® Collection, and permission to copy is granted for non-commercial educational purposes only. All other reproduction requires written permission. For more information, please email copyrightpermission@firemtn.com.