Single-Strand Necklace and Earring Set with Resin Cabochons and Wirework


Design Idea G90S
Wrapped Resin
-- Designer --
Amy Hardy, Exclusively for Fire Mountain Gems and Beads®
: : : Materials : : :
Click here to view a full list of materials used in this design.
Please take the creative opportunity to select the products of your choice for this design, offered here at Fire Mountain Gems and Beads. Some materials may not be available or listed.
- Cabochon, resin, opalescent yellow, 14x10mm non-calibrated faceted oval
- Cabochon, resin, opalescent yellow, 40x30mm non-calibrated faceted oval
- Chain, stainless steel, 2mm cable, 20 inches with lobster claw clasp
- Ear wire, stainless steel, 14mm leverback with open loop
- Jump ring, stainless steel, 5mm round, 3.6mm inside diameter, 22 gauge
- Jump ring, stainless steel, 8mm round, 6.2mm inside diameter, 18 gauge
- Wire, stainless steel, soft, half-round, 20 gauge
- Wire, stainless steel, soft, square, 22 gauge
Instructions
Necklace Instructions
Straighten and cut four 6-1/2 inch lengths (for earrings) and two 12-3/4 inch lengths (for pendant) of square wire and two 2-inch lengths, two 1-inch lengths, one 4-inch length and one 1-3/4 inch length of half-round wire.

Tape two pieces of square wire together approximately 1/2 inch from the center, on either side. Bind the center with the half-round wire. (Use five bindings for earrings and 15 for the pendant.) Remove the tape.
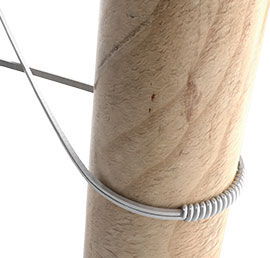
Shape the wire into a U-shape using mandrel pliers for the earrings; use a wooden dowel to shape the pendant.
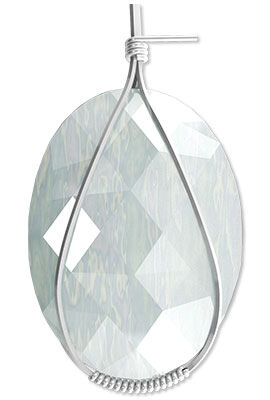
Place the cabochon in the U-shaped wire setting and bring the ends up to the center of the the top of the cabochon. Use the shorter length of half-round wire to bind the ends just above the cabochon. (Use three bindings for earrings and four bindings for the pendant.)
Use a pin vise (or flat-nose pliers) to twist the two wires from the front to give them a more sparkly look. (Optional.)
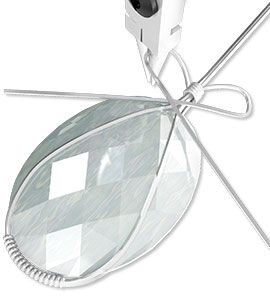
Bend the twisted wires so they are flat and horizontal to the piece. Tip: Mark your round-nose pliers where you will make the bend, near the base, to ensure even loops on both sides of the bow. Bend the wires one at a time up and around the pliers so that the ends come down and cross just above the bound top of the pendant.
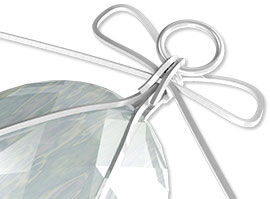
Trim the back two wires to about 1/4 inch then use flat-nose pliers to bend the very tip of the two wires down to a 90 degree angle. Use the round-nose pliers to bend the wire about 2-3mm from that point. Slide the jumpring onto the wires and then fold them the rest of the way over the crossed front wires. (This will make the "knot" of your bow.)
If you are adding crystals to the bottom of the ribbons, create a loop on the bottom of each wire before twisting it.

To twist; hold one end of the wire with the round-nose pliers and wrap the wire around the nose of the pliers in a spiral (like a curled ribbon). Repeat on the opposite side of the bow. Tip: If your wire is long, you may need to release part of the wire and move the pliers up to continue curling the wire.
To add the crystals, string one crystal on a headpin then make a loop just above the crystal. Slide the headpin through the loop at the bottom of the curled wire. (I like to close mine by wrapping the extra headpin wire below the loop so the crystal cannot fall off.) Repeat to create a second drop.
For the earrings, you will need to open the leverback ear wire and slide the jump ring onto the earring. Make sure the earring is hanging the way you want it to and close the ear wire. (Optional.)
Shop for Your Materials Here:


Have a question regarding this project? Email Customer Service.
Copyright Permissions
All works of authorship (articles, videos, tutorials and other creative works) are from the Fire Mountain Gems and Beads® Collection, and permission to copy is granted for non-commercial educational purposes only. All other reproduction requires written permission. For more information, please email copyrightpermission@firemtn.com.