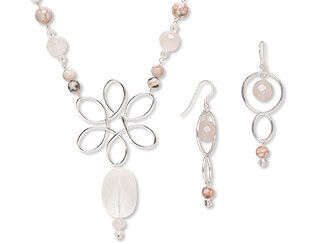
Single-Strand Necklace and Earring Set with Gemstone Beads and Wirework
Floral Gift
-- Designer --
Patti, Jewelry Designer, Exclusively for Fire Mountain Gems and Beads®
To learn more about Patti Miller, read her jewelry artist success story here
- Bead, quartz crystal, 4mm faceted round (15 beads)
- Bead, quartz crystal, 8mm faceted round (6 beads)
- Bead, quartz crystal, 25x18mm faceted oval (1 bead)
- Bead, desert pink marble, 5-6mm round (8 beads)
- Bead, desert pink marble, 7-8mm round (12 beads)
- Bead, rose quartz, 6mm rose-cut round (13 beads)
- Bead, rose quartz, 10mm tumbled faceted round (8 beads)
- Jump ring, sterling silver-filled, 4mm round, 20 gauge (3 jump rings)
- Eye pin, sterling silver-filled, 1-5/8 inches, 22 gauge (24 eye pins)
- Head pin, sterling silver-filled, 2 inches, 22 gauge (5 head pins)
- Clasp, toggle, sterling silver-filled, 12mm smooth round (1 clasp)
- Ear wire, sterling silver-filled, 18mm flat fishhook with 2.5mm ball and 3mm coil and open loop, 22 gauge (2 ear wires)
- Wire, sterling silver-filled, half-hard, round, 16 gauge
- Pliers, Wubbers Designer Mandrel, jumbo round mandrel
- Pliers, Wubbers Designer Mandrel, large oval mandrel, steel and rubber, 6-3/4 inches
- Pliers, round-nose
- Pliers, chain-nose
- Pliers, bent-nose
- Pliers, flat-nose
- Pliers, crimping
- Pliers, flush-cutter
Wire Focal
STEP 1
Cut an 11-inch length of 16-gauge wire.
STEP 2
Grip with oval mandrel Wubbers approximately one inch from the end of the wire. Bend both sides of the wire around the larger barrel, crossing on the opposite side to create a petal shape.
Repeat to create five more petals along the wire.
STEP 3
Create a small hook at the end of the wire at the first petal. Hook the wire between the last two petals then trim both ends of the wire.
STEP 4
String a 4mm quartz crystal round, a 6mm rose quartz round and a quartz crystal oval onto a head pin then create a simple loop.
Attach the drop to a petal of the wire focal.
Beaded Chain
STEP 5
String a 6mm rose quartz round, an 8mm quartz crystal round and a 6mm rose quartz round onto an eye pin then create a simple loop.
Repeat to create a total of four quartz crystal links.
STEP 6
String an 8mm pink marble round onto an eye pin then create a simple loop.
Repeat to create a total of four single marble links.
STEP 7
String a 4mm quartz crystal round, a 10mm rose quartz round and a 4mm quartz crystal round onto an eye pin then create a simple loop.
Repeat to create a total of six rose quartz links.
STEP 8
String two 6mm pink marble rounds onto an eye pin then create a simple loop.
Repeat to create four double marble links.
STEP 9
String a 6mm rose quartz round, an 8mm quartz crystal round and a 6mm rose quartz round onto an eye pin then create a wrapped loop.
Repeat to create a second wrapped-loop link.
STEP 10
String two 6mm pink marble rounds onto an eye pin. Create a wrapped loop around a petal of the focal.
STEP 11
Connect the following sequence of links to the double marble link attached to the focal twice to create a beaded chain:
-
One rose quartz
-
One single marble
-
One quartz crystal
-
One double marble link
Continue the beaded chain with one rose quartz link, one single marble link and one wrapped-loop link.
STEP 12
Use a jump ring to attach half of the clasp to the wrapped loop of the last link.
STEP 13
Repeat Steps 10 - 12 to complete the second half of the necklace.
Creating Components
STEP 1
Without cutting the wire from the roll, use the small barrel of round mandrel Wubbers to create a circle. Then use the large barrel of oval mandrel Wubbers to form a petal shape in the opposite direction.
Trim the wire.
STEP 2
String a 4mm quartz crystal round and a 6mm pink marble round onto a head pin then create a simple link.
Repeat to create a second marble drop.
STEP 3
String a 10mm rose quartz round onto a head pin then create a simple loop.
Repeat to create a second rose quartz drop.
Assembly
STEP 4
Attach the loop of an ear wire through the loop of a rose quartz drop and around the circle of the wire component.
STEP 5
Attach a marble drop to the petal shape of the wire component.
STEP 6
Repeat Steps 4 and 5 to complete the second earring.
: : : Additional Resources : : :
The pieces featured in the Gallery of Designs are copyrighted designs and are provided for inspiration only. We
encourage you to substitute different colors, products and techniques to make the design your own.
Have a question regarding this design idea? Email Customer Service.