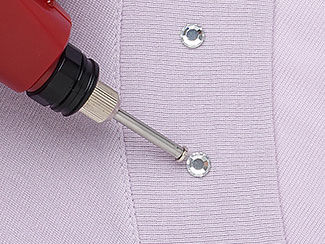
Jewelry-Making Techniques
Hot-Fix Applicators, How-To
8C02
STEP 1
Place a hot-fix crystal in position on your project (glue side facing down).
STEP 2
Slide applicator to the ''ON'' position. Press red button and hold down to activate the heating element. Wait approximately 30 seconds.
Caution: Do not touch any metal parts. The applicator will get very hot.
STEP 3
 |
|
Holding the applicator vertically, continue to hold the red button down and lightly touch the top of the crystal. You do not need to use any pressure--just a gentle touch for about three seconds. The heat will radiate through the crystal and activate the glue on the hot-fix crystal. The embellishment will now be securely attached. |
STEP 4
Remove the applicator. Release the red button to allow applicator to cool. When you have completed your project, slide the black switch to the ''OFF'' position. This is a safety feature to prevent the applicator from heating even if the red button is held down.
Note: To avoid burning your project, be especially careful when adhering crystals smaller than the head of the applicator.
Not recommended for leather, water resistant material or non-porous surfaces.
Before beginning any project, always test the hot-fix crystal in an inconspicuous area to make sure you are getting the best adhesion possible.
Tip: Hand-wash fabrics with embellishments.
Have a question regarding this project?
Email Customer Service.
Copyright Permissions
Permission to copy this instruction sheet is granted for non-commercial educational purposes only. All other reproduction
requires written permission. Please email copyrightpermission@firemtn.com
for more information.