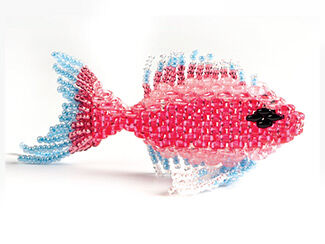
Jewelry-Making Techniques
Bracelet with Czech Glass Beads and Glass Pearls
Courtesy of Preciosa®
CAF8
Late Harvest
This original bracelet sewn from seed beads and beads from the PRECIOSA Traditional Czech Beads brand represents one of a number of PRECIOSA ORNELA trendy costume jewellery color combinations for the autumn and winter 2012/2013 autumn and winter seasons. Introducing Twin, a unique new seed bead from the PRECIOSA Traditional Czech Beads brand: this new oval two-hole seed bead will enable you to create interesting effects, spatial shapes, original structures and lacy patterns in a simple way. The selection of mature autumn colors gives a classical impression thanks to the dark grey and the dark shades of late harvest grapes which we have playfully brightened up with an icy rosé. The crystalline structures of the cut and twisted surfaces of the seed beads and beads provide an icy glitter, whereas the powdery velvet of the matt greys refines the feeling of coolness. We recommend the following colors and finishes: sapphire, icy rosé, steel grey, burgundy blue, bronze brown, colored irises.
The bracelet which we have described here corresponds to the standard bracelet length, i.e. ca 17cm without the fastening. You can extend or shorten it as needed.
STEP 1
 |
|
Start the stringing with a so-called stop bead which should be placed ca 20cm from the end of the fine line. String 17x T and alternately turn the individual seed beads left and right. Add 1x R and pass the needle with the line through the second hole of the last T. This starts the next row. Then string one T between the individual T. String a total of 8x Twin. At the ends of the individual rows, add 1x R at one end before starting a new row and at the other end alternate 1x R and the loop created from the 7x R which is then further strengthened by passing the line through it twice. Straighten the individual beads, including the outer rocailles, and always tighten each row well. |
STEP 2
 |
|
Place the bracelet fastening at the edge of the bracelet in the gaps between the individual outer Twin beads. Use the free amount of line at the start of the bracelet to string the rocailles which are used to finish the edge of the bracelet and the loop for the fastening. Release the so-called stop bead and leave it on the line. Continue through the second hole of the nearest Twin from the first row and string 20x R. Count 3 rocailles from the beginning and pass the line through two of them again. Add 1x R and continue through the second hole of the nearest Twin. Sewn 1x rocaille into the two nearest gaps and create the central loop in the same way as the outer one. Once again, fill in the nearest two gaps between the Twins with 1x rocaille each and create the outer loop. At the end of the row, string 1x R and pass the needle with the line back between the Twins from the initial row, tighten it well, make a knot which is hidden in the hole of the nearest Twin and cut the line. |
STEP 3
 |
|
For the second part of the fastening, sew together 4x T through both holes, tighten the line well and hide the end of the line in the seed bead holes. Proceed in this way three times. String 1x R in the last row of the bracelet, continue through the second hole of the nearest Twin, string 3x R, pass the needle and line through the gap between the four sewn together T, string 1x R, pass the needle and line back through the gap between the sewn together T and the two nearest strung rocailles, add 1x R and continue through the second hole of the nearest Twin. Sew 1x rocaille into the two nearest gaps and sew on the central part of the fastening. Once again fill in the nearest two gaps between the Twins with 1x rocaille and create the outer part of the fastening in the same way. String 1x R at the end of the row and pass the needle and line back between the Twins in the initial row, tighten well, make a knot which is then hidden in the hole of the nearest Twin and cut off the end of the line. |
STEP 4
 |
|
Affix various imitation pearls and pressed beads, which have been strung onto pins in advance and made into loops using needle-nose pliers, to the small loops on one side of the bracelet using the rings. |
Have a question regarding this project?
Email Customer Service.
Copyright Permissions
Permission to copy this instruction sheet is granted for non-commercial educational purposes only. All other reproduction
requires written permission. Please email copyrightpermission@firemtn.com
for more information.