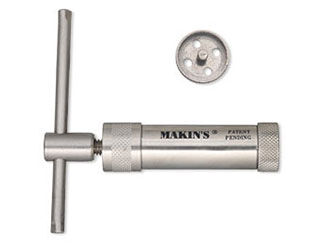
Extruding Tubes of Clay with the Clay Extruder and Adapters
D50T.jpg)
: : : Materials : : :
- Clay extruder adapter, Makin's Professional Clay Core, stainless steel, 18mm disc with 1-3mm holes
- Clay extruder adapter, Makin's Professional Clay Core, stainless steel, 18mm disc with 3.5mm-4.5mm inside hole
- Clay extruder, Makin's Professional Ultimate Clay Extruder®, stainless steel, 4x4 inches with (10) 18mm design discs
STEP 1
![]() |
Put the T-handle end onto the barrel of the Makin's Professional® Ultimate Clay Extruder® extruder and tighten into place. | |
![]() |
Turn the T-handle until the plunger is close to the bottom end of the barrel, leaving enough room to accommodate the clay. |
STEP 2
![]() |
Insert the clay. |
STEP 3
![]() |
Place the shaped extruder die (suitable to the diameter of the tube you need for your design) into the bottom cap of the extruder so it sits flush. | |
![]() |
Place the tube adapter (suitable in size to the shaped die so the walls of the tube work for your design) into the bottom cap so the tip of the adapter extends through the shaped die and out past the outside end of the cap. |
STEP 4
![]() |
Place the bottom cap onto the barrel and tighten into place. |
STEP 5
![]() |
Twist T-handle to extrude the clay tube. |
STEP 6
![]() |
Use a sharp blade or awl to trim the tube around the adapter. |
STEP 7
![]() |
Use a clean sharp blade to trim the tube to size. |
STEP 8
![]() |
If needed, use a rounded object to open up the ends of the tube. |
Have a question regarding this project? Email Customer Service.
Copyright Permissions
Permission to copy this instruction sheet is granted for non-commercial educational purposes only. All other reproduction requires written permission. Please email copyrightpermission@firemtn.com for more information.