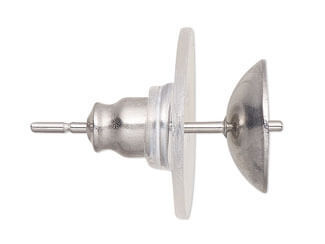
Jewelry-Making Techniques
Bracelet with Czech Pressed Glass Beads and Seed Beads
Courtesy of Preciosa
EA7P
Checked Bracelet
Bracelet made from Preciosa Beads and Seed Beads
Delicate, geometrically arranged lace created by stringing and sewing delicate rocailles and two-hole square beads constitutes the basis for the creation of this elegant bracelet. Using the illustration, you will soon discover that the basic procedure of alternating seed beads and beads which permeates the entire width of the pattern can be used to create more items than just a bracelet. The basic pattern created by means of the connection of individual square beads can be used to create various straps, applications and costume jewelry accessories according to your requirements and imagination.
We wish you many inspirational ideas when working with Czech beads and seed beads from the Preciosa Traditional Czech Beads brand.
STEP 1
Figure 1 |
|
String 1x R10, 1x PB, 1x R10, 1x PB, 7x R10, 1x PB, 1ks R10, 1x PB, 7x R10 etc. (figure 1). Repeat the sequence of 1x PB, 1x R10, 1x PB and 7x R10 a total of 9 times. Commence the return. String 1x R10, 1x PB, 1x R10 and 1x PB. Thread the line through the first 7 R10. String 5x R10 and thread the line through the last 7 R10. Once again add 2x PB and 1x R10 between them. Thread the line through the first R10 of the 7. Add 5x R10 and thread the line through the last of the 7x R10. Repeat this 8 times. Tie off the end of the line with two knots and pull them into the holes in the surrounding beads. (figure 1) |
STEP 2
Figure 2 |
|
Straighten the squares. Twist them outwards. String 6x R10 onto a new line. Thread the line through the second hole in the second PB and the middle R10 of the 7 rocailles from the middlerow and then through the second hole of the third PB. Add 7x R10 and thread the line through the second hole from the fourth PB. Then thread the line through the central rocaille of the 7 rocailles from the middle row and the second hole of the fifth PB. Add 7x R10. Continue in a similar way up to the end of the strap. Then add 9x R10. Thread the line through 1x R10 between the PB and start the return. Add 2x R10 and thread the line through the first R10 from the 9. Add 1x PB, 1x R10 and 1x PB. Thread the line through the first R10 of the 7 and add 2x R10. Thread the line through 1x R10 between the PB. String 2x R10. Thread the line through the last of the 7x R10. Thread 1x PB, 1x R10 and 1x PB. Once again thread the line through the first R10 of the 7. String 2x R10, 1x PB, 1x R10, 1x PB and 2x R10. Thread the line through the last of the 7x R10. Gradually proceed to the end of the strap. Tie off the line, but do not sew it in. Proceed in the same way in the second side of the strap. (figure 2) |
STEP 3
Figure 3 |
|
thread the line through second hole of the next outer PB. Create an arch from 6x R10. Thread the line through the second hole from the outer PB from the side strap. Thread the line through the middle R10 of the 7 rocailles and the second hole from the next square. String 6x R10 and thread the line into the second hole of the next PB. Continue in a similar way up to the end of the peripheral squares. Thread the line through 4x R10 and through the second hole from the last PB of the central strap. String 6x R10. Thread the line through the second hole of the penultimate PB and the 4x R10. Thread the line through the second holes of the peripheral squares on the side strap. Repeat the same procedure as in the first edge piece. Thread the line back to the beginning, to the bracelet's point. Tie off the line and sew it in. Now pull the remaining ends of the lines into the holes. (figure 3) |
STEP 4
Connect the fastening to the bracelet's point. Connect the lobster claw clasp to the oval on one side and the adjusting chain to the oval on the other side.
The second more colorful bracelet variant:
The arrangement of the beads when adding the 7x R10:
-
2x pink
-
1x bronze
-
2x pink
-
1x bronze
The 1x rocaille between the squares is bronze.
The peripheral arch is made from 6x R10:
-
1x bronze
-
4x pink
-
1x bronze
Have a question regarding this project?
Email Customer Service.
Copyright Permissions
Permission to copy this instruction sheet is granted for non-commercial educational purposes only. All other reproduction
requires written permission. Please email copyrightpermission@firemtn.com
for more information.