How to Make a Simple Loop
Watch this quick video tutorial to learn how to make simple loops with jewelry wire and is an essential technique for earrings, charms, and connectors. Perfect for beginners, this step-by-step guide shows you how to create clean, consistent loops every time.
Instructions
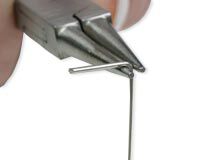
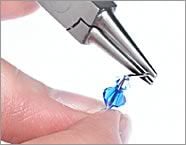
Using round-nose pliers, grip the wire above the last bead added in your design or about 3/8 inch down from the end of a length of wire. Bend the wire to a 90 degree angle.
Forming the first loop:

Grip the tip of the wire with the end of the round-nose pliers, leaving very little wire peeking through the barrels of the pliers.
Rotate your wrist away from your body, while using the tip of your thumb on the other hand to push on the wire below the pliers, forming a loop. The placement of your thumb will help keep the angle sharp and the loop circular. Turn the wire into a loop.
If necessary, adjust the loop so it is centered.
Forming the second loop:
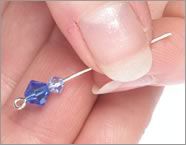
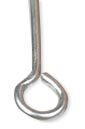
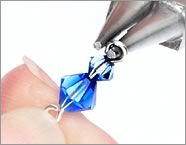
Slide bead(s) onto your created eyepin from Step 4.
Using your bent-nose or chain-nose pliers, bend the wire to form a right angle as close to the bead as possible.
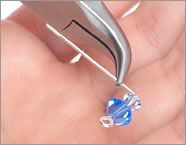
Using side-cutting pliers or the cutting part of your rosary pliers, remove any excess wire, leaving approximately 1/4 inch of wire.
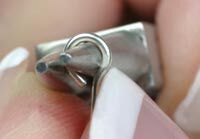
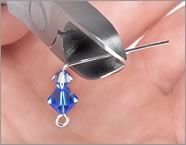
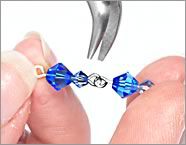
Examine the tips of your round-nose or rosary pliers. Find the area that is approximately 1/8 inch away from the end. Depending on how fine or thick of a point your round-nose or rosary pliers have, you might need to adjust the distance in order to achieve the same size loop.
Grab the very end of the wire at a point approximately 1/8 inch down from the tip of your round-nose or rosary pliers.
Roll the wire around the tip of the round-nose or rosary pliers to form a complete circle centered over the wire stem.

To open or close a loop, using your bent-nose or chain-nose pliers, gently lift the loop up from the closed side making a small space to insert your next loop. Do not pull the loop straight out or the round shape will be distorted.
Insert another loop or earwire. Close the loop back to its closed position using your bent-nose or chain-nose pliers.

To make sure the tip of the wire forms a secure loop, use your bent-nose or chain-nose pliers and gently squeeze the loop to ensure it is securely closed. Or if you have them, you can use a pair of loop-closing pliers. This ensures the loops won't separate while you're wearing your design.
Helpful hint: to make the piece look more finished, make your loop so it closes on the same side as your original loop when using eyepins.
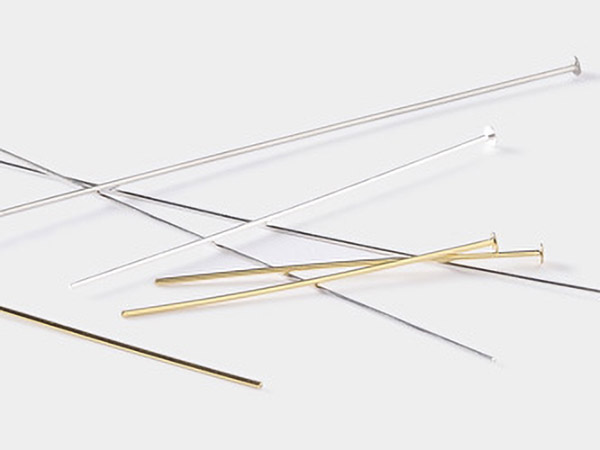
Shop for Your Materials Here:


Copyright Permissions
All works of authorship (articles, videos, tutorials and other creative works) are from the Fire Mountain Gems and Beads® Collection, and permission to copy is granted for non-commercial educational purposes only. All other reproduction requires written permission. For more information, please email copyrightpermission@firemtn.com.