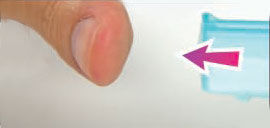
Knotting and Knotting Tools

Knots play a crucial role in jewelry making, from behind-the-scenes support to in-the-limelight style features. Designers use knots for jewelry construction, in finishing techniques or as design elements.
Index
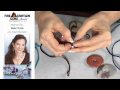
In this video, Arbel demonstrates common jewelry-making knots, including the overhand knot, the surgeon's knot, half-hitch knot and more. Below the video are also step-by-step written instructions for each knot type.
Instructions
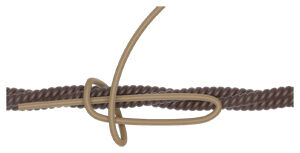
How: Make a loop with the thread or group of threads, and pass the end through the loop. Pull to tighten.
The basic knot for terminating stringing material. This knot lets you end your piece for use with a bead tip. You can also use this knot to connect threads going in the same direction. For example, this is how you tie the threads together when starting a kumihimo piece.
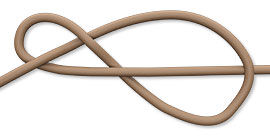
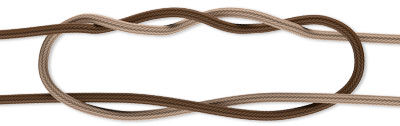
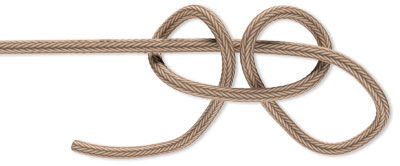
How: Move the cord end under the cord to create a loop, then pass the end under and through the loop. Tighten by pulling both sides to create an 8 shape.
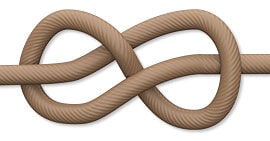
You might also see this type of knot called a figure-of-eight or Flemish knot. This knot is quick and easy to tie, but also easy to untie. A variation to try uses two cords held parallel while knotting to create a double (or paired) figure eight.
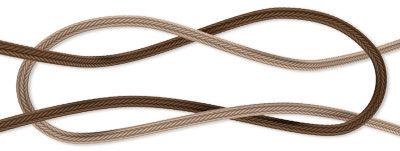
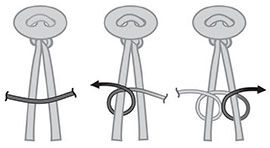
How: Bring the left cord over and around the right cord twice. Cross the right cord over the left cord, through the loop and pull to tighten.
This knot is what we recommend when you're ending a piece made with elastic cord, or any other slippery stringing material. The surgeon's knot is basically a square knot with an extra twist; providing more friction and therefore more security.
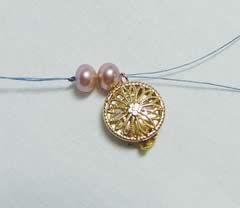
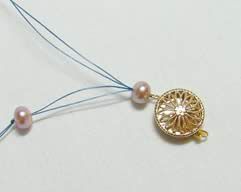
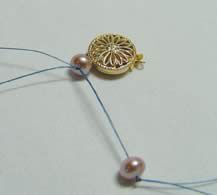
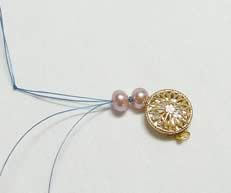
How: Fold your length of cord in half, pass the fold through the hole of your component, then pass the ends of the cord through the loop.
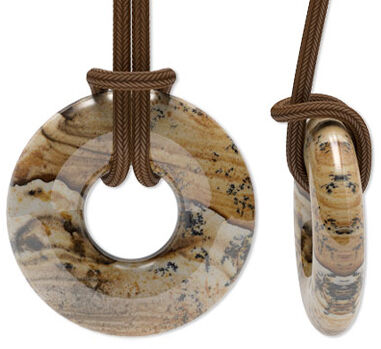
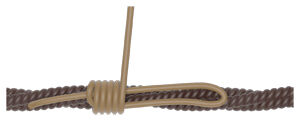
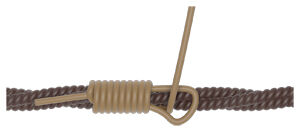
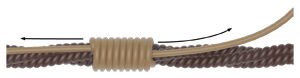
This knot can be used to add decoration to a material, such as a pendant or bangle. You can also use this to create a different style of adjustable knot; just perform the steps around two cords that have been knotted at the tips like with the adjustable knot.

How: Make an overhand knot at both ends of your cord, near the tips. This gives the piece a finished look and keeps the adjustable knot from being pulled free. Make an overhand knot with the right cord around the left cord, go through the loop twice. Slide the knot you just made down to the end knot of the right cord. With the left cord, do the same knot around the right cord. Adjust the length of the design by pulling on the knots or the cord.
This knot allows you to create necklaces and bracelets that are conveniently adjustable in length. Since a clasp isn't needed, this is a great technique when you're making pieces for those with metal allergies.
How: Pass one "working" cord behind and around one "anchor" cord forming a loop. Continue to pass the working cord through the loop then pull the cord tight. Repeat to wrap the same working cord around the anchor cord to create a double half-hitch knot.
This knot is generally used for decorative purposes, as it's not very secure. You might want to use this in macramé designs for an extra flair.
Tip: Form a half-hitch or double half-hitch knot between strung beads, using the length of stringing cord as an anchor, to cushion the beads and as a decorative element.
How: Using two outside strands (working strands 1 and 4) over two inside strands (anchor strands 2 and 3).
Pass strand 1 over the anchor strands then pass strand 4 over strand 1, under the anchor strands and up through the loop (created by strand 1) then pull snug. (This is a half knot.)
Pass strand 4 over the anchor strands then pass strand 1 over strand 4, under the anchor strands and up through the loop (created by strand 4) then pull snug.
Note: You must alternate starting with strand 1 then strand 4 to get a flat pattern. If you start consistently with the same strand, the pattern will twist.
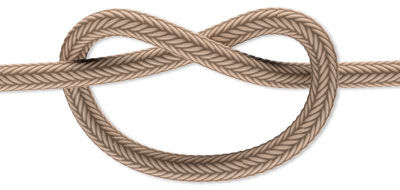
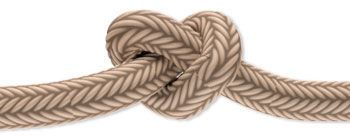
This is a somewhat secure knot that most already know. Remember the rhyme? Right over left, left over right makes a square knot nice and tight. Because this knot is designed to be easily untied, you may only want to use this in low-strain applications. This can be used to temporarily connect two cords together but is more often seen as a decorative knot in macramé. You might recognize this look from parachute bracelets and shamballa-style bracelets.
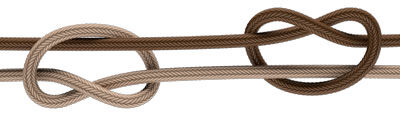
How: Hold the two separate pieces of thread with the ends facing each other. With the first thread, tie an overhand knot about five inches in from the end of the second thread. With the second thread, tie an overhand knot about five inches in from the end of the first thread. Pull the two knots together to create a firm hold (the knots should rest tight against each other).
Similar to an adjustable knot, a fisherman's knot is used to securely join two pieces of thread together. Used often by seasoned anglers, the fisherman's knot is simple to tie--consisting of two overhand knots that are pulled together to tighten.
How: Cut a length of cord, about 10 inches; this is your binding cord.
Make an approximately 3/4 inch loop on one end of the cord. Place the loop parallel to the end of the cord(s) you are wrapping then hold it in place with your non-dominate thumb.
Wrap the loose end of the binding cord around the cord(s) and loop. Continue to make several wraps, making sure not to completely covering the loop.

Thread the end of the binding cord back through the loop and pull both ends tight to secure. Trim excess thread from the binding cord.
This knot can be used to add decoration to a material, such as a pendant or bangle. You can also use this to create a different style of adjustable knot; just perform the steps around two cords that have been knotted at the tips like with the adjustable knot.
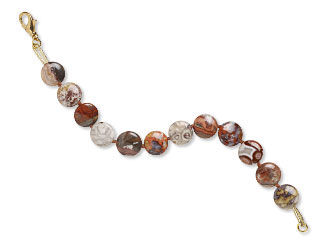
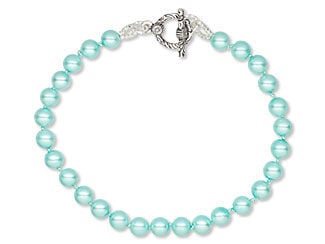
Knotted Bead Jewelry
One of the foundational jewelry styles is the knotted bead necklace. The most traditional form is the pearl necklace with knots between each pearl—sometimes with a clasp, sometimes as a continuous loop. Knotting between the beads or pearls reduces damage from friction and prevents catastrophic loss should the thread break. This style is ideal for soft materials such as cultured pearls, as well as beads made of malachite, amber, seraphinite, selenite and any gemstones with a Mohs hardness of 3-1/2 or lower.
A helpful tip when making knotted bead jewelry: pre-stretch your thread. Threads will stretch or relax over time, so it helps to pre-stretch it before stringing and knotting.
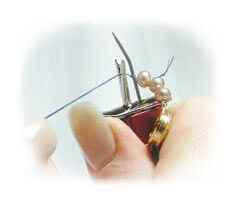
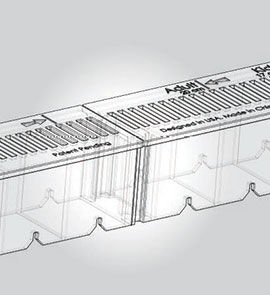
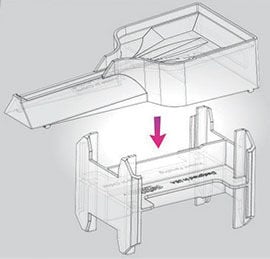
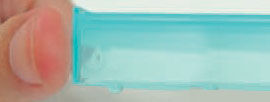
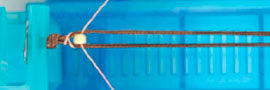
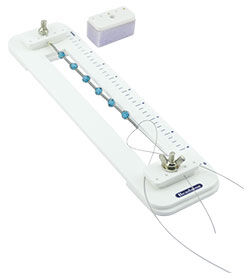
Tabletop Knotting Tools
One option for jewelry makers interested in creating knotted bead jewelry is tabletop knotters, such as the easyknotter® and the Knot-a-Bead™ tools. With their weighted bases, these knotters offer a stable base for creating knotted strung designs and can be a bonus for jewelry makers with limited hand mobility.
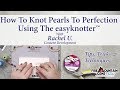
Rachel shows how to use the easyknotter in this video; below the video are also step-by-step written instructions. No matter how you learn, you can learn the easyknotter.
Instructions
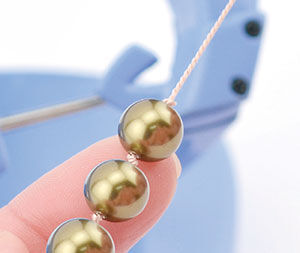
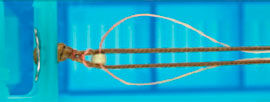
Create beautiful knotted pearl jewelry with the help of the easyknotter. See how to use this handy tool for even, professional knots every time in no time.
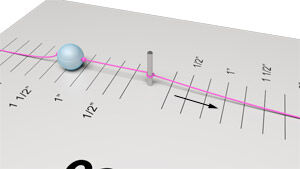
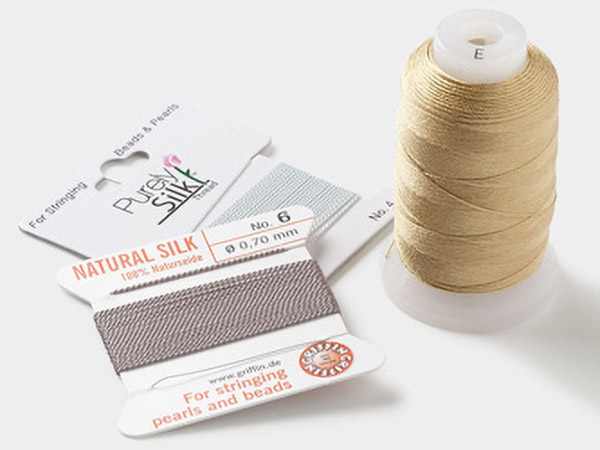
Create evenly spaced knots quickly and easily with the easyknotter. This compact tool is easy to use, yet offers professional results. The easyknotter is designed for use with a variety of threads and cords, though size 6 silk is strongly recommended as the ideal by the manufacturer. Caution is recommended when using with sharp-edged beads such as glass, crystal and metal.
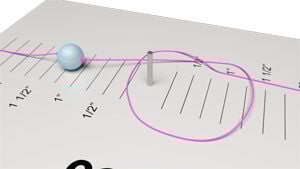
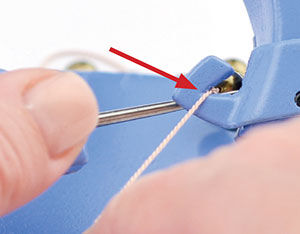
Place knot loop on the post with loop facing toward you.
Pull the thread firmly, sliding the knot into desired position.
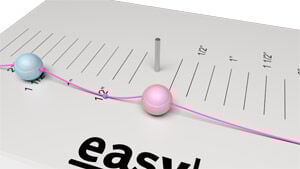
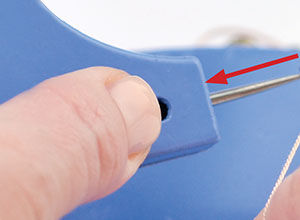
Remove knot with thumb and forefinger and pull firmly in both directions to tighten. Place bead on thread and pull toward knot.
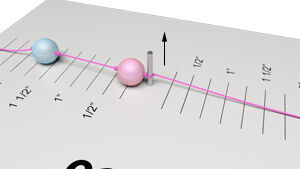
Repeat Steps 1 - 3 to create second knot.
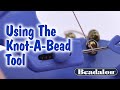
In this pair of videos, Wyatt White, formerly of Beadalon®, uses silk thread to demonstrate how to use the Knot-a-Bead™ tabletop knotter. Below Wyatt's videos are also step-by-step written instructions.
Instructions
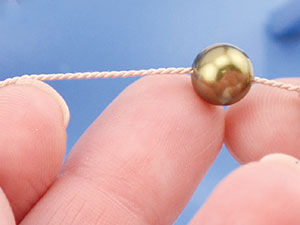
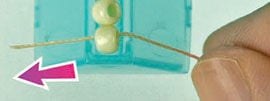
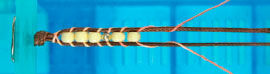
Begin by adding a clasp or by knotting one end of your silk cord. String beads onto the cord and slide the first bead up against the knot.
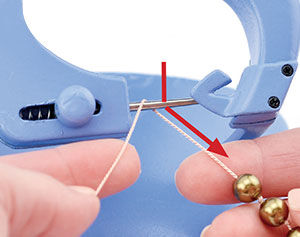
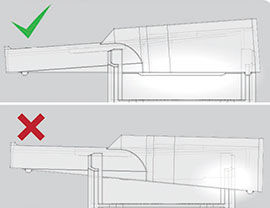
Drop the bead BEHIND the awl and pull it through the underneath opening.
Next, tie an overhand knot and drop the bead back BEHIND the awl just as you did in Step 2. Pull up on the cord to snug the knot.
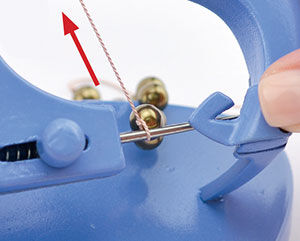
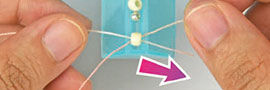
Pull the cord through the YOKE and apply medium pressure.
While still applying pressure to the knot/cord, place your thumb on the button and pull to the left. This releases the knot from the awl. Simply repeat these steps until you reach the desired length of your design.
Each bead is perfectly knotted and tightly positioned!
Handheld Knotting Tools
Ideal for on-the-go jewelry makers, handheld bead knotting tools offer convenience and portability. The Bead Knotter™ and the Tin Cup Knotting Tools are smoothly operating knotters that fit comfortably in the hand, using many of the same motions as knitting or crochet.
Knotting between gemstones and pearls is a popular, timeless look. Learn how to knot between beads using a bead knotting tool with the help of this video tutorial led by jewelry expert Tammy Honaman.
Instructions
Determine the length of your finished necklace.
Cut a length of thread 4 times your determined finished length.
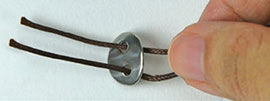
Thread on your needle, doublling the thread. Tie the ends of the lengh of thread in an overhand knot, securing them together. Note: Thread used is for illustration purposes only. It is recommended that you choose a thread color that matches the beads in your design.
Thread on two beads and your clasp. Slide them down toward the knot.
Pass the needle back through the bead closest to the clasp.
Pull the working thread until the clasp is snug against the first bead and 1-inch of thread remains between the first and second bead. Tie an overhand knot using the tail end and the working thread. Pull the knot tight so it rests against the pearl closest to the clasp.
Pass the working thread through the second bead then slide it against the first knot.
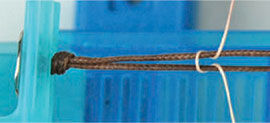
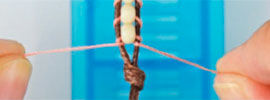
Make an overhand knot using the tail thread and working thread. Slip the knot over the awl (long tip end) of The Bead Knotter. Slide the knot all the way down so it rests against the base. Hold The Bead Knotter in one hand and place your thumb under the tab. Place the working thread over the fork on The Bead Knotter and pull with your other hand, so the knot is pulled snugly against the bead.

Hold the working thread firmly while pushing your thumb upward against the tab. The knot will slide up and off the awl.
Thread on the rest of your beads. Space the beads 8-10" from the beads that are already knotted. Slide the bead next in line up against the last knot. Repeat Steps 8 - 9 until you've placed knots between all of your beads except for the last two.
Thread the other loop of the clasp onto the working thread. Bring the thread back through the last strung bead. Pull the thread so the beads are tight against the clasp.
Tie a half-hitch knot between the last two beads; pull tight.
Bring the working thread through the second to last bead.
Trim the thread on both ends of the necklace. Apply glue to the first knot on both ends (optional).
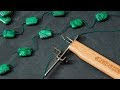
Named after the film that featured them, Tin Cup-style necklaces are as popular as ever. Knotting beads in place between consistent lengths of thread or cording is easy with the adjustable length Tin Cup Knotter Tool. Wyatt shows how to adjust and use it in this video.
Bracelet Knotting Tools
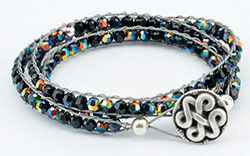
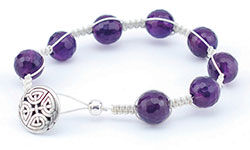
Lashed wrap, Shamballa-style and knotted friendship bracelets are ongoing design trends that offer easy personalization options for a range of customers. These two tying stations secure the beginning or base of bracelet and anklet designs for consistent beading tension and speedy jewelry making.
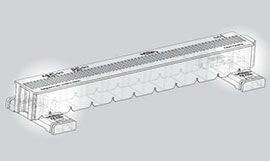
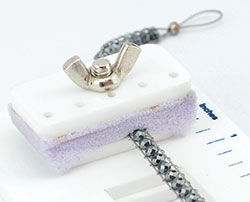
The Wrapit Loom™ tying station is designed to make creating lashed wrap bracelets quickly and easily. This tutorial includes step-by-step written instructions for assembling the loom and creating a bracelet on it.
Instructions
Assembly Instructions
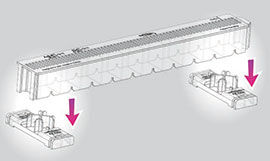
Attach the base.
Attach the clamp.

Attach the sliding clip.
Attach extension track.
Assembly
How to Make a Beaded Bracelet

Bracelet length
To customize your bracelet length, fold the cord in half. Measure the cord around your wrist. Add about 3 - 4 extra inches to allow for knots. Cut the cord.
To create a standard bracelet length, refer to template guide.
Add a button
Insert both ends of the cord through the holes on the "RL" logo side of the button. Slide the button until it is in the middle of the cord.
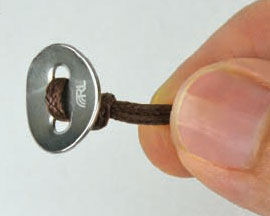
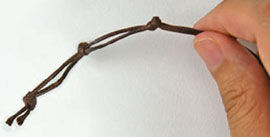
Tie knots
Tie a knot to secure button. To create button loops, tie three knots on opposite end of cord.
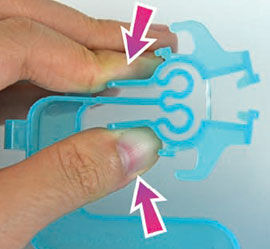
Place the cord on loom
Place the button into the "clamp."
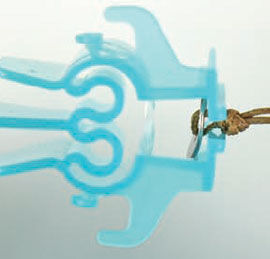
Slide knot into "sliding clip"
Secure cord
Pull sliding clip away from clamp (a few clicks) to tighten cord.

Prepare wrap line
For specific designs, measure and cut the wrap line according to the bracelet template.
Weave wrap line onto cord
Place the wrap line over the cord. Wrap the left side of the thread under and over the cord on the left. Wrap the right side of the thread under and over the cord on the right.
Tip: Adjust the wrap line so the line is centered with equal halves.

Tie wrap line knot
Pull the slide ends to tighten wrap line against the cord knot. Tie a simple knot with the wrap line.
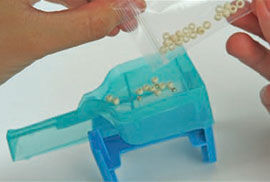
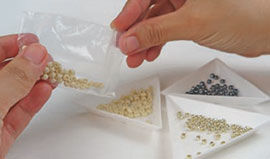
Pour beads onto tray
Snap the "bead tray" onto the stand. Put beads onto tray. Use triangle trays to help sort and transfer beads.

Line Beads up
Gently shake the tray until the beads align in the track.
Threading bead(s)
Pick and thread bead(s) with one side of the wrap line.
Threading bead(s)
Pick and thread bead(s) with one side of the wrap line.
Align beads
Pull both ends of the wrap line to slide the bead(s) in between the cords.
Wrap bead(s)
Weave the wrap line over the cord and up through the center.
Continue wrapping beads
Repeat Steps 12 -15 to secure beads. Repeat these steps until the end.
Finish wrap line
Tie three simple knots to secure the wrap line.
Tip: Use glue to help reinforce knot.

Cut excess wrap line and cord
You did it!
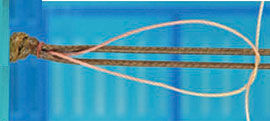
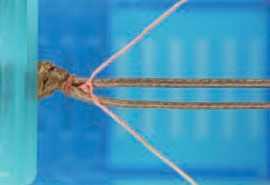
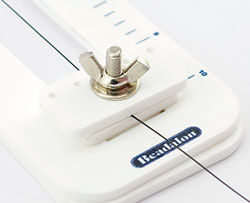
The Beadalon® Tying Station is designed for creating any bracelet style that needs to have one end secured while being created, including Shamballa-style, lashed wrap and more. This video by Beadalon® shows the features of the Tying Station and how to use it; below the video are also step-by-step written instructions.

Instructions
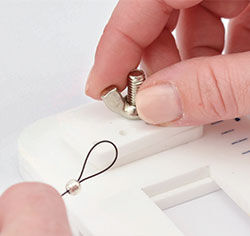
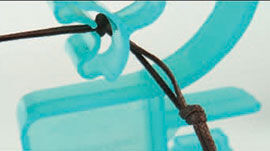
Unscrew the wing nut at the upper part of the tying station. Make a loop with your wire/cord and tie or crimp it.
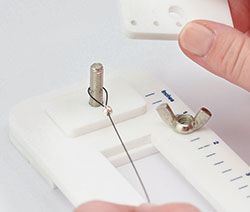
Remove the plate and place the looped wire/cord around the post. Replace the plate.
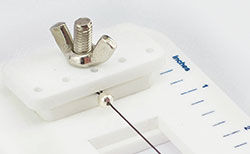
Tighten the wing nut.
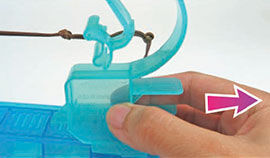
Loosen wing nut at the base of the Tying Station. Slide cord between acrylic plates. Tighten as needed to keep cord secure.
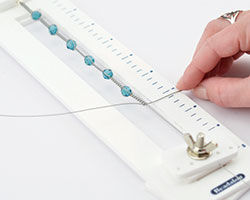
Enjoy the convenience of having both hands available to design intricate jewelry, such as Shamballa style and wrap bracelets.
Tip: If your design is longer than the tying station, simply remove the upper plate and add the foam pad. Pull your design through and gently tighten the wing nut to continue working on your jewelry piece.
Proper knotting isn't just about tying things together—it ensures your jewelry designs stay strong, secure and stylish.
Shop for Your Materials Here:
Have a question regarding this project? Email Customer Service.
Copyright Permissions
All works of authorship (articles, videos, tutorials and other creative works) are from the Fire Mountain Gems and Beads® Collection, and permission to copy is granted for non-commercial educational purposes only. All other reproduction requires written permission. For more information, please email copyrightpermission@firemtn.com.