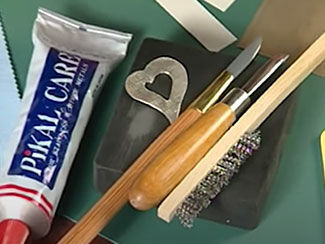
Presented by Tammy Honaman, Author, Jewelry-Making Expert and Educator,
962C
Learn some tips to working with Art Clay and the tools featured in the Secrets to Art Clay Success DVD.
Tammy Honaman, Fire Mountain Gems and Beads online "Ask the Experts" host, author and noted jewelry-making expert, guides you through seven jewelry-designing projects where you'll learn the secrets of working with Art Clay precious metal materials.
Learn tips from jewelry-making expert Tammy Honaman for working with Art Clay®, including the tools you’ll want to use for creating, finishing and firing this jewelry metal clay.
If the clay is too sticky, allow to sit for a few seconds so it won't stick to tools
Use a releasing agent like olive oil and work on a nonstick surface like Teflon
Creating:
Roll the clay out using stacked playing cards or acrylic slats to ensure a consistent thickness
Art Clay takes texture very well so use texture tools or natural items to apply the texture of your choice.
If desired use plastic wrap to avoid sticking to skin
Use clay cutters or a blade to create the desired shape. Tip: Attach a popsicle stick to one side of the blade for added safety.
If drying or cracking occurs while working on your piece, apply a very small amount of water from a spray bottle or with a fingertip. Fold the clay over onto itself to distribute the water.
Finishing:
Once your design is created allow the clay to dry according to manufacturer's instructions. Other options are to use a food dehydrator or heat plate to accelerate drying time.
Use files, sand papers and polishing paper to refine the surface of your design by removing sharp edges, corners and holes and smoothing and polishing the surface of the design.
Note: The piece should be completely finished before moving to the baking stage.
Firing: Use a torch for pieces smaller than a silver dollar or a kiln for larger pieces. During firing the clay will burn off leaving 99.9 percent pure silver.
Torch Firing:
Fill the butane torch as directed
Always use safety glasses and other equipment when working with a torch
Turn the safety switch off, depress the igniter then engage the flame lock
Adjust the flame of the torch to the desired intensity
Fire the piece according to manufacturer's instructions
To turn the flame off depress the igniter once more
Kiln:
Fire the piece according to manufacturer's instructions
Have long handled tongs, safety gloves and a bowl of water on hand
Burnishing: Use a burnisher, wire brush and polishing cream followed by a polishing cloth to bring out the luster and beautiful finish you worked so hard to get.
Permission to copy this instruction sheet is granted for non-commercial educational purposes only. All other reproduction requires written permission. Please email copyrightpermission@firemtn.com for more information.