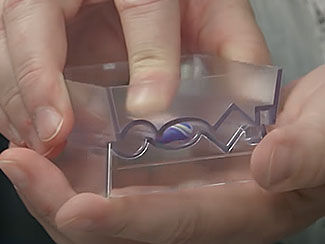
How to Use the Tri-Bead Roller™

Presented by Christi Friesen, Award-Winning Artist, Author and Educator,
Instructions by Rachel, Content Development Group, Exclusively for Fire Mountain Gems and Beads®
E40E

STEP 1
Place conditioned clay into the provided measuring ring to ensure the proper amount of clay is used in the Tri-Bead Roller.

Tip: If the incorrect amount of clay is used, beads may be poorly formed.
STEP 2
Roll clay into a ball and place into desired shape on the base of the roller.
STEP 3
Place the alignment bar on the base of the roller into the small channel on the top of the roller.
STEP 4
Holding the base portion of the roller stationary, slide the top portion approximately 1 - 2 inches back and forth until the clay forms the desired shape.

Note: Too rapid or long strokes may cause the shape not to form properly.

Use caution when removing to avoid finger prints and distorting the shape of the clay.


Have a question regarding this project? Email Customer Service.

Copyright Permissions

Permission to copy this instruction sheet is granted for non-commercial educational purposes only. All other reproduction requires written permission. Please email copyrightpermission@firemtn.com for more information.