Impress Me Butterfly

Presented by Christi Friesen, Award-Winning Artist, Author and Educator,
Instructions by Jennifer, Content Development Group, Exclusively for Fire Mountain Gems and Beads®
E64P

Use stamps to impress a pattern on polymer clay for a fun butterfly jewelry project as you follow along with step-by-step instructions from Christi Friesen, award-winning artist and author.
STEP 1
Condition each color of polymer clay well by hand or by running them through a poly-roller until soft and pliable.

Roll two balls of clay, about the size of a large pea, to create the larger pair of top wings. Repeat to create a smaller pair of bottom wings.
STEP 2
Press and roll one side of one ball to create a teardrop-shape then flatten it with your fingers, using the fingerprints to create a natural texture.

Repeat for each ball.
STEP 3
Gently apply mica powder to a desired portion of a stamp template design using an index finger.

Note: If too much mica powder is applied or stuck into the crevices of the template blow or wipe away any excess powder.
STEP 4
Gently press each wing into an area in the template where the mica powder had been applied, transferring the pattern onto the wing.

Repeat for each wing.

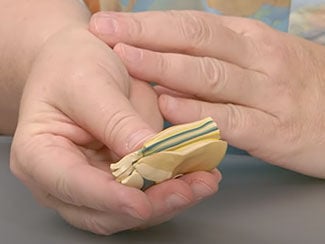
Gently press the pointed end of one small teardrop over the pointed end of of one large teardrop (designs facing up), making sure one side of the teardrops are overlapping and are facing the same direction, to connect the wings on either side.

Repeat for the opposite side of wings.
STEP 5
Roll a separate color of clay into a fat snake. Use a paint brush handle, or similar, to gently roll the snake back and forth approximately a third of the way down the snake-shape, making an even indentation in the clay to separate the body from the head.

Pinch and roll the indentation to make it more pronounced.

Tip: To make the body more slender, roll and pull with your fingers.

Roll the end of a fine tool over the ridge and along the body to create more indentations, making it look more like an insect.
STEP 6
Roll two tiny balls of dark-colored clay, to create the eyes, then gently push them onto either side of the head.

Gently press each wing onto the body's mid-section, attaching the wings.
STEP 7
Roll a ball of the same-colored clay as the body then gently push it into the design template.

Apply a dab of liquid polymer clay to the center of the body where the wings meet then cover with the piece of clay, hiding the adjoining wings from sight.
STEP 8
Slightly curve a headpin (any desired length).

Apply a dab of Lisa Pavelka's Signature Series PolyBonder™ glue onto the tip of the headpin then insert the headpin into the forehead, above one eye, creating one antenna.

Repeat to create the second antenna.
STEP 9
With a pointed tool, poke a hole into the clay at the top of each top wing to later string.

Tip: If baked before adding holes, use a drill to add holes.

Bake according to manufacturer's instructions.

Have a question regarding this project? Email Customer Service.

Copyright Permissions

Permission to copy this instruction sheet is granted for non-commercial educational purposes only. All other reproduction requires written permission. Please email copyrightpermission@firemtn.com for more information.