Jewelry-Making How-To Videos
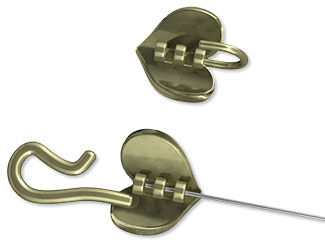
How to Use the Hidden Crimp End Clasp
by Michelle Wood, Jewelry-Making Expert, Exclusively for Fire Mountain Gems and Beads®
E901
VIDEO
Add a rubberized coating to your pliers with non-permanent Tool Magic® to protect metal findings from being marred when crimped.
STEP 1
Open the jaws of the pliers to be protected.
STEP 2
Dip the jaws of your pliers into the jar of Tool Magic just far enough in to cover most of the jaws.
Note: Do not dip the hinge of the pliers into the Tool Magic liquid.
STEP 3
Pull the pliers out slowly, in an upward motion.
Turn the pliers so that the jaws are pointing upward, then set them into a tool holder or on a magnetic rack.
STEP 4
Let the Tool Magic dry for 4 hours.
Note: It is best to let the Tool Magic dry undisturbed. Avoid air movement from wind or a fan, high heat and humid conditions.
STEP 5
Repeat to apply two more coats of Tool Magic.
Note: The Tool Magic will dry in 4 hours, but it is recommended to let it cure for 24 hours for the best result.
Once the Tool Magic is cured, use the protected pliers for any wire-wrapping project.
STEP 6
Insert 0.019 Accu-Flex® professional-quality beading wire into the crimp tube.
STEP 7
Using the Tool Magic protected chain-nose pliers, crimp the center section of the crimp tube flat to hold wire secure.
STEP 8
Bead the wire strand and repeat Steps 6 and 7 to crimp off the other end.
Have a question regarding this project? Email Customer Service .
Copyright Permissions
Permission to copy this instruction sheet is granted for non-commercial educational purposes only. All other reproduction requires written permission. Please email
copyrightpermission@firemtn.com for more information.