How to Create a Loop in Loop Chain

Form round rings into links then loop them together to create a length of chain. Use the chain in any finished design of your choice.
Instructions
Step 1
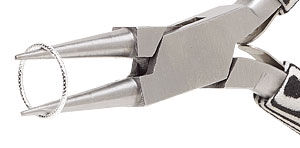
Insert the tips of a pair of round-nose pliers into a soldered closed ring. Stretch the ring into an oval by slowly opening the pliers.
Gently press the tips of a pair of chain-nose pliers in the middle to form a bow-tie-shaped link.
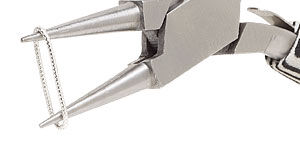
Step 2
Using the round-nose pliers, grip across the link at the center. Bend the loops toward each other, folding the link in half.
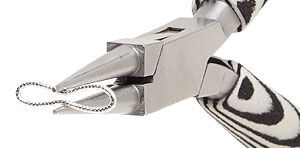
Step 3
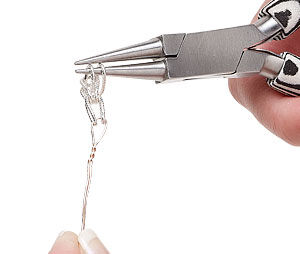
Thread a length of copper wire through the center folded section of one loop. Twist the wire so it stays in place.
Note: The wire will be used as a marker to designate which end you started with, as well as a handle to help when drawing the chain through a draw plate later.

Feed the loops of a second link through the first link’s loops. Repeat adding as many links to the expanding chain as you’d like.
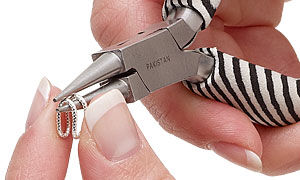
Step 4
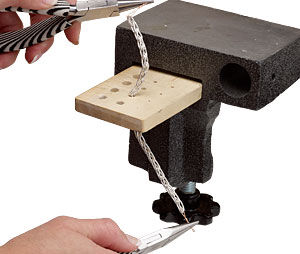
Once you have assembled your links, add a second piece of copper wire to the last link. Pass the original length of copper wire through the hole in the draw plate that is just slightly larger than the diameter of the chain. Pull the chain through--this will help ensure the links are all lined up and similar in size. Insert the chain through the next smaller opening on the draw plate. Using chain or flat-nose pliers, grasp the copper wire and pull the chain through. This pass will start to elongate the links as well as the chain length. Repeat until the chain links are even and in line.
The process of drawing down the chain elongates the links and lengthens the chain as well as will work-harden the chain.
Step 5
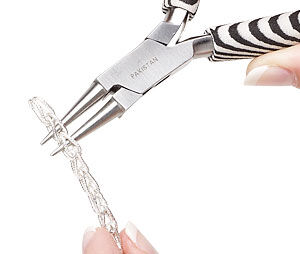
If needed, use round-nose pliers to reshape the links so they are nicely and uniformly shaped as well as so they move freely along the length of the chain.
Have a question regarding this project? Email Customer Service.
Copyright Permissions
All works of authorship (articles, videos, tutorials and other creative works) are from the Fire Mountain Gems and Beads® Collection, and permission to copy is granted for non-commercial educational purposes only. All other reproduction requires written permission. For more information, please email copyrightpermission@firemtn.com.