How to Set Up a Beading Loom

Not sure how to warp a loom, also known as setting the threads in a loom for weaving? In-house jewelry designer Rose shows you just how easy it is to get a warped loom in no time.
Instructions
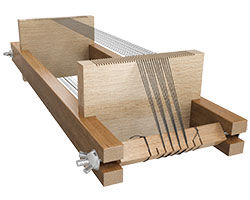
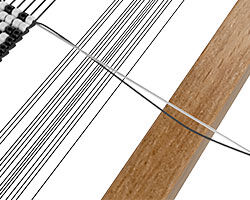
What is warp? Warping is setting up the threads that you will loom on. They are placed in the individual grooves in the wood or spaces in the spring. These grooves are designed to space the thread evenly to fit the size of bead you are using.
Here are some tips to get you started:.
Step 1
To start your loom piece, attach your needle and thread to the warp threads on your loom, leaving a long tail which you will weave in later.
Step 2
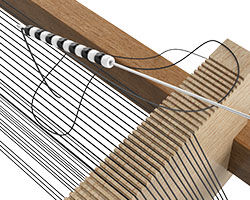
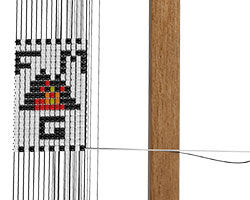
Tie the looming thread and needle to the outside warp threads. Next, pick up beads on your needle according to the pattern you are using.
Step 3
Always follow your pattern from the same direction on each row, either right to left or left to right. Move all of the beads to the end of the thread where it is attached to the warp.
Step 4
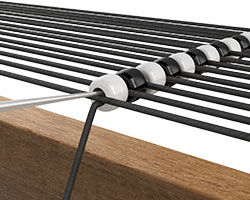
Place a finger under the beads and press them up between the warp threads. Holding them in place, pass the needle back through the beads, being careful to keep the needle above the warp. This way your beads are locked in place.
Step 5
When you have finished your piece, weave the thread end back and forth over and under the warp threads for about 1/4 inch. This will finish your ends.
Step 6
Now go back and re-thread your needle and do the same thing on the other end with the tail that you left at the beginning.
Step 7
Clip the threads in the center, leaving the thread on each end of your work. This can be trimmed to the proper length later.
No matter which projects appeal to you the most, from simple bracelets and hatbands to the more involved tapestries and wall hangings, the whole idea of the loom is to have fun. There is no end to the projects you can create. There are a wide variety of patterns and books for you to choose from.
Shop for Your Materials Here:


Copyright Permissions
All works of authorship (articles, videos, tutorials and other creative works) are from the Fire Mountain Gems and Beads® Collection, and permission to copy is granted for non-commercial educational purposes only. All other reproduction requires written permission. For more information, please email copyrightpermission@firemtn.com.