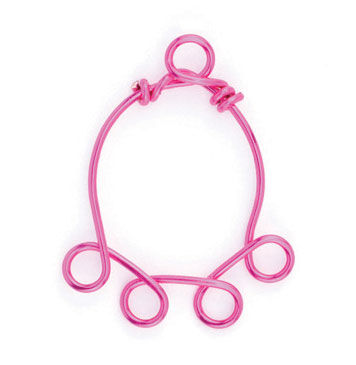
Artistic Wire® Round Connector Jig
Instructions
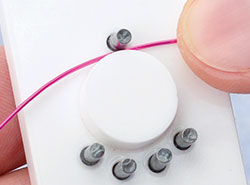
Place the end of wire (20-24 gauge) 6'' (15cm) in length across findings form as shown, tail should only be a few millimeters off the form.
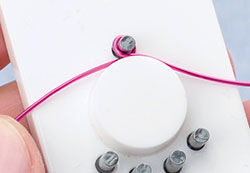
Wrap the wire (counterclockwise) around the single peg at the top, while holding the tail with your non dominant hand, then on to the next peg (counterclockwise).
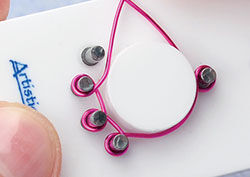
Continue to take a single revolution with the wire around each of the pegs (counterclockwise).
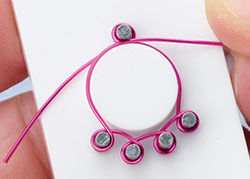
Once all pegs are wrapped, continue around the form, but do not wrap second wire onto the top peg.
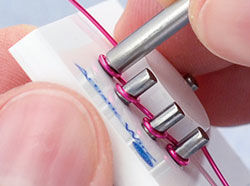
Use the included pusher tool to push the design all the way down to the surface of the finding form.
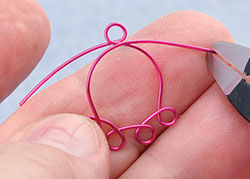
Remove the connector from the form and trim both tail wires to about 1-1/4'' (3.2cm).
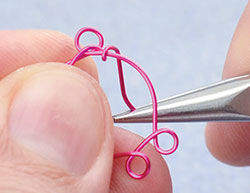
Grasp the right facing tail wire and wrap it tightly around the right top portion of the round connector as shown. This will take some practice.
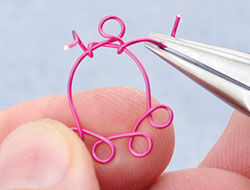
Flip the finding and wrap the other tail around the top of the other side. Make these wraps as close to a mirror image as possible.
Have a question regarding this project? Email Customer Service.
Copyright Permissions
All works of authorship (articles, videos, tutorials and other creative works) are from the Fire Mountain Gems and Beads® Collection, and permission to copy is granted for non-commercial educational purposes only. All other reproduction requires written permission. For more information, please email copyrightpermission@firemtn.com.
