The Right Adhesive for the Job
Courtesy of The Polymer Arts magazine
The subtitle here is a bit misleading I'm afraid. A truly definitive list would have the absolute right answer for every bonding issue we have. Well, this is not quite that but it may come as close as one possibly can in the wacky world of adhesion.
We had staff in different parts of the country test some of the more promising adhesives to see if properties changed from place to place, and they sometimes did. Humidity looked to be the primary factor in how well adhesives worked in different environments. Epoxies and thick tube glues seemed to have a harder time curing in high humidity but the opposite was true with cyanoacrylates (superglues). This makes sense since moisture is what gets superglues to bond. But other factors such as brands of polymer, the age of the polymer, the variations in other materials such as metal findings (some had sealants on them, some probably did not) and simply the way in which each person performed the tests even when strictly outlined also seemed to affect the outcome. In other words, there is not going to be any single answer for what adhesive will be best for all of us. We each will need to do some testing before putting our faith and our work into the hands of a particular adhesive.
The good news, however, is that we can highly recommend a few so you don't have to test dozens but can start with a few that sound promising for you.
Bonding Methods
In order to choose the best adhesive for the job, you will want to start thinking in terms of what method of adhesion will work best for the situation first. There are three primary methods of bonding:
Mechanical fastening
This method involves situating materials around an object to hold it in place. It includes things like the prongs on a gem setting, polymer pushed up around the edge of a crystal and then cured, screws and nails, and wire wrapping. This bond is as strong as the material that is holding things in place. It can easily be one of the strongest options for polymer since metal items or the clay itself are the usual options. It is not, however, always practical or possible to use this method.
Chemical
Some substances can cause a chemical reaction with other materials in such a way as to meld the materials together on a chemical level. Others use a solvent to keep molecules that would normally bond together on their own from bonding until they are needed but the chemical reaction is in the adhesive substance itself not between the items to be bonded and the adhesive. There does not seem to be a viable chemical reactive adhesive but solvent based glues can work well with polymer.
It seems to come down to whether the adhesive has a rough enough surface to grip or, alternately, can get a good seal on the materials being glued. A complete seal between materials works like a suction cup and is very strong. It seems that the problem with cured polymer is that it's slightly porous—not enough that this helps adhesives grab onto it—and it's not slick and sealed enough to cause suction. However, you can try using a polymer compatible sealant (water-based Varathane or the polymer manufacturer's sealants for instance) on cured polymer to help with adhesion.
Coalescence
This is the actual melding of materials together using heat. In the case of polymer, this occurs when we press raw polymer together and then have it meld in the curing process. This is an extremely strong bond. Think of welding or the making of glass beads. The bond is as strong as the material.
So when determining what to use, consider what would be your strongest option. Mechanical or Coalescence are the strongest options for polymer since glues all have issues and shortcomings with polymer. However, if gluing is the only suitable option, use the following steps and recommendations and do a little testing of your own.
The RIGHT way to Use Adhesives
Use glue sparingly. In most cases, liquid and gel adhesives will not set well if there is too much on the project. Unless the glue packaging says otherwise, this is the most common process for using glue successfully:
- Read the glue package directions. This may seem ridiculously obvious but how often have you just opened something up and used it without reading? We all have. Go with their instructions unless they are vague; in which case, use the following steps as a guideline.
- Roughen slick textured surfaces with rough sandpaper, a wire brush or scratch them up with a needle as appropriate.
- Clean the surface of both sides to be glued with alcohol to remove any oils or other residues.
- Apply a very thin layer of adhesive to both sides or add it to one side and press the two sides together momentarily to distribute the glue very thinly between them.
- Let the glue air dry just a little, so it's tacky and the two sides will grab when put together. This might be a matter of seconds for some glues such as cyanoacrylates and quick bond epoxies, or a couple minutes as with E6000 and slow drying liquid epoxies. Don't wait on epoxy putties. They are tackiest when first mixed.
- It's best to allow the glue to cure overnight before moving it. Let it go 24 hours before applying any stress to the bond. This, of course, will be different for every glue but if you've lost the information, this is the safest route.
Top Adhesives for Different Situations:
Our general recommendations for adhesives to have in your studio as a result of these tests include:
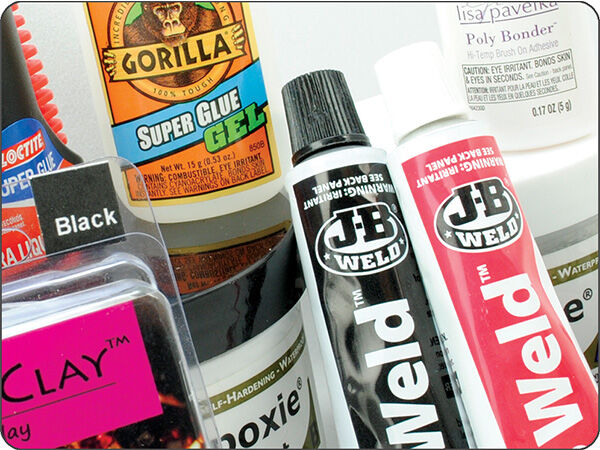
- Gorilla™ Super Glue Gel—A new house favorite! This was the most consistently strong glue in the bunch. It was the only cyanoacrylate glue that held on all attempts to pry two pieces of cured polymer apart. It would not let go. We were able to eventually pry a metal bail off a polymer piece but it took effort. It was even harder to remove a glued crystal. This unusual version of cyanoacrylate must be well shaken before use because it has tiny rubber particles in it. These give it some flex unlike other superglues which become brittle after curing. You want flex in your polymer and your adhesive so your pieces can withstand bumps and whacks and this really seems to do it. Like other superglues, this can have a fairly short shelf life averaging about 6 months, but immediately replacing the cap on the bottle will keep solvent from escaping and moisture in the air from getting into the bottle. Like all cyanoacrylates, it has strong fumes, so use with good ventilation.
- JB Weld PlasticWeld—This was a last minute recommendation for our tests so it was only tested by one staffer. However, it looked very, very promising which is why it's on this list. It was almost as strong as the Gorilla Superglue in polymer-on-polymer pieces but less so on metal to polymer. Our tester was in a fairly high humidity place which we were guessing may have affected its performance. In the research we did, it was highly recommended by other crafters and was even named the best glue for plastics on a couple independent sites. It needs more tests though. Its big disadvantage to the superglues is that it's a two-part urethane that needs to be mixed before using so on that alone it might not be an attractive option.
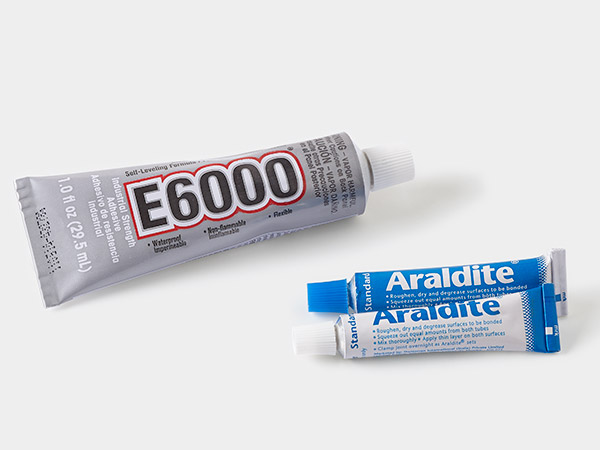
- E6000—Tried and true, this adhesive has been used for years by crafters but it definitely has its negative side. It is considered one of the most toxic glues for craft as well as being one of the messiest to work with. However, most people who have worked with it for years have found it to be a very dependable bond, especially between metal and polymer, a tricky bonding situation with two such different materials. In low humidity places, it usually fared the best on the metal bail to polymer test but it seemed that is was less effective or took forever to cure in high humidity.
- Epoxy putty—This is actually not the best adhesive for polymer. This stuff will stick to everything insanely well, except for cured polymer. Sealing polymer helps tremendously but in our tests it still came apart easier than the other items listed. But what it does do that none of the other adhesives can do, is be formed around or pressed into a space to create a physical bond with polymer and a strong suction bond with other materials. If you form the polymer surface with undercuts it can hold onto this could be a great bonding solution between polymer and other materials. We tested four epoxy putties to see if any had a better bond than the others. We tested Apoxie Putty, MagicSculpt, EasySculpt and Crystal clay. EasySculpt held significantly better than any of the others probably because EasySculpt was so soft and a little sticky. It probably grabbed better than the others which were fairly firm and dry when mixed as directed. Adding a little more hardener could have made these stickier but it would also reduce their working time.
Polymer Paste Recipe
- Shave or crumble raw translucent polymer into a sealable, polymer safe container.
- Mix 1 part liquid polymer with 3 parts raw clay.
- Let it sit overnight
- Mix it up with a metal spoon or tool until well mixed. Add more liquid polymer if you want it thinner.
- You can add colored clays, alcohol inks or oil paints to make colored versions.
- Cyanoacrylate gels—We are bunching a number of brands into the same recommendation because we didn't see a huge difference between gel based superglue brands. We tested Loctite®, Green House (a more eco-friendly superglue) and Super Glue® brands. Loctite and Green House seemed slightly better than the original brand on strong polymer-to-polymer bonds but they all gave out relatively easily when it was polymer to metal or crystals.
- Polymer Paste—there is no better bond between two polymer pieces than polymer itself. Paste will stay put and fill gaps making it your best polymer-to-polymer adhesive bar none. You can purchase paste or make your own (see sidebar).
Run Your Own Tests
- To test adhesives, create a number of flat cured squares about 1'' (25mm) square from a thick sheet of polymer.
- Set yourself up for testing in the place where you would commonly use the adhesive, preferably somewhere with good ventilation as a lot of adhesives have noxious fumes.
- Follow the manufacturer's instructions or our instructions here if you don't have much to go by, and glue polymer to polymer and then other materials you commonly use such as metal findings, beads, crystals, etc. Label each test item with the name of the adhesive.
- Wait 48 hours before testing the materials.
- Try pulling the glued pieces apart. Make notes on what held well and what didn't.
- Retest the ones that seemed to hold well to ensure the first test was not a fluke.
- Stock up on the adhesives that worked for you and remember they all have limited shelf lives so keep them in a temperature stable environment and put caps back on right away. When an adhesive changes consistency, toss it. Don't take chances with something coming off on your work!
Have a question regarding this project? Email Customer Service.
Copyright Permissions
All works of authorship (articles, videos, tutorials and other creative works) are from the Fire Mountain Gems and Beads® Collection, and permission to copy is granted for non-commercial educational purposes only. All other reproduction requires written permission. For more information, please email copyrightpermission@firemtn.com.
