How-To Use Bead Tips
Bead tips are designed to conceal and protect knots and create a secure connection to jump rings and clasps. Bead tips terminate jewelry designs with a clean and professional finish. When finished, bead tips look like small, metal beads at each end of the strand. Available in three basic types in a variety of precious and plated metals, fashion finishes and designer styles.
Instructions
Standard
.jpg)
The standard style provides an open cup with a hole in the bottom and a single attachment loop.
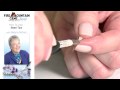
Step 1
.jpg)
Feed the thread through the hole in the bottom of the bead tip.
Step 2
.jpg)
Slide the bead tip down the strand and tie an overhand knot at the end of the thread. Bring the bead tip back up against the knot.
Step 3
Place a small amount of gel adhesive inside the cup of the bead tip, securing the knot.
Step 4
.jpg)
Use a pair of chain-nose pliers to close the open loop at the top of the bead tip around a jump ring and/or clasp to attach it to the strand.
Side Clamp-On
.jpg)
The side-hinged clamp-on style is notched on the bottom of each side of the sphere to allow for the seed bead and knot. The two sides of the sphere clamp over the finished knot to form a small round bead with a projecting closed loop.
Step 1
String one seed bead onto the end of the thread and slide down to the end of your beaded strand.
Step 2
Tie an overhand knot to hold seed bead in place.
Step 3
Pick up your bead tip and lay the seed bead inside the bead tip cup.
Optional: Place a small amount of gel adhesive inside the bead tip.
Step 4
.jpg)
Once bead is lying in bead tip, use a pair of flat-nose pliers and gently close the bead tip.
Attached at the top of the bead tip is a closed loop you will attach to your jump ring and/or clasp.
.jpg)
Bottom Clamp-On
.jpg)
The bottom-hinged clamp-on style has a thread hole in the bottom hinge. The clamp forms a spherical bead with an attachment loop.
Step 1
.jpg)
Feed thread through the thread hole in the hinged section of the bead tip.
Step 2
.jpg)
String one seed bead onto your thread then pass the thread back through the seed bead in the same direction, to hold seed bead in place.
Step 3
Pick up your bead tip and lay the seed bead inside the bead tip cup.
Optional: Place a small amount of gel adhesive inside the bead tip.
Step 4
.jpg)
Once bead is lying in bead tip, use a pair of flat-nose pliers and gently close the bead tip. Attached at the top of the bead tip is a loop you can open, use a pair of flat-nose pliers to twist the loop open and attach to your jump ring and/or clasp.
Note: Some bottom clamp-on styles feature closed double loops for attaching a jump ring.
Shop for Your Materials Here:


Copyright Permissions
All works of authorship (articles, videos, tutorials and other creative works) are from the Fire Mountain Gems and Beads® Collection, and permission to copy is granted for non-commercial educational purposes only. All other reproduction requires written permission. For more information, please email copyrightpermission@firemtn.com.