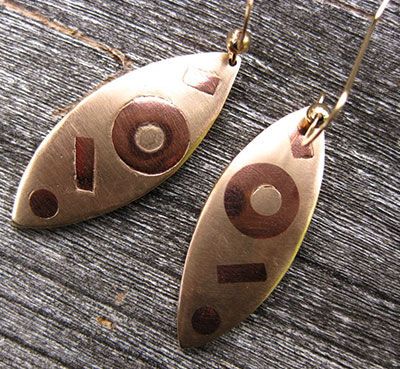
Prometheus Clays Information Sheet
Working with Prometheus® Clay is similar to working with polymer and ceramic clays. Find all the tips and techniques you need in this how-to article from Prometheus.
Working with Prometheus™ Clay is similar to working with silver clays, polymer clays, modelling dough, flower dough and ceramic clays. It is very easy to use.
Wet Stage
- At normal consistency, Prometheus™ Clay does not stick to hands or plastic working surfaces. However, oiling your fingers and the working surface lightly is useful and would not harm your clay. Olive oil is preferable.
- Remove the clay from its plastic bag and place it on a clean plastic surface or wax paper. Use your fingers, roller, spatulas, clay shapers, craft knives, tooth picks and other simple tools to shape it, texture it, or turn it on a potter's wheel. You can texture the clay with rubber stamps, texture mats, leaves, paper, and other interesting textures.
- When you work with the clay out of the packet it is called "The Wet Stage". To stop your clay from drying out, try to not work at this stage for too long. Don't rush your work as Prometheus™ Clay gives you enough time to play. If you detect any cracks on the surface, apply some water straight away with a brush or spray, and fill the cracks with a little paste to repair them.
- To join two pieces together wet the points that will touch or add a little paste (to make paste, simply mix a little clay with a little water until it is the consistency of thick yogurt). If the two pieces are dry, wet the touching points and paste to create a secure bond.
- Store any unused clay in a plastic bag with a zipper to prevent it from drying out. Place any offcuts in the bag straight away whilst you're working and keep it closed tight. If you're not planning to work with the clay for a while, put the sealed plastic bag in a jar with a tight lid. Placing a wet sponge in the bottom of the jar will keep your clay in a good condition until your next usage. If you are storing it for a long time, keep an eye on the sponge and add water if needed.
Drying
- Before firing the clay you need to dry it completely. Using a hair dryer or putting it on top of a kiln will do it well. Hot-plates or food dehydrators work well too.
- To check if the clay is completely dried, put the hot clay (straight from drying) on a cold mirror. After 10-20 seconds, move it and check that there is no condensation on the mirror. This test is especially important for big and thick pieces. If the piece is not dried completely it can crack, break or have bubbles on the surface while firing.
- We don't recommend fast drying for large pieces, as it may cause cracks. For these, it is recommended to leave them at room temperature for a few hours and then continue drying at moderate temperatures.
Dry Stage
Whilst the dried Prometheus™ Clay is strong, you still need to take some care when working with it. You can carve designs on the surface, file it, grind it, drill holes with hand tools or rotary tools and engravers. To join dried pieces, wet the joining points with a brush and apply some paste. After completing your design it is easy to sand uneven surfaces using sand papers and sanding sponges. It is a lot easier to do this step now - before you have fired the clay!
Firing Prometheus Clay™
It is important to fire the clay according to the manufacturer's instructions; these are included with each package of clay. Please note that each metal type has different firing instructions.
Finishing Prometheus™ Clay
Brush your piece with a metal brush and, if necessary, put it in hot pickling solution. After pickling, rinse the piece thoroughly with water and dry. This will give you a nice brushed finish. You can also use many different patina solutions to give you other colours.
Polish the piece with a burnisher, polishing papers, a tumbler or polishing motor. Using polishing compounds can give extra shine to your works.
Have a question regarding this project? Email Customer Service.
Copyright Permissions
All works of authorship (articles, videos, tutorials and other creative works) are from the Fire Mountain Gems and Beads® Collection, and permission to copy is granted for non-commercial educational purposes only. All other reproduction requires written permission. For more information, please email copyrightpermission@firemtn.com.
