The Art of Metalsmithing - How to Forge a Sterling Silver Pendant

Sterling silver is a malleable metal, giving silversmiths a large range of metalworking choices.
- Fabrication of the metal, shapes are cut from sheets and wire, constructed into a design and soldered together
- Lost wax casting, the wax original is burnt out during a process in the kiln and replaced with metal
- Forging, metal is hammered into a specific shape
How to Fabricate a Sterling Silver Pendant
Step 1
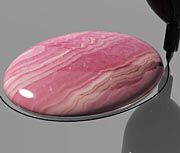
Place the cabochon onto 20-gauge sterling silver sheet, close to the edge to avoid waste. Using a felt-tip marker, draw a line around the perimeter 1/4 inch larger than the cabochon. The line does not need to be perfect as corrections can be made when filing later.
Step 2
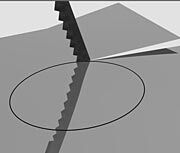
Insert a 2/0 saw blade into a jeweler's saw frame.
Begin sawing at the edge of the sheet, working toward the outline. Continue sawing out the shape, following the line.
Optional open-back design: Draw a line 1/4 inch in from the outer edge of the shape you sawed out.
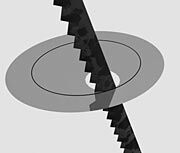
Insert a drill bit, large enough to fit the saw blade through, into the rotary tool. Mark a hole location near the line and make an indentation for the drill bit to settle into, then drill the hole. Undo the saw blade from one end of the frame, insert the blade through the hole, then connect the blade to the frame. Saw along the line you drew, then remove the cut out shape. Set it aside for use in a future project or to send to a refinery.
Tip: An open back design uses less material and makes for a lighter design overall. This design element also allows you to see the back of the cabochon.
Step 3
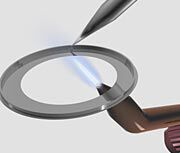
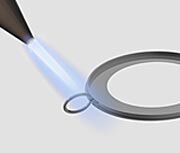
Place the base on top of the steel tripod's mesh screen. With the bezel centered on the base, place snippets of wire or sheet solder on the inside bottom edge where the bezel meets the base. Using the torch, and working from underneath the tripod, apply heat to the base, bezel and solder. Keep the flame moving to disperse the heat evenly to avoid melting or warping the bezel. As the solder begins to melt, move the torch along the seam of the bezel and the base to evenly distribute the solder. The solder will flow toward the direction of the flame. Make sure the seam is soldered closed.
Step 4
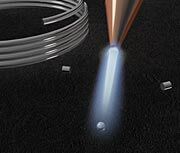
Using side-cutting pliers, cut three small pieces of 20-gauge sterling silver wire. Lay the pieces onto a charcoal block and brush with flux. The flux will enhance the shape of the ball created when the wire is heated. Using the torch, heat one piece of wire until it forms into a round ball. Repeat for the other two pieces.
Step 5

Carefully place one ball at a time (made in Step 4) along the edge of the base, next to the bezel. Using the torch, heat a ball and the sheet until hot, then with a pick, place medium solder at the edge of the ball until it begins to melt and flow. The balls will have a tendency to move as the flux gets hot and bubbly. Simply reposition by pushing the ball back into place with a titanium pick. Remove the heat as soon as the solder begins to flow to avoid having the solder overflow onto the bezel, sheet or balls.
Step 6
Center a jumpring at the top of your design (or make a bail by shaping 18 or 20-gauge wire with a pair of round-nose pliers). Clip the jumpring (or the wire bail) onto one side of a Third Hand and the pendant base onto the other side of the Third Hand. Make sure the two touch but do not overlap. Using the torch, heat both pieces, apply flux and with a titanium pick, add a small piece of solder until it starts to flow. Use enough solder to ensure a strong bond between the bail and pendant base. And remember, a little solder goes a long way (too little solder will not seal the joint properly and too much solder will overflow onto other areas of your pendant base).
Step 7
While the piece is still hot, using copper tongs, remove the pendant base and place it into the heated pickling solution in the pickle pot. Let the piece stand for about 15 minutes. Using the copper tongs again, remove the piece from the pickle solution then rinse in water.
Step 8
With metal shears, cut off as much of the excess sheet as possible on the outside of the bezel (and on the inside if you chose that option). File all raw edges with jeweler's files until they are flush and the pendant base and bezel look like one continuous piece of metal.
Step 9
Using the lathe polishing kit, buff the pendant with tripoli to remove small scratches and nicks, then finish with red rouge for a fine, shiny polish.
Have a question regarding this project? Email Customer Service.
Copyright Permissions
All works of authorship (articles, videos, tutorials and other creative works) are from the Fire Mountain Gems and Beads® Collection, and permission to copy is granted for non-commercial educational purposes only. All other reproduction requires written permission. For more information, please email copyrightpermission@firemtn.com.