Wrapping Stones and Beads with Half-Round Wire
by Sandra Lupo, Jewelry Designer and Instructor, Exclusively for Fire Mountain Gems and Beads®

Half-round wire is semi-circular in shape. This detail makes half-round wire ideal for wire-wrapping round or irregularly shaped objects as its flat side hugs the object being wrapped. This also makes the wire economical as it is half its gauge weight compared to round wire in the same gauge.
To wrap a freeform gemstone bead you can bypass the drill hole and treat the bead like a slab or stone. The individuality of the wrap is defined by the shape of the stone or bead you are working with, so you can expect each piece you wrap to be different. Enjoy the process and wire up!
Instructions
Step 1
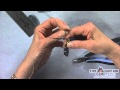
Using flush-cutters, cut a 20-inch length of 16-gauge half-round dead-soft wire. File the ends if necessary.
The 20-inch length of wire is based on the overall size of the stone shown. The wraps take up more wire than you might expect so make certain there's extra in your measurement.
Step 2
Begin midway down the length of the stone. Place a piece of tape to hold the wire at its middle.
Have smooth jawed flat-nose pliers ready, but realize that with dead-soft wire the shaping can be done by hand to form a tight fit. In a way, your hands become your tools.
Step 3
Wrap one half of the wire downward, pressing the wire at the edges of the stone (with your fingers as your tool) as you spiral down towards the bottom. Keep the wraps as close as you like.
Step 4
Use up all this wire for the bottom end. As you spiral towards the tapered bottom of the stone, end the wire in a tighter spiral or circle. This creates a seat, as a bezel would, and secures the stone at the bottom. Keep the tape in place.
Step 5
Wrap up toward the top of the stone with the balance of the wire. A wider spiral will allow the stone's character to show through. Criss-crossing the wire gives a different look and creates dimension.
As you wrap upward consider the wire you have left to make a bail and the neckpiece the pendant will hang from. The bail can be as few as two wraps or as many as five depending on available wire.
Step 6
To make the bail, angle the wire vertically to form the coil horizontally.
Use a jumpring mandrel with varying millimeter sizes suitable for your neckpiece. This design uses the 5mm size found on the smaller jumpring mandrel. A forming pliers with stepped barrels can also be used.
Keep the flat side of the wire on the surface of the mandrel, hugging the mandrel with the remaining wire as you form a consistent coil. Again, make as few as two or as many as five coils for the bail. Flush-cut excess wire and file wire end if necessary.
Shop for Your Materials Here:


Have a question regarding this project? Email Customer Service.
Copyright Permissions
All works of authorship (articles, videos, tutorials and other creative works) are from the Fire Mountain Gems and Beads® Collection, and permission to copy is granted for non-commercial educational purposes only. All other reproduction requires written permission. For more information, please email copyrightpermission@firemtn.com.