Making a Wrapped Loop and Double-Wrapped Loop

Use the double wrapped-loop technique to attach a pendant or charm to a soldered loop on a chain for a secure finish. Link double wrapped loops together to create your own chain then finish with your choice of clasp.
by Tammy Honaman, Author, Jewelry-Making Expert and Educator, Exclusively for Fire Mountain Gems and Beads®
Instructions
Step 1
Cut an approximately 3-inch length of wire.
Forming the first loop:
Step 2
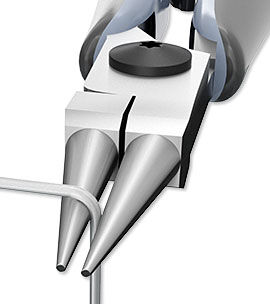
Hold a pair of round-nose pliers so the jaws are horizontal. Grip the wire with the tips of the pliers, about 1-1/2 inches down from one end of the wire. With your free hand, bend the top of the wire to form a 90 degree angle.
Step 3
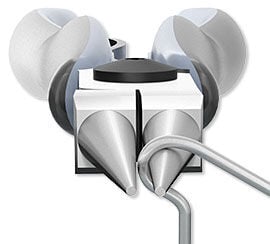
Place the pliers into the angled section, vertically, so one barrel is above and one is below the wire. Bring the wire up and over the top barrel of the pliers so it is now facing down at an angle.
Step 4
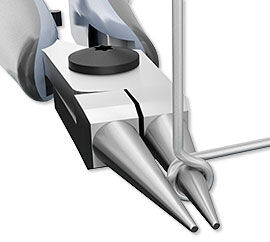
Reposition the pliers so they are horizontal again, with one barrel in the loop and one outside of the loop. With chain-nose pliers, or your free hand, grasp the tip of the wire and direct it behind the length of wire extending below the loop you just created.
OPTIONAL: Open the loop slightly and slide on the loop of your pendant or charm; close the loop.
Step 5
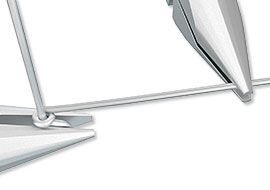
Grip across the loop with a pair of chain-nose pliers. Grasp the tip of the wire with chain-nose pliers and wrap it around the straight length of wire above the pendant, making approximately three tightly-wound wraps. Trim any excess wire, then press in the cut end with chain-nose pliers.
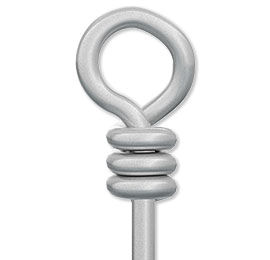
OPTIONAL: Place a bead onto the wire.
Forming the second loop:
Step 6
Hold the round-nose pliers horizontally and grip the wire directly above the last wrap you created in Step 5 or, if you chose to add a bead, right above the bead.
Step 7
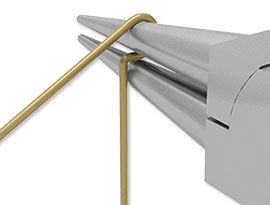
With your free hand, bend the tip of the wire to form a 90 degree angle. Place the pliers into the angled section vertically so one barrel is above and one is below the wire. Bring the wire up and over the top barrel of the pliers so it is now facing down at an angle.
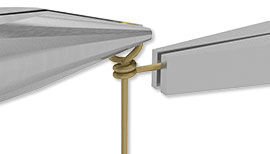
Step 8
Reposition the pliers so they are horizontal again, with one barrel in the loop and one out and to the right. With chain-nose pliers, or your free hand, grasp the tip of the wire and direct it behind the length of wire extending below the loop you just created.
OPTIONAL: Open the loop slightly and slide onto your chain or finding; close the loop.
Step 9
Grip across the loop with your chain-nose pliers. (If you've attached this loop to a chain, be careful not to grip the chain at the same time as you grip the wire.)
Step 10
Grasp the tip of the wire with the chain-nose pliers and wrap it around the straight length of wire below the loop, making approximately three tightly-wound wraps. Trim any excess wire, then press in the cut end with chain-nose pliers.


Have a question regarding this project? Email Customer Service.
Copyright Permissions
All works of authorship (articles, videos, tutorials and other creative works) are from the Fire Mountain Gems and Beads® Collection, and permission to copy is granted for non-commercial educational purposes only. All other reproduction requires written permission. For more information, please email copyrightpermission@firemtn.com.