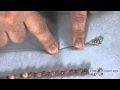
Using Accu-Guard™ Wire Protectors
.jpg "Accu-guards in use")

Instructions
Step 1
Cut a piece of Accu-Flex® Professional Quality Beading wire to the size needed for your beading project.
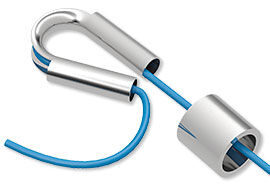
Step 2
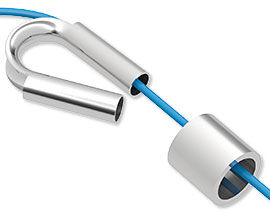
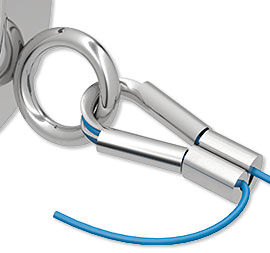
Pass the end of the Accu-Flex professional-quality beading wire through a crimp tube and through the tube on one side of the wire protector. You will notice that there is a tube on each end of the wire protector, with a channel in between.
Pass the Accu-Flex through the other tube then tighten. As you tighten, the Accu-Flex will lay flush in the channel.
Step 3
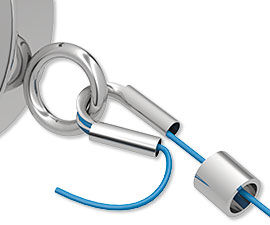
Add one half of your clasp by sliding the loop up into the curve of the wire protector. Pass the Accu-Flex back through the crimp bead and crimp using crimping pliers. Using wire cutters, trim any excess Accu-Flex.
Note: Another option is to use a jump ring to attach each portion of the clasp. This may be necessary depending on the beads and clasp to be used in the design.

Step 4
String your beads onto the Accu-Flex.
Step 5
To finish, repeat Steps 2 and 3 using the other half of the clasp. Pull the Accu-Flex to make sure there is no slack along the length of the design. Crimp the bead to secure.
Shop for Your Materials Here:


Copyright Permissions
All works of authorship (articles, videos, tutorials and other creative works) are from the Fire Mountain Gems and Beads® Collection, and permission to copy is granted for non-commercial educational purposes only. All other reproduction requires written permission. For more information, please email copyrightpermission@firemtn.com.