Layered Collage with Magic-Glos®
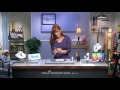
Follow along to learn how to layer resin to make a steampunk pendant. Renowned mixed media artist Lisa Pavelka walks you through step by step on how to make this jewelry project with a bezel setting, texture stamps, polymer clay and Magic-Glos® UV resin.
Instructions
Step 1
Optional:
- Embellish the edge of the bezel with polymer clay then bake before embellishing the inside of the bezel.
- Apply a foiled border along the edges of the bezel using Apoxie® then let air dry before finishing the pendant.
Pour a very thin layer of Lisa Pavelka's Magic-Glos® into the center of a glass bezel then spread around to completely seal the glass inside the bezel.
Tip: Add less Magic-Glos than you think you need because it is more difficult to remove than to add.
Place underneath an ultraviolet lamp or the sun for 5 - 10 minutes to cure.
Tip: Curing for 2 - 3 minutes allows the Magic-Glos to become solid enough to work on but remain sticky.
Step 2
Pour a few drops of Magic-Glos into the bezel.
Use non-magnetic tweezers to position a water-proof component in the desired place in the Magic-Glos. Continue adding as many as six components.
Notes:
- If too much Magic-Glos is applied to the bezel, the added components will not stay in the desired place.
- Add small components to the first layer and then larger components to each additional layer so that the larger components will still be visible from behind.
- Adding too many components in the first layers will not produce the desired dimensional effect.
Tips:
- Use components that have empty space so that components added later can be seen.
- Components can poke out of the Magic-Glos so long as there are some flat surfaces of layer of Magic-Glos to add more components onto.
Step 3
Remove flammable objects from the workspace, pull any loose clothing or hair back then place the bezel on a ceramic tile. Pull down the safety lock on the butane torch then press in the ignition button and hold down the button on the side.
Pass the torch over the bezel for only a second to remove any bubbles. Repeat once for good measure then press the ignition button, turning off the torch, and set the torch safely away since it will continue to stay hot for some time.
Note: The bubbles will pop if they are on the surface. Poke the bubbles with a needle-tool or toothpick if they are below the surface.
Place the bezel under the ultraviolet lamp to cure.
Step 4
Repeat Step 2, adding components as desired, then repeat Step 3 to remove bubbles and cure.
Tips:
- Modify components by cutting off loops or use broken pieces, spacers, beads or glitter if desired.
- Modify broken pieces to make it look intended such as cutting gears in half then placing half of the gear against the side of the bezel to make it look as if it's coming in from the edge.
Step 5
Add a finished layer of Magic-Glos for a smooth surface.
Tip: The pendant can be worn either way since the gloss is transparent.
Have a question regarding this project? Email Customer Service.
Copyright Permissions
All works of authorship (articles, videos, tutorials and other creative works) are from the Fire Mountain Gems and Beads® Collection, and permission to copy is granted for non-commercial educational purposes only. All other reproduction requires written permission. For more information, please email copyrightpermission@firemtn.com.