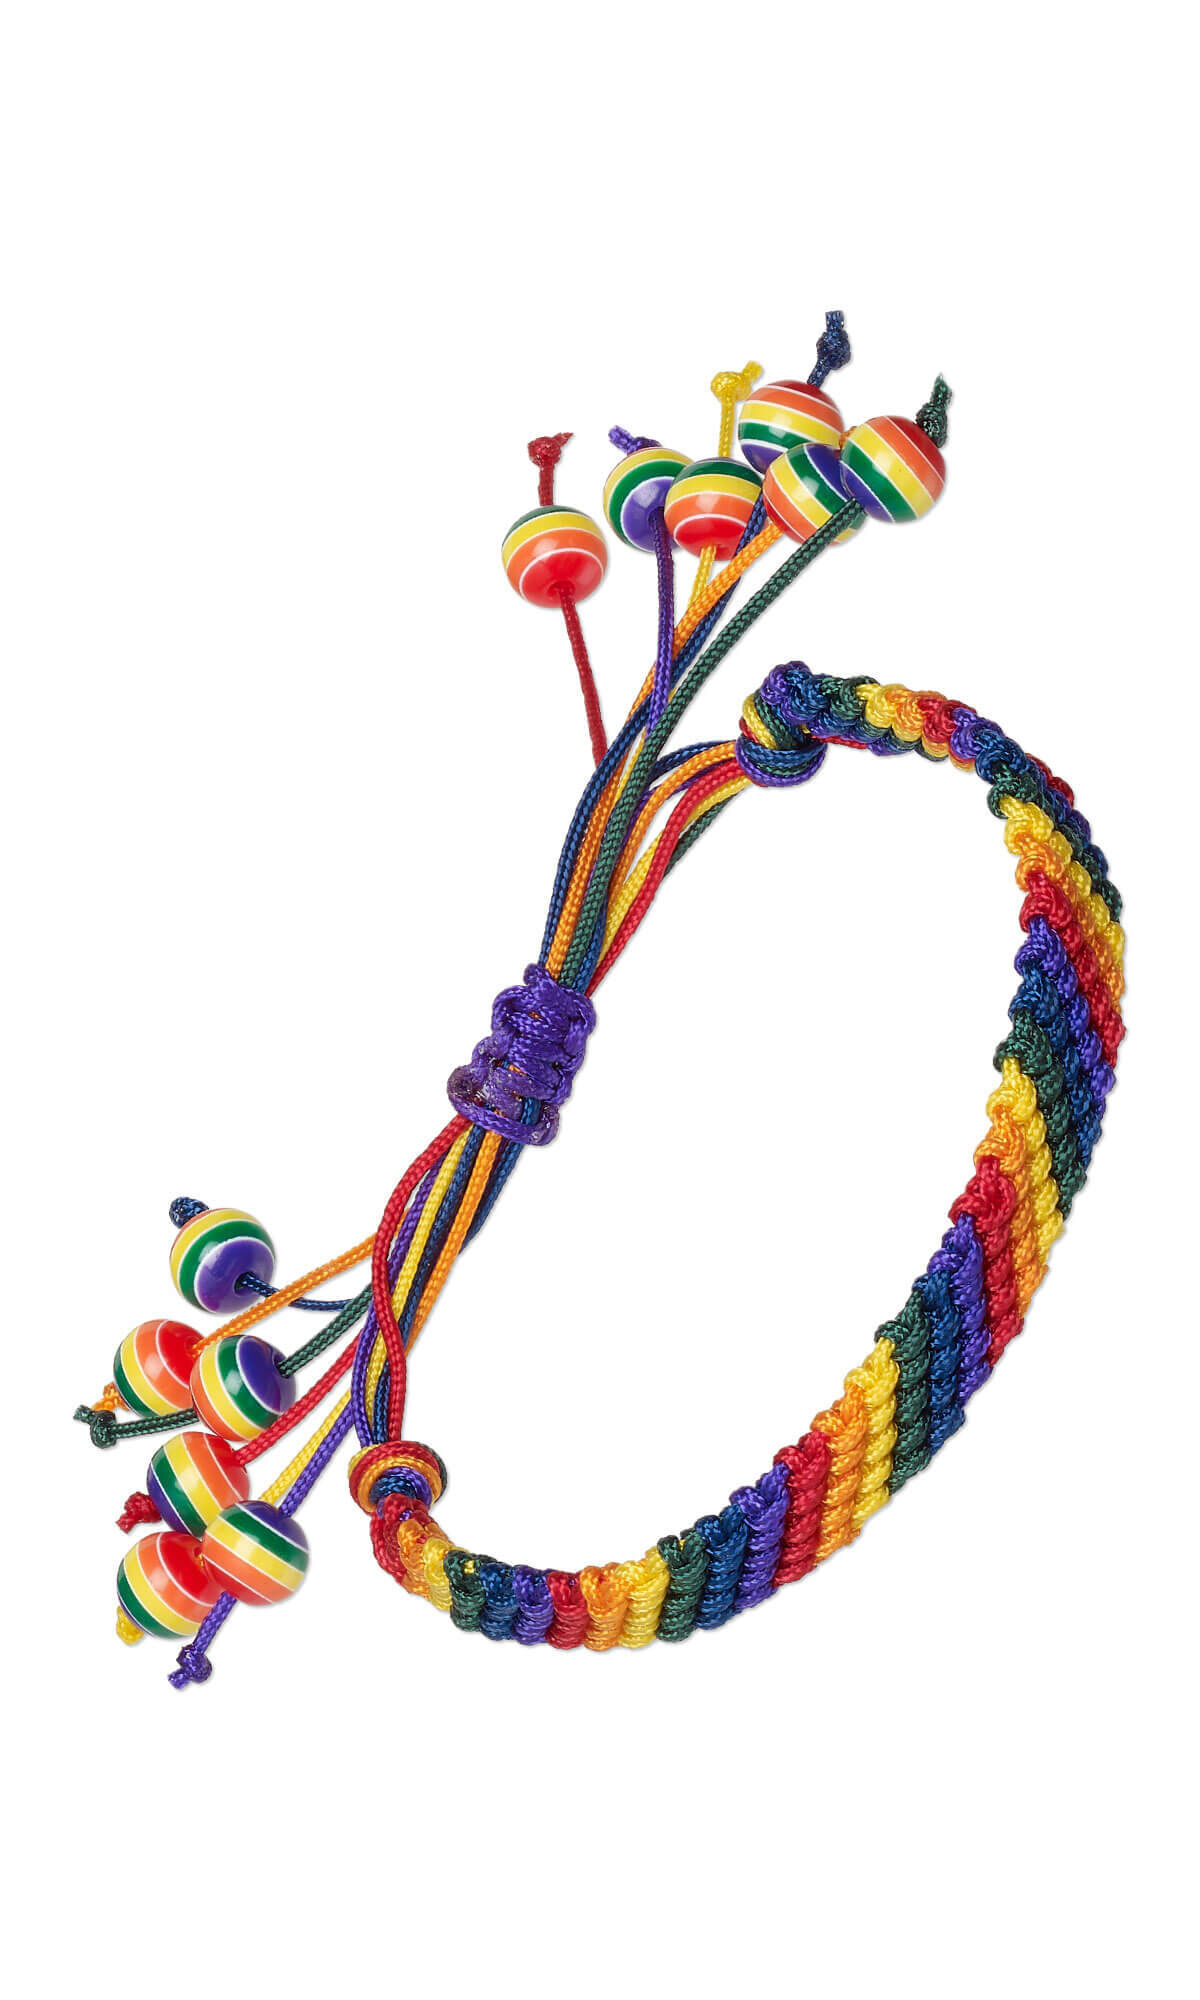
Bracelet with Macramé Imitation Silk Cord and Laminated Acrylic Beads


Design Idea KB2G
Classic Rainbow
-- Designer --
LauraLynn, Jewelry Designer, Exclusively for Fire Mountain Gems and Beads®
To learn more about LauraLynn, read her jewelry artist success story here.
: : : Materials : : :
Click here to view a full list of materials used in this design.
Please take the creative opportunity to select the products of your choice for this design, offered here at Fire Mountain Gems and Beads. Some materials may not be available or listed.
- Bead, laminated acrylic, opaque multicolored, 8mm round
- Cord, imitation silk, orange, 1mm
- Cord, imitation silk, red, 1mm
- Cord, imitation silk, purple, 1mm
- Cord, imitation silk, medium blue, 1mm
- Cord, imitation silk, medium green, 1mm
- Cord, imitation silk, yellow, 1mm
To learn more about Friendship Bracelets, visit this article and video

Using six beautiful colors, designer LauraLynn shows how to make a rainbow diagonal stripe friendship bracelet. Watch this informative video, then gather your supplies and follow along to create your own vivid bracelet.
Instructions
Cut one 36-inch length each of red, orange, yellow, green, blue, and purple imitation silk thread.
Cut one 15-inch length of purple thread and set aside.
Gather each of the 36-inch strands and knot them together, leaving about 4- to 6-inch dangles from the knot.
Clip the threads onto the clipboard just under the knot. Give a slight tug to make sure it is secure.
Spread out the threads in the following order:
- Purple
- Blue
- Green
- Yellow
- Orange
- Red
Take the first thread (purple) and cross it over the second thread (blue) so that it looks like the number "4". Keeping the second thread pulled tight, pass the first thread back under the second thread. Continue to keep the second thread pulled tight and pull the first thread through the loop so that it tightens the knot and slides to the top. Repeat using the same threads to complete the forward knot.
Repeating Step 5, work through all the colors to create the first purple row: purple to green, purple to yellow, purple to orange, and purple to red. One block of the pattern is now created. The purple thread should now be on the right side of the design.
Repeat Steps 5 and 6 with blue as the first thread and green as the second thread: blue to green, blue to yellow, blue to orange, blue to red, and blue to purple.
Repeat this pattern until the bracelet is at a desired length.
Repeat Step 2 to create a knot and dangles at the other end of the bracelet.
Creating the Slide Knot Clasp
Secure the bracelet in a vertical position so it does not move. Rest the ends parallel to each other so that they point in opposite directions. This will be referred to as the "core".
Place the 15-inch purple thread perpendicular to the core, making a "t" or "+".
Take the left end of the thread and bring it over the core so that it looks like a "4". With the same end, go under the right side of the thread to create a loop. Bring the thread up through the loop and tighten, leaving room to slide the clasp once completed.
Take the right end of the thread and bring it over the core so that it looks like a backwards "4". With the same end, go under the left side of the thread to create a loop. Bring the thread up through the loop and tighten, leaving room to slide the clasp once completed.
Repeat Steps 12 and 13 until the desired clasp size is reached.
Apply E6000® Fray Lock™ adhesive to the ends of the clasp, making sure not to apply any to the thread inside the clasp.
Cut the dangles created in Steps 2 and 9 to a desired length. String onto each dangle an 8mm laminated acrylic bead and secure with a knot. Set aside to dry.
Once dry, cut off any extra thread from the clasp to complete the bracelet.
Have a question regarding this project? Email Customer Service.
Copyright Permissions
All works of authorship (articles, videos, tutorials and other creative works) are from the Fire Mountain Gems and Beads® Collection, and permission to copy is granted for non-commercial educational purposes only. All other reproduction requires written permission. For more information, please email copyrightpermission@firemtn.com.

