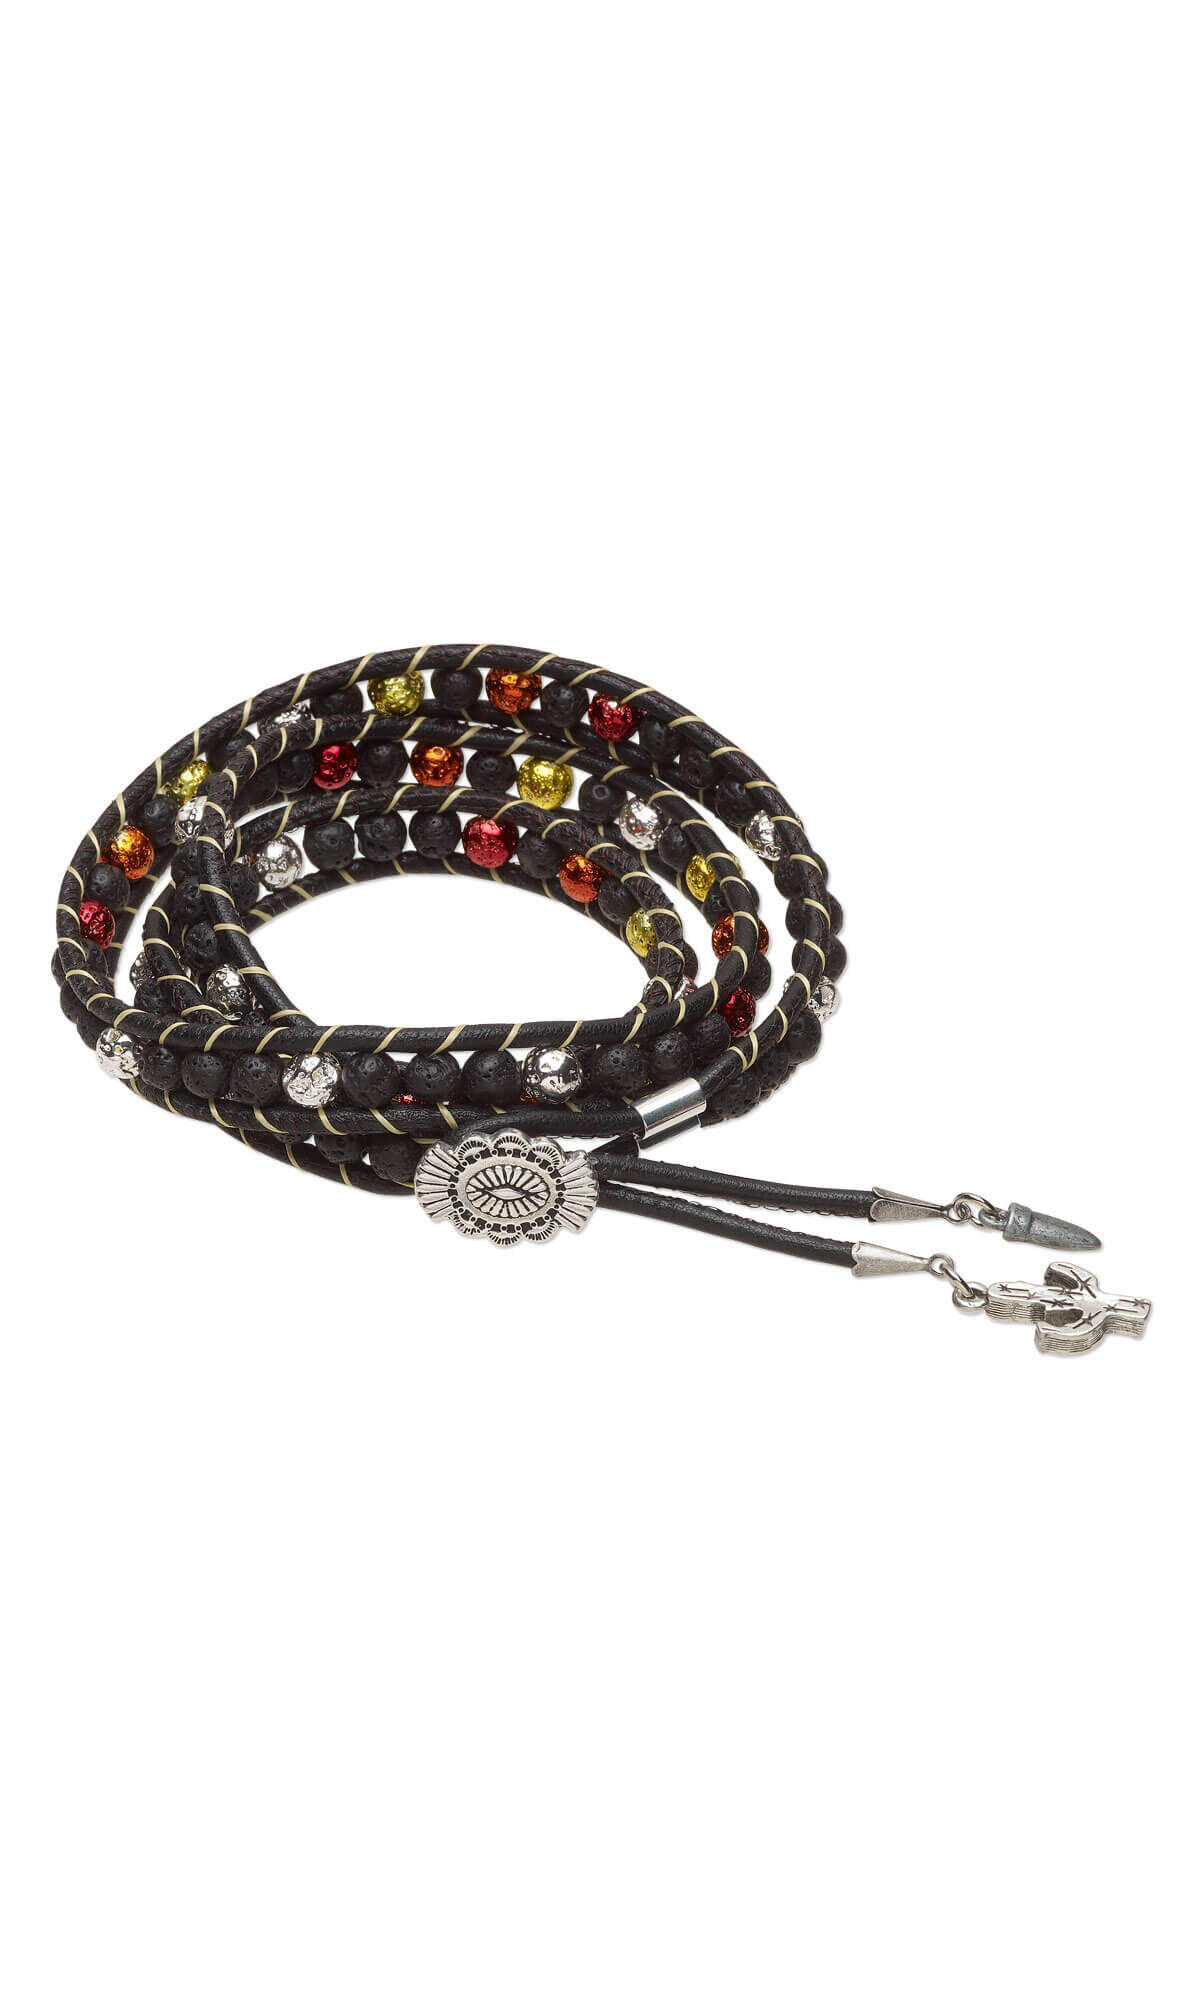
Wrap Bracelet with Lava Rock Gemstone Beads, Coated Lava Rock Gemstone Beads and Silver Metal Beads and Components


Design Idea NE2H
-- Designer --
LauraLynn, Jewelry Designer, Exclusively for Fire Mountain Gems and Beads®
To learn more about LauraLynn, read her jewelry artist success story here.
: : : Materials : : :
Click here to view a full list of materials used in this design.
Please take the creative opportunity to select the products of your choice for this design, offered here at Fire Mountain Gems and Beads. Some materials may not be available or listed.
- Charm, antiqued pewter (tin-based alloy), 17.5x11mm double-sided cactus
- Button, TierraCast®, "Western Winds" collection, antique silver-plated pewter (tin-based alloy), 20x14mm with concho design and closed loop
- Charm, antique silver-finished "pewter" (zinc-based alloy), 11x5.5mm 3D horn
- Bead, silver-finished brass, 8.5x8mm double tube
- Cord, leather and cotton (dyed), black, 2.5mm zigzag-stitched round
- Thread, Kevlar®, natural, 0.18mm diameter, size D, 15-pound test
- Jump ring, imitation nickel-plated brass, 5.5mm round, 3.5mm inside diameter, 18 gauge
- Bead, electro-coated lava rock (coated), yellow, 6-7mm round
- Bead, electro-coated lava rock (coated), orange, 6-7mm round
- Bead, electro-coated lava rock (coated), red, 6-7mm round
- Bead, silver-finished lava rock (coated), 6-7mm round
- Bead, lava rock (waxed), 6mm round, B grade, Mohs hardness 3 to 3-1/2
- Wire, ParaWire™, silver-plated copper, round, 30 gauge
- Drop, antique silver-plated brass, 8x4mm cone
- Adhesive, epoxy, Devcon® 2 Ton® Clear Epoxy, 30-minute, 2-part
- Bead board, flocked plastic, grey, 13 x 9-3/4 inch rectangle
- Sorting tray, aluminum, 3-1/4 x 3-1/4 x 3-1/4 inch triangle
Instructions
Cut the following:
- One 57-inch length of leather cord
- One 6-inch length of ParaWire™
- One 12-foot length of thread
Fold the leather cord in half then string a double tube bead onto both ends. Pull the double tube up to the folded end of the cord leaving a 1-inch U-shape loop. Adjust the tube position as needed so the ends of the leather cord are even.
Position the leather cord so the loop with the double tube is at the top and there is a left and right cord. Tape or pin the loop to a clipboard.
Add a beading needle to both ends of the length of thread. Pick up one black lava rock and pull to the center of the thread. Place the thread under the leather cord, just below the double tube, so the lava rock is between the two cords.
Bring the right needle around and over the right leather cord, through the lava rock and behind the left cord. Bring the left needle around the left leather cord from the back to the front, through the lava rock and behind the right cord. Pull both ends tight so the lava rock does not slide between the cord.
Note: The working needles will continue to switch sides throughout the design.
Pick up another lava rock bead with one needle and bring the thread over the top of the cord. Position the bead between the cords. Bring the other needle over the top of the cord and pass the needle through the same bead in the opposite direction. Bring both needles around the back of the cords in their respective directions.
Repeat the lash wrap in Step 5 using the beads of your choice until there is approximately 2 inches left on both ends of cord.
Wrap both needles around both cords multiple times and pull tight to bring the cords together.
Place a button over the top of the cords with the loop in between. Pass both needles through the loop of the button then wrap the thread around both cords on the opposite side of the button. Tie the ends of the thread together so the knot is hidden between the button and the cord. Trim excess thread.
For additional security, pass the length of wire around one cord, through the loop and around the other cord multiple times. Tuck the ends in between the cord near the loop of the button.
Mix Devcon® 5-Minute™ epoxy according to manufacturer's instructions. Place a drop of epoxy on the knot of thread to secure.
Place a small drop of epoxy on the inside of one 8x4mm cone then press onto one end of the leather cord. Repeat with the other end of cord. Set aside to cure.
Pass a jump ring through the loop on one cone and a cactus drop then close. Repeat to attach a 3D horn drop to the other cone to complete the bracelet.
Have a question regarding this project? Email Customer Service.
Copyright Permissions
The pieces featured in the Gallery of Designs are copyrighted designs and are provided for inspiration only. We encourage you to substitute different colors, products and techniques to make the design your own.
All works of authorship (articles, videos, tutorials and other creative works) are from the Fire Mountain Gems and Beads® Collection, and permission to copy is granted for non-commercial educational purposes only. All other reproduction requires written permission. For more information, please email copyrightpermission@firemtn.com.

