Cookie-Themed Earrings with Sculpey® Polymer Clay and Undrilled Glass Microbeads
Get ready to celebrate the season with these adorable polymer clay gingerbread earrings! In this holiday jewelry tutorial, Elaine shows you step by step how to create festive earrings inspired by the Kawaii aesthetic, highlighting new Premo® polymer clay colors. Perfect for makers who love miniature food designs, these earrings are fun to wear, easy to customize and a great idea if you’re creating jewelry to gift or sell this Christmas.


Design Idea RF42
Tiny Treats
-- Designer --
Elaine, Jewelry Designer, Exclusively for Fire Mountain Gems and Beads®
To learn more about Elaine Young, read her jewelry artist success story here.
: : : Materials : : :
Click here to view a full list of materials used in this design.
Please take the creative opportunity to select the products of your choice for this design, offered here at Fire Mountain Gems and Beads. Some materials may not be available or listed.
- Adhesive, E6000®, clear
- Bead, coated glass, opaque green, 1mm undrilled micro round
- Bead, coated glass, opaque red, 1mm undrilled micro round
- Bead, coated glass, opaque white, 1mm undrilled micro round
- Bead, Czech fire-polished dipped décor glass, emerald green, 6mm faceted round
- Bead, Czech fire-polished glass, translucent light red, 6mm faceted round strand
- Birch, embossing stylus light brown
- Blades, steel and rubber, black, 140 x 18.5 x 0.5mm / 140 x 18 x 0.15mm smooth / 120 x 18 x 1.5mm serrated with hand guard
- Clay carving tool, stainless steel
- Clay cutter, Kemper®, brass, 9-19mm assorted circle with built-in pop-out tool
- Cup, stainless steel, 10x6mm with 6mm cup and 5mm twisted peg, fits 6-10mm bead
- Ear wire fishhook, silver-plated, 18mm angular / 3mm ball / perfect balance / open loop, 22 gauge brass
- Eye pin, silver-plated brass, 1-1/2 inches, 21 gauge
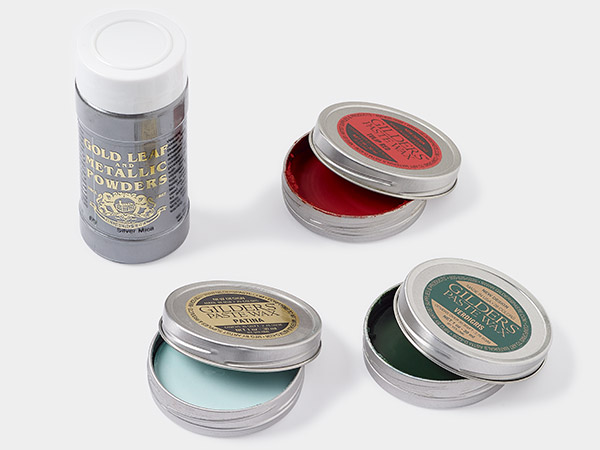
- Glaze, Sculpey®, acrylic emulsion, glossy
- Jump ring, sterling silver, 6mm round, 4.7mm inside diameter, 22 gauge
- Liquid polymer clay, opaque white Liquid Sculpey®
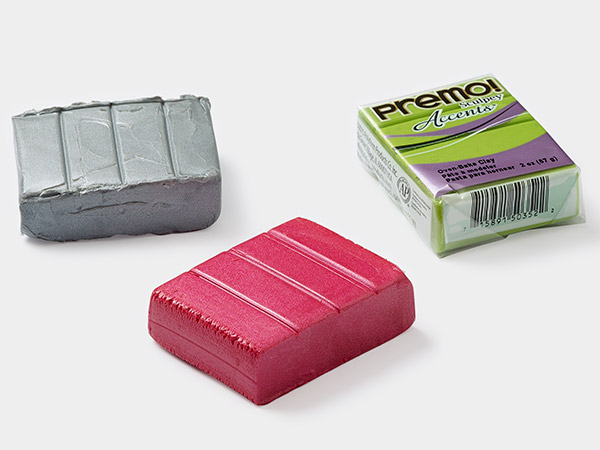
- Polymer clay, Sculpey® PREMO, black
- Polymer clay, Sculpey® PREMO, burnt umber
- Polymer clay, Sculpey® PREMO, ecru
- Polymer clay, Sculpey® PREMO, raw sienna
- Polymer clay, Sculpey® PREMO, white
- Polymer clay, Sculpey® Soufflé™, canary
- Polymer clay, Sculpey® Soufflé™, cherry pie
- Polymer clay, Sculpey® Soufflé™, french pink
- Polymer clay, Sculpey® Soufflé™, jade
- Polymer clay, Sculpey® Soufflé™, sea glass
Instructions
Gingerbread Man Earring Instructions
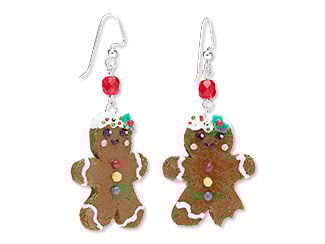
Create a paper template of a gingerbread man—approximately 2x1-1/2 inches—and cut it out.
Roll out half of one bar of raw sienna Sculpey® PREMO polymer clay. Trace the gingerbread man template and cut out a gingerbread man.
Use a toothbrush to add texture all over the surface of the gingerbread man.
Roll tiny balls of clay to use for buttons, one of each color Sculpey Soufflé™ polymer clay: cherry pie, jade and canary. Use white Liquid Sculpey liquid polymer clay to attach the buttons to the gingerbread man.
Roll two tiny balls of black Sculpey PREMO polymer clay for the gingerbread man’s eyes. Roll a tiny line of black polymer clay for the mouth.
Roll two even smaller balls of white Sculpey PREMO polymer clay for the highlights in the black eyes.
Roll two small balls of French pink Sculpey Soufflé polymer clay for the cheeks.
Attach the eyes, eye highlights, mouth and cheeks to the gingerbread man using white Liquid Sculpey liquid polymer clay.
Using white Liquid Sculpey liquid polymer clay, make icing stripes on the gingerbread man’s arms and legs and the icing cap on his head.
Shape holly leaves out of jade Sculpey Soufflé polymer clay and add a dot of cherry pie Sculpey Soufflé polymer clay. Attach to the gingerbread man using white Liquid Sculpey liquid polymer clay.
Sprinkle red and green 1mm undrilled coated glass microbeads on the white icing on the gingerbread man’s head.
Using a toothpick, make a hole in the top of the gingerbread man’s head. This will be the place the jump ring attaches.
Bake at 275 degrees Fahrenheit (135 degrees Celsius) for 15 minutes. Let it cool completely.
Glaze the gingerbread man with Sculpey acrylic emulsion glaze. Let it dry.
Thread a 6mm translucent light red Czech fire-polished glass faceted round bead onto a 1-1/2 inch 21-gauge silver-plated eye pin to create a drop. Finish it with a simple loop.
Attach the drop you just made to a 6mm 22-gauge sterling silver round jump ring and then attach the drop to the cookie.
Finish by attaching the ear wire to the drop.
Repeat Steps 1 - 12 for the second earring.
Tip: For more information on using polymer clay, watch “Top 5 Tips for Working with Polymer Clay.”
Milk and Cookie Earring Instructions

Create a paper template of a glass—approximately 2x1-1/2 inches—and cut it out.
Roll out half of one bar of white Sculpey PREMO polymer clay.
Trace the template and cut out a glass.
Roll out thin ropes of sea glass Sculpey Soufflé polymer clay and outline the glass.
Using 1/8 of a bar of white Sculpey PREMO polymer clay, roll out thin ropes. Do the same with 1/8 of a bar of cherry pie Sculpey Soufflé polymer clay.
Twist the tops of the thin ropes of white and cherry pie clay to create the candy cane. Set aside the remaining twisted rope for the second earring.
Using 1/16 of a bar of ecru Sculpey PREMO polymer clay, roll a ball of clay and flatten it to create the cookie.
Use tiny pieces of burnt umber Sculpey PREMO polymer clay to make the chocolate chips.
Roll two tiny balls of black Sculpey PREMO polymer clay to be the eyes. Roll a thin line of black clay for the mouth. Attach to the milk glass.
Roll two tiny balls of French pink Sculpey Soufflé polymer clay for the cheeks. Attach to the milk glass.
Using white Liquid Sculpey® liquid polymer clay, fill the glass with “milk.”
Use the liquid polymer clay to attach the candy cane to the “milk.”
Using a toothpick, make a hole in the top of the milk cup. This will be the place the jump ring attaches.
Bake at 275 degrees Fahrenheit (135 degrees Celsius) for 15 minutes. Let it cool completely.
Glaze the design with Sculpey acrylic emulsion glaze. Let it dry.
Thread a 6mm translucent light red Czech fire-polished glass faceted round bead onto a 1-1/2 inch 21-gauge silver-plated eye pin to create a drop. Finish it with a simple loop.
Attach the drop you just made to a 6mm 22-gauge sterling silver round jump ring and then attach the drop to the cookie.
Finish by attaching the ear wire to the drop.
Repeat Steps 1 - 12 for the second earring.
Fruitcake Earring Instructions

Roll a clay ball, using a quarter of one bar of raw sienna Sculpey PREMO polymer clay. Flatten it to make a donut shape.
Roll tiny balls of clay to create the fruit using Sculpey Soufflé polymer clay in jade, canary and cherry pie.
Roll more tiny balls of ecru Sculpey PREMO polymer clay to create the nuts.
Using white Liquid Sculpey liquid polymer clay, glue the fruit and nuts onto the burnt umber clay donut.
Roll two tiny balls of black Sculpey PREMO polymer clay to make the eyes and a tiny black line for the mouth.
Roll two smaller balls of white Sculpey PREMO polymer clay to make highlights for the eyes.
Roll two small balls of French pink Sculpey Soufflé polymer clay for the cheeks.
Attach the eyes, highlights, mouth and cheeks using white Liquid Sculpey liquid polymer clay.
Using a toothpick, make a hold in the top of the clay donut for the peg.
Bake at 275 degrees Fahrenheit (135 degrees Celsius) for 15 minutes. Let it cool completely.
Glaze the fruitcake with Sculpey acrylic emulsion glaze. Let it dry.
Using E6000® adhesive, glue a 10x6mm stainless steel cup and twisted peg into the hole on the top of the donut.
Thread a 6mm emerald green Czech fire-polished dipped décor glass faceted round bead onto a 1-1/2 inch 21-gauge silver-plated eye pin to create a drop. Finish it with a simple loop.
Attach the drop you just made to a 6mm 22-gauge sterling silver round jump ring and then attach the drop to the fruitcake.
Finish by attaching the ear wire to the drop.
Repeat Steps 1 - 8 for the second earring.
Christmas Tree Earring Instructions

Create a paper template for a tree shape and cut it out.
Roll out a quarter bar of ecru Sculpey PREMO polymer clay. Then trace the template and cut out a tree shape.
Roll two tiny balls of black Sculpey PREMO polymer clay to make the eyes and a tiny black line for the mouth.
Roll two smaller balls of white Sculpey PREMO polymer clay to make highlights for the eyes.
Roll two small balls of French pink Sculpey Soufflé polymer clay for the cheeks.
Use chalk pastel to tint the cookie base.
Use green chalk pastel to tint white Liquid Sculpey® liquid polymer clay. Then frost the Christmas tree cookie with the green liquid polymer clay.
Place the eyes, highlights, mouth and cheeks on the glaze.
Place red, green and white 1mm undrilled coated glass microbeads on the glaze for lights.
Using a toothpick, make a hole in the top of the Christmas tree. This will be the place the jump ring attaches.
Bake at 275 degrees Fahrenheit (135 degrees Celsius) for 15 minutes. Let it cool completely.
Glaze the fruitcake with Sculpey acrylic emulsion glaze. Let it dry.
Thread a 6mm emerald green Czech fire-polished dipped décor glass faceted round bead onto a 1-1/2 inch 21-gauge silver-plated eye pin to create a drop. Finish it with a simple loop.
Attach the drop you just made to a 6mm 22-gauge sterling silver round jump ring and then attach the drop to the Christmas tree.
Finish by attaching the ear wire to the drop.
Repeat Steps 1 - 12 for the second earring.
Shop for Your Materials Here:

Copyright Permissions
The pieces featured in the Gallery of Designs are copyrighted designs and are provided for inspiration only. We encourage you to substitute different colors, products and techniques to make the design your own.
All works of authorship (articles, videos, tutorials and other creative works) are from the Fire Mountain Gems and Beads® Collection, and permission to copy is granted for non-commercial educational purposes only. All other reproduction requires written permission. For more information, please email copyrightpermission@firemtn.com.