Bangle Bracelet with Preciosa Czech Glass Seed Beads and FireLine® Thread
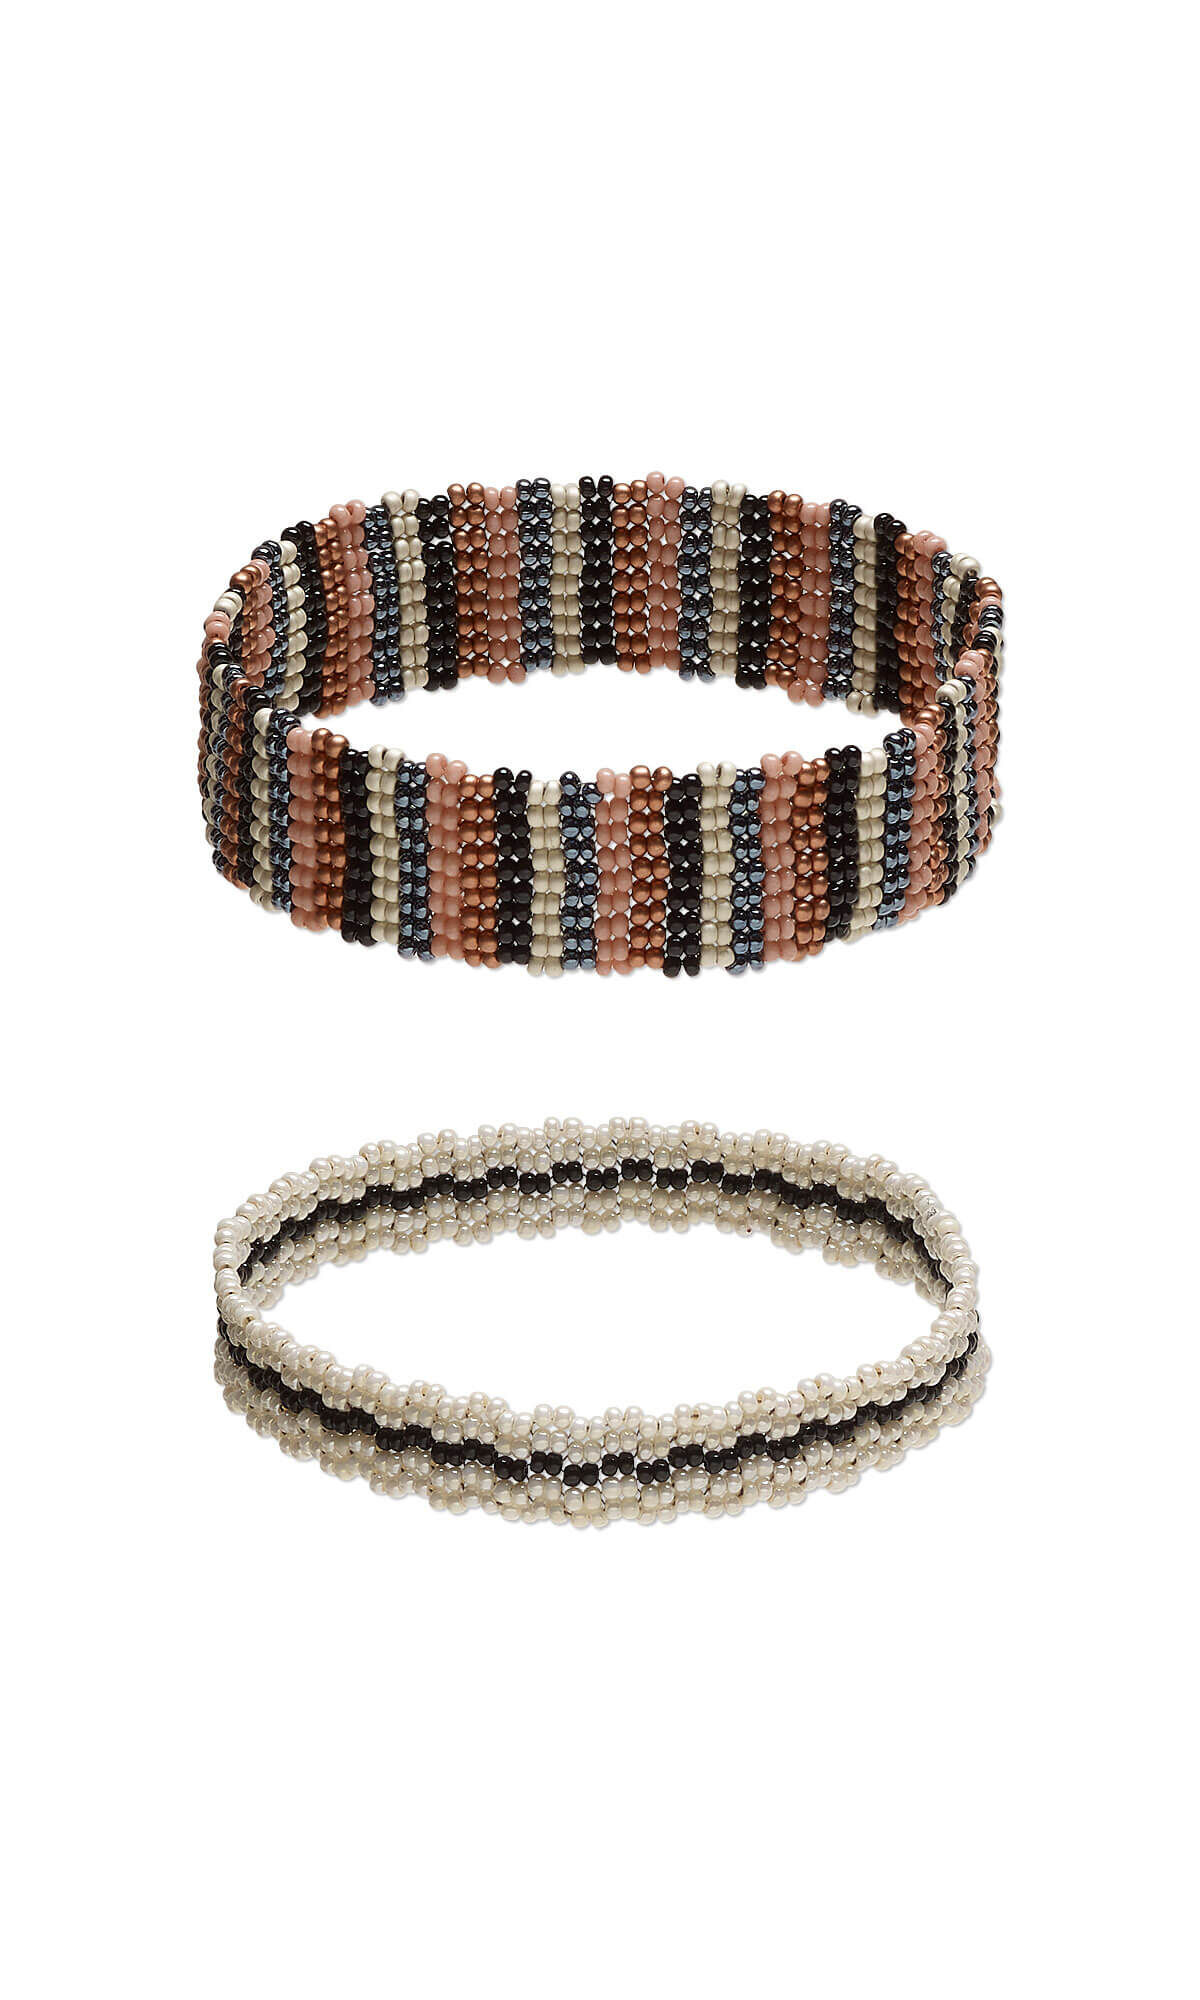


Design Idea QC35
Understated Stack
-- Designer --
Elaine, Jewelry Designer, Exclusively for Fire Mountain Gems and Beads®
To learn more about Elaine Young, read her jewelry artist success story here.
: : : Materials : : :
Click here to view a full list of materials used in this design.
Please take the creative opportunity to select the products of your choice for this design, offered here at Fire Mountain Gems and Beads. Some materials may not be available or listed.
- Seed bead, Preciosa Ornela, Czech glass, opaque black, #11 rocaille
- Seed bead, Preciosa Ornela, Czech glass, opaque hematite black, #11 rocaille
- Seed bead, Preciosa Ornela, Czech glass, opaque matte metallic silver-dyed crystal clear, #11 rocaille
- Seed bead, Preciosa Ornela, Czech glass, opaque metallic soft copper, #11 rocaille
- Seed bead, Preciosa Ornela, Czech glass, opaque shell luster, #11 rocaille
- Seed bead, Preciosa Ornela, Czech glass, opaque terra dyed rose, #11 rocaille
- Thread, Berkley® FireLine®, gel-spun polyethylene, smoke, 0.15mm diameter 4-fiber braid, 6-pound test
- Needle, Tulip, nickel- and gold-plated steel, #11 with 0.52mm eye width, 2 inches
Two Drop Brick Stitch Instructions
Thread your needle with Fireline:
Cut a comfortable length of beading thread, about 1-1/2 yards of thread. You can add more later if needed. Keeping a comfortable length will keep it from getting tangled.
Thread one end of the thread through the eye of the beading needle.
First Row
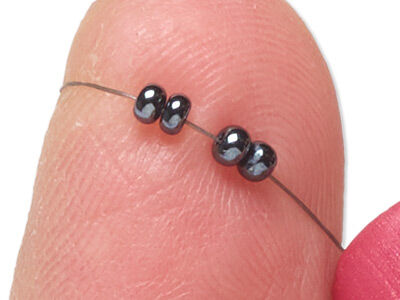
Create a ladder stitch by picking up four beads and sliding them down to the end of the thread, leaving about 8”- 9” (20-23cm) for the tail.
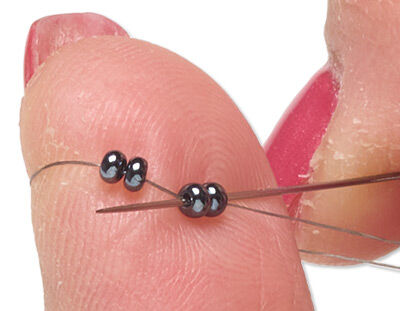
Pass your needle back up through the first two beads, pull thread tight, forming a square with the two beads lying next to the other two beads.
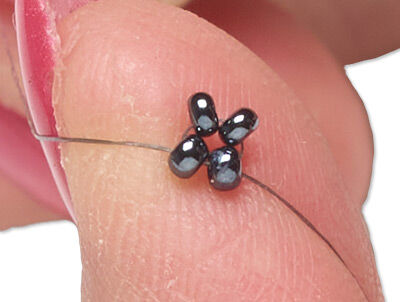
Pass your needle down through the last bead added, then back up through the first bead again. This creates a loop around the first bead, securing the two beads in place.
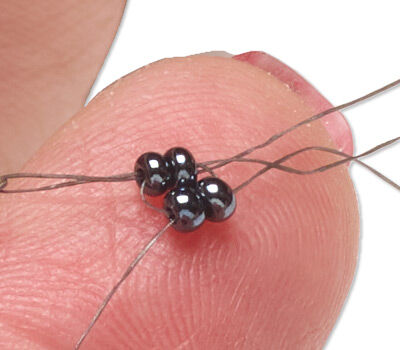
Pick up two more beads and pass your needle under the thread bridge between the first and second beads of your ladder stitch from the row below.
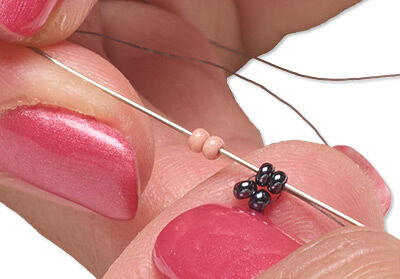
Pull the thread snugly so the new beads sit next to the previous two.
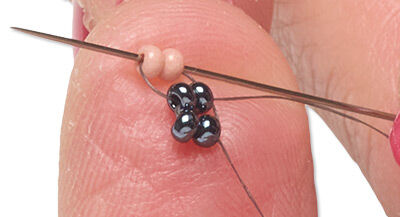
Pick up two more beads and go down from the top of the last two beads you just placed.
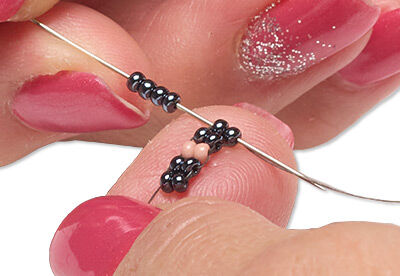
Add two more beads and keep following this pattern by adding two more beads and going up and down the last beads added. (5 for narrow / 9 for wide) This will be your base row.
Second Row
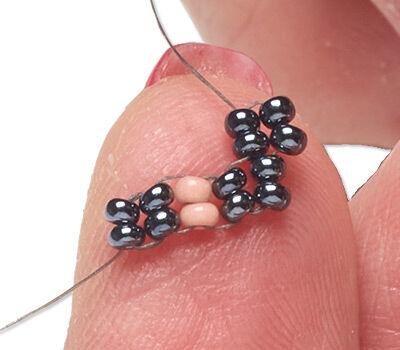
With your thread coming out of the top of last bead, add four beads and thread needle into the first thread loop on top of your beads. Your two beads will now be sitting on top of your first stack.
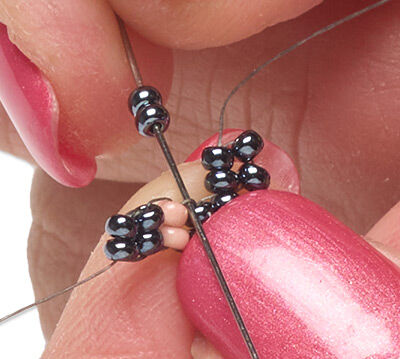
Bring needle back up through beads, add two more beads and go through the next thread loop.
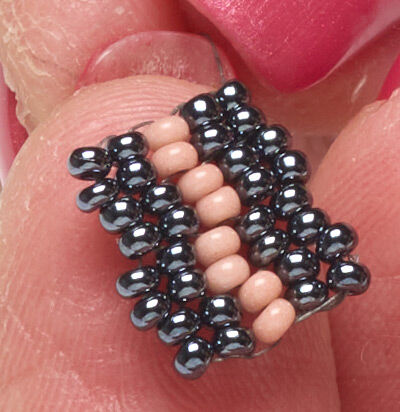
Continue adding two more beads and threading through loops until you get to the end.
Keep pulling thread to maintain tension so the beads remain together and not loose.
Close the Bangle
When your beadwork reaches the desired length, stop with a row that is the opposite of the base row.
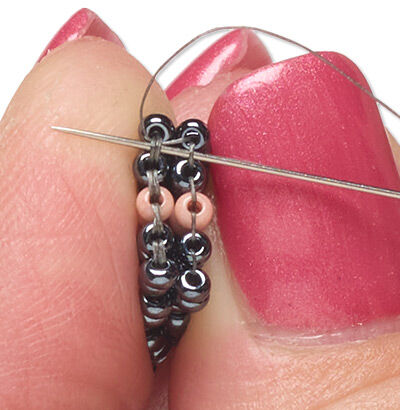
Start with the active thread and pass the needle under the thread loops of the base row, and back into the last beaded row.
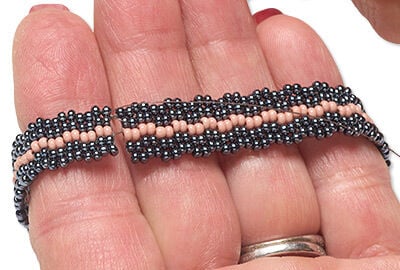
Connect both sides of bracelet, by bringing the loop ends together.
Use the beginning tail of thread to cross over to the finished end, stitch across and join and bury the thread.
Tie off the thread with a square knot and trim any excess thread with scissors. Add a drop of glue to secure the knot.
Tips:
Keep tension consistent throughout your work to ensure a neat and even appearance.
Experiment with different bead colors and sizes to create unique patterns and designs.
Copyright Permissions
The pieces featured in the Gallery of Designs are copyrighted designs and are provided for inspiration only. We encourage you to substitute different colors, products and techniques to make the design your own.
All works of authorship (articles, videos, tutorials and other creative works) are from the Fire Mountain Gems and Beads® Collection, and permission to copy is granted for non-commercial educational purposes only. All other reproduction requires written permission. For more information, please email copyrightpermission@firemtn.com.

