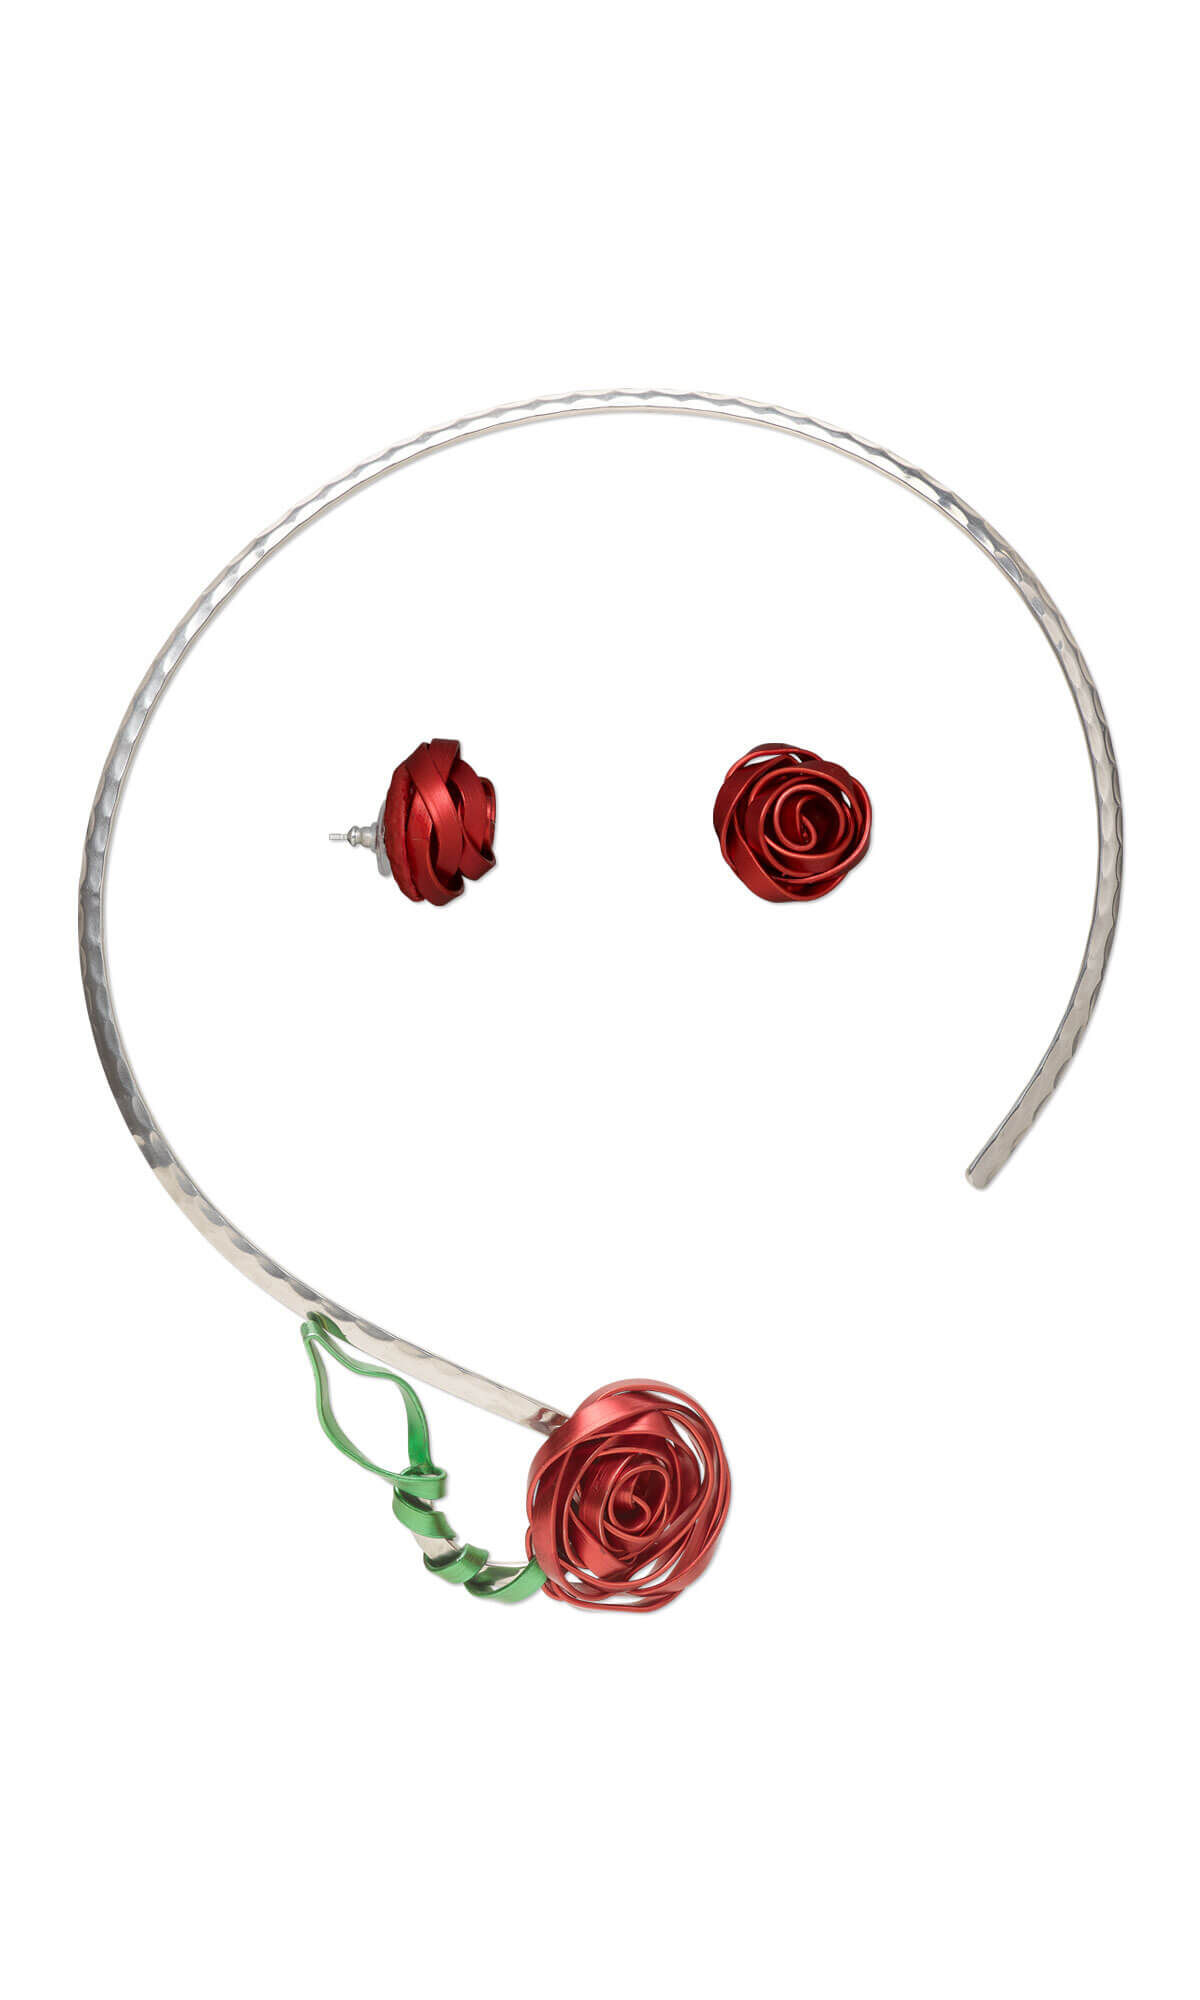
Choker-Style Necklace and Earring Set with Wirework


Design Idea MK3B
-- Designer --
LauraLynn, Jewelry Designer, Exclusively for Fire Mountain Gems and Beads®
To learn more about LauraLynn, read her jewelry artist success story here.
: : : Materials : : :
Click here to view a full list of materials used in this design.
Please take the creative opportunity to select the products of your choice for this design, offered here at Fire Mountain Gems and Beads. Some materials may not be available or listed.
- Earstud, acrylic and silver-finished brass, clear, 20mm perforated disk
- Neckwire, silver-plated brass, 5mm flat with hammered curve, 15 inches
- Wire, anodized aluminum, green, 3.5x1mm flat, 16 gauge
- Wire, anodized aluminum, red, 3.5x1mm flat, 16 gauge
- Adhesive, Apoxie® Sculpt, epoxy and polymer resin, assorted primary colors
Instructions
Necklace Instructions
Cut one 6-inch length of green flat wire.
Using one 18-inch length of red wire, place the wire centered under a pen or similar sized cylindrical object.
Bend both ends of wire up and across the pen, so the tails are pointing in opposite directions.
Using one tail, twist the wire so the edges are up on end. Repeat with the other tail.
Using both tails, wrap the wire around the center either clockwise or counterclockwise, adding some upward and downward bends in the wire, until the wires form a rose. Tuck the tails into the rose to hide the ends.
Remove the pen from the rose then slide the rose onto the neckwire using the loop formed by the pen. Slide the rose to the base of the neckwire loop.
To secure the rose to the neckwire, use the green length of wire and slide the wire through the rose closest to the outer part of the neckwire loop then through the loop of the rose formed by the pen.
Wrap the green wire three times around the loop of the neckwire going toward the end of the loop so the last wrap goes around the tip of the loop.
Using the remaining length of green wire, form the wire into a leaf shape then tuck the tail into the last wire wrap to hide the end. Trim excess wire.
If the rose and leaf are loose on the neckwire, use a pair of pliers to make the wraps around the neckwire tighter.
Earring Instructions
Cut two 6-inch lengths of red flat wire.
Using one 6-inch length of red wire, place the wire centered under a pen or similar sized cylindrical object.
Bend both ends of wire up and across the pen, so the tails are pointing in opposite directions.
Using one tail, twist the wire so the edges are up on end. Repeat with the other tail.
Using both tails, wrap the wire around the center either clockwise or counterclockwise, adding some upward and downward bends in the wire, until the wires form a rose. Tuck the tails into the rose to hide the ends.
Remove the pen from the rose. Use a pair of pliers to flatten down the loop formed by the pen.
Mix a small amount of red Apoxie® Sculpt approximately the size of a small marble according to manufacturer's instructions.
Form the Apoxie around the pad of the earstud into a flattened dome similar to a round cabochon but slightly smaller in diameter than one wire rose (with the flat side up).
Press the rose into the Apoxie then set aside to cure.
Repeat Steps 2 and 3 to create a second earring.
Have a question regarding this project? Email Customer Service.
Copyright Permissions
The pieces featured in the Gallery of Designs are copyrighted designs and are provided for inspiration only. We encourage you to substitute different colors, products and techniques to make the design your own.
All works of authorship (articles, videos, tutorials and other creative works) are from the Fire Mountain Gems and Beads® Collection, and permission to copy is granted for non-commercial educational purposes only. All other reproduction requires written permission. For more information, please email copyrightpermission@firemtn.com.

