Single-Strand Necklace and Earrings with Quartz Crystal Drops, Sterling Silver Wire and ParaWire™ Copper Wire


Design Idea RN2F
-- Designer --
Patti, Jewelry Designer, Exclusively for Fire Mountain Gems and Beads®
To learn more about Patti Miller, read her jewelry artist success story here.
: : : Materials : : :
Click here to view a full list of materials used in this design.
Please take the creative opportunity to select the products of your choice for this design, offered here at Fire Mountain Gems and Beads. Some materials may not be available or listed.
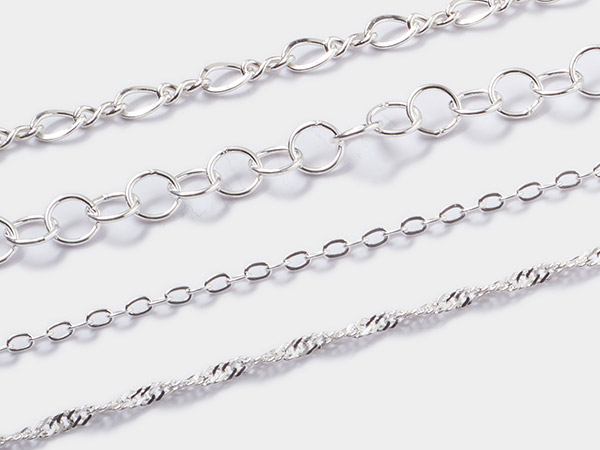
- Chain, sterling silver snake, 1mm, Gossamer™, unfinished
- Charm, sterling silver, 9mm flat star
- Clasp hook, sterling silver 9x2.5mm tube / crimp end / fits 1mm cord, JBB Findings
- Crimp end, sterling silver, 4x2.5mm tube with loop, 1mm inside diameter
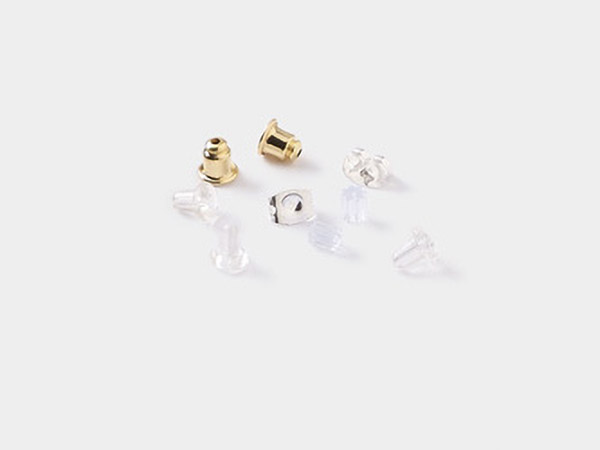
- Earnut, imitation rhodium-plated, 12x7mm, comfort clutch, aluminum / plastic
- Earnut, 11.5x6mm comfort clutch, stainless steel / acrylic clear
- Earstud, sterling silver, 9x9mm star / closed loop / earnuts
- Jump ring, sterling silver, 4mm round, 2.4mm inside diameter, 20 gauge
- Jump ring, sterling silver, 6.5mm round, 4.7mm inside diameter, 19 gauge
- Pliers, Wubbers® Designer Mandrel, extra-large round mandrel, steel and rubber
- Quartz crystal, hand-knapped moon drop natural 20x15mm-25x20mm
- Rainbow moonstone, hand-cut 1-sided faceted domed oval drop natural 14x10mm / 20x15mm
- Rubber tool dip, liquid coating Tool Magic®, white
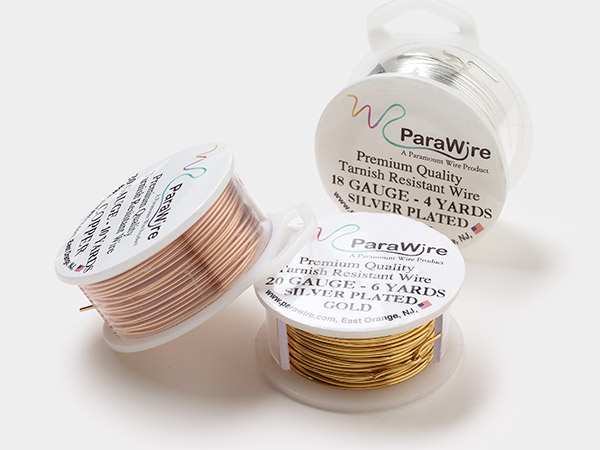
- Wire, ParaWire™, copper, half-round, 21 gauge
- Wire, ParaWire™, copper, round, 18 gauge
- Wire, ParaWire™, copper, round, 20 gauge
- Wire, sterling silver, half-hard, round, 18 gauge
- Wire, sterling silver, half-hard, twisted square, 20 gauge
Instructions
Necklace Instructions
Dip a pair of chain nose pliers in Tool Magic®. Allow to dry overnight.
Cut the following wire and chain lengths and set aside:
- One 16-inch length of 18-gauge sterling silver half-hard round wire
- Two 7-inch lengths of 20-gauge sterling silver half-hard twisted square wire
- One 12-inch length of 20-gauge copper round ParaWire™
- Two 5-inch lengths of 18-gauge copper round ParaWire
- Twelve 2-1/2 inch lengths of 21-gauge copper half-round ParaWire
- Two 6-1/2 inch lengths of 1mm sterling silver snake chain
Create the frame.
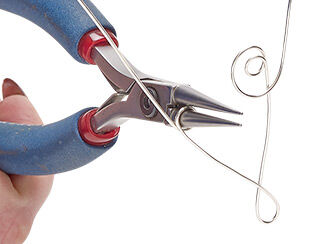
Find the center of the 16-inch sterling silver wire. Using round-nose pliers, bend both sides of the wire most of the way around the barrel to form a small teardrop loop.
About 1 inch from the tip of the teardrop, form a small inward-facing loop toward the center. Continue wrapping around the pliers to create a second loop, allowing the wire to spiral outward.
Angle the tail upward to follow the direction of the teardrop wire. Curve it in the opposite direction and form a loose spiral, creating an S shape with loose spirals at both ends. Repeat on the opposite side to mirror the shape and complete the frame.
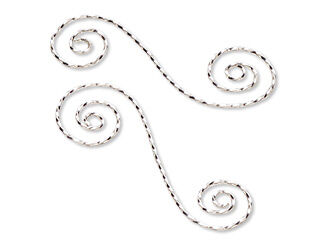
Using one 7-inch length of twisted square sterling silver wire, form an S shape with loose spiral ends that is slightly larger than the S shape on the frame. Repeat with the remaining wire to create a matching S shape.
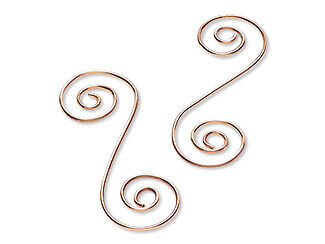
Using one 5-inch length of 18-gauge copper wire, form a slightly smaller S shape with spiral ends. Repeat with the remaining wire.
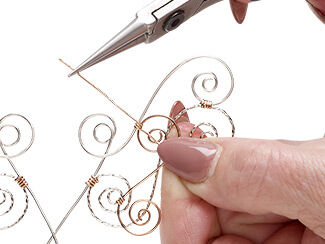
Position one twisted square wire S shape beneath the S shape on one side of the frame. Align it so the bottom edge of the top frame spiral slightly overlaps the outside edge of the square-wire spiral.
The lower edge of the square-wire spiral should overlap the frame just below the bottom spiral.
Using one 2-1/2 inch length of 21-gauge copper half-round wire, bind the top spirals together with four tight wraps. Trim the excess wire and tuck the tails neatly to the back.
Bind the lower overlapping area in the same manner.
Repeat this step on the opposite side of the frame.
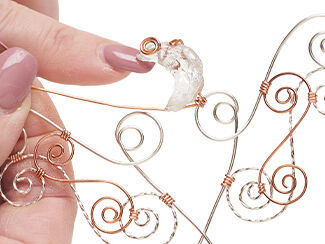
Place one copper S shape on top of the bound spirals on one side of the frame, facing the opposite direction. Align it so the outside edge of the top copper spiral overlaps both the square-wire spiral and the frame just below its top spiral.
Bind the overlapping points with a 2-1/2 inch length of 21-gauge copper half-round wire, wrapping four times. Trim and tuck the wire tails neatly to the back.
Repeat on the opposite side of the frame.
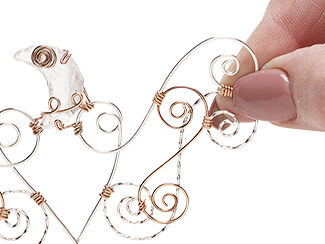
Create the moon centerpiece.
Using the 12-inch length of 20-gauge copper round wire, form a small three-revolution spiral. Bend the spiral to a 90-degree angle from the tail.
Thread the tail through the front of the quartz crystal moon drop. About 3/4 inch from where the wire exits the stone, make a 180-degree bend and close it firmly against the moon using chain-nose pliers coated with Tool Magic.
Use round-nose pliers to curve the end of the bend, forming a prong around the edge of the moon.
Bring the wire down about three-quarters of the height of the moon and wrap it several times around the top edge of the right center spiral on the frame. Bring the wire upward and form two loose loops across the front of the moon.
Guide the wire under the bottom tip of the moon and wrap it several times around the top right edge of the left center spiral.
About 3/4 inch from the wraps, make another 180-degree bend, close it firmly, and curve the tip to form a prong around the bottom edge of the moon. Wrap the remaining wire several times around the center left edge of the right center spiral.
Mix a large drop of Devcon 5-minute Epoxy. Using a toothpick, apply a small drop to the back of each area bound with the 21-gauge copper half-round wire.
Allow the epoxy to dry for 10 minutes.
Open a 6.5mm sterling silver round jump ring.
Add the star charm and moonstone drop, then close the jump ring securely over the tip of the teardrop loop at the top of the frame.
Crimp one end of each 6-1/2 inch snake chain using a sterling silver tube crimp end. Repeat until all four chain ends are finished.
Using a 4mm sterling silver round jump ring, attach one chain to each side of the top of the necklace frame.
Attach a jump ring to one free end of the chain. Attach the clasp hook to the remaining free end to complete the necklace.
Earring Instructions
Cut the following wire lengths and set aside:
- One 10-inch length of 18-gauge sterling silver half-hard round wire
- One 6-1/2 inch length of 18-gauge copper round ParaWire
- One 7-inch length of 20-gauge copper round ParaWire
- Two 2-1/2 inch lengths of 21-gauge copper half-round ParaWire
Create the frame.
Position mandrel pliers about 1-1/2 inches from one end of the sterling silver wire. Bend the wire three-quarters of the way around the barrel to form a teardrop loop with a slight overlap.
At the crossing point, use round-nose pliers to bend the short tail around the long tail to form a small loop. Trim the excess wire, then form an open spiral with the remaining tail to complete the frame.
Form a small open spiral on one end of the 6-1/2 inch copper wire. Reverse direction and form a slightly larger open spiral to create an S shape.
Place the copper S shape on top of the frame so the top copper spiral overlaps the bottom center loop of the silver spiral.
Bind the overlap with one 2-1/2 inch length of 21-gauge copper half-round wire, wrapping four times. Trim and tuck the wire tails.
Bind the lower overlap where the copper spiral meets the frame just below the top of the teardrop in the same way.
Create the moon accent.
Using the 7-inch length of 20-gauge copper wire, form a small two-revolution spiral and bend it to a 90-degree angle. Thread the wire through the front of the quartz crystal moon drop.
Bring the wire down the back edge of the moon about 1/4 inch and wrap it three times around the frame so the moon covers the wraps. Bring the wire across the front of the moon, form two loose loops, and guide it down the back.
Wrap the wire three times around the frame beneath the bottom edge of the moon.
Using a 4mm sterling silver round jump ring, attach the star ear stud to the top of the frame. Add an ear nut to secure.
Repeat Steps 1 – 6 to complete the second earring.
Shop for Your Materials Here:

Copyright Permissions
The pieces featured in the Gallery of Designs are copyrighted designs and are provided for inspiration only. We encourage you to substitute different colors, products and techniques to make the design your own.
All works of authorship (articles, videos, tutorials and other creative works) are from the Fire Mountain Gems and Beads® Collection, and permission to copy is granted for non-commercial educational purposes only. All other reproduction requires written permission. For more information, please email copyrightpermission@firemtn.com.